

 Manufacturers
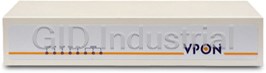
AEGIS MICRO VP-200
Description
The VP-200 system is a remote video web camera server that provides exceptional streamed video images through the Internet, Intranet, or direct dial-up modem connection via common telephone lines. Up to six video cameras can be hooked up to the unit to deliver high-speed video transmission to anywhere in the world through a desktop PC, workstation, or laptop. All that is needed is an Internet browser and our proprietary software. The system allows users to record live digital video images continuously onto the users' computer hard drive. Attached video cameras can be remotely controlled to swivel and zoom in and out, and the unit can be triggered to initiate certain events through our specialized call-back feature by utilizing a telephone connection
Part Number
VP-200
Price
Request Quote
Manufacturer
AEGIS MICRO
Lead Time
Request Quote
Category
PRODUCTS - V
Datasheet

Extracted Text
Chapter 6: Use VPON through PSTN
Table of Content
6.1 VPON Installation-----------------------------------------------------6-1
6.2 OYO Viewer Installation---------------------------------------------6-2
Chapter 1: Introduction
6.3 Dial up to VPON------------------------------------------------------6-2
6.4 Screen Splitting --------------------------------------------------------6-3
1.1 Main Features---------------------------------------------------------1-1
1.2 System Requirements ------------------------------------------------1-2 6.5 Camera Setting---------------------------------------------------------6-4
6.6 Set Account Name and Password------------------------------------6-5
Chapter 2: Getting Start
6.7 Record the Video -----------------------------------------------------6-5
2.1 Use VPON through Intranet------------------------------------------2-1
6.8 Play back ---------------------------------------------------------------6-6
2.2 Use VPON through Internet------------------------------------------2-2
6.9 Snapshot/Print ---------------------------------------------------------6-7
2.3 Use VPON through PSTN -------------------------------------------2-3
6.10 Disconnect from VPON----------------------------------------------6-8
2.4 Power On VPON------------------------------------------------------2-6
Chapter 7: GPI/O and Callback Setting ----------------------------
7-1
Chapter 3: Installation through LAN
Chapter 8: Remote Camera Control
3.1 Configuration----------------------------------------------------------3-1
8.1 Remote Camera Control using built in RS232 Interface Camera
3.2 Camera Setting---------------------------------------------------------3-7
--------------------------------------------------------------------------8-1
3.3 Set Date and Time -----------------------------------------------------3-10
8.2 Operation---------------------------------------------------------------8-2
3.4 Alarm and Remote Control ------------------------------------------3-10
8.3 Remote Camera Control using VP-201 and VP-202 ------------8-2
3.5 Set Name of Server and Camera -------------------------------------3-11
3.6 Set User’s Authority --------------------------------------------------3-12
Appendix A: Specifications ----------------------------------------------
A-1
3.7 Upload Resources -----------------------------------------------------3-13
Appendix B: LED Status -------------------------------------------------
B-1
Chapter 4: Connecting through Com Port
Appendix C: Modem Compatibility -----------------------------------
C-1
4.1 OYO Viewer Installation---------------------------------------------4-2
Appendix D: Trouble Shooting -----------------------------------------
D-1
4.2 Hardware Installation-------------------------------------------------4-2
4.3 Connecting -------------------------------------------------------------4-3
4.4 Configuration ---------------------------------------------------------4-5
Chapter 5: Use VPON in Internet/Intranet------------------------
5-1
1 2
Chapter 1 : Introduction
1.2 System Requirements
VPON is a high performance camera server built-in as a mini web server with
??Composite CCD camera, V8 or camcorder… (NTSC or PAL standard)
real-time video capturing capability. The video is grabbed and compressed for faster
??The equipment for connecting to Internet
transmission to your PC through Internet, Intranet or PSTN/ISDN.
1. Dial up: telephone line, modem, a static Internet IP
2. Ethernet: Ethernet network connected to Internet and a static Internet IP
The installation is easy: All you have to do is to plug the power and assign VPON an
3. PSTN: telephone line, modem
IP address for Internet connection. Then, you can view the video through your
??PC for the configuration
browser, Navigator or Internet Explorer, at any time, anywhere in the world.
1. Pentium233 PC or higher, desktop or notebook
2. 32MRAM or higher
It is perfect for factory/office monitoring, ATM surveillance, children care, security
3. PCI VGA Card
system, tourism, sales presentation and more...
4. Microsoft Windows 95
5. An empty COM port
VPON is the new era of the network video transmission. It makes you see whatever
??PC for the browsing
you want easily!
1. Pentium233 PC or higher, desktop or notebook
2. 32MRAM or higher
1.1 Main Features
3. PCI VGA Card
??Cost effective
4. Microsoft Windows 95
??Wide applications
5. Internet Browser (such as Netscape Navigator 3.0 or higher)
??Simple interface for plug-and-play
??Use web browser as the client application
??Real time video capturing
??Digital Input/ Output for surveillance
- End of this chapter -
??Support video source selection, zoom-in
??Video adjustable for hue, contrast, saturation, brightness and quality
??Built-in web server for Internet browsing
??Hardware self-diagnosing when power on
??Easy system configuration(via HTTP Home Page/ RS232 Com Port)
1-1 1-2
Chapter 2 : Getting Start
Figure 2.1
LAN
As VPON can transmit videos through Internet, Intranet, PSTN/ISDN, to get the best
performance, we suggest you reading the following instructions and choosing the
correct way to install VPON. (Figure 2.0)
POWER LTR READY
POWER LAN
Figure 2.0
VPON Private IP
( )
Use VPON
Chapter 3 & 5
through Intranet
2.2 Use VPON through
Internet
First, make sure that you can assign a static Internet IP to VPON.
Chapter 3 & 5
LAN ready
Getting Use VPON
a) If your environment is LAN ready and it is connected to Internet directly. Please
Start through Internet
read Chapter 3 for the installation and Chapter 5 for the usage of VPON. (Figure
Through
PSTN/ISDN Chapter 4 & 5
2.2a)
to ISP
b) If you want to connect VPON directly to Internet through PSTN/ISDN to ISP
Use VPON
(Internet Service Provider). Please read Chapter 4 for the installation and
Chapter 6
through PSTN
Chapter 5 for the usage of VPON. (Figure 2.2b)
Figure 2.2a
Starting from VPON firmware 1.4, you can set VPON operating mode from client
Internet
PC. Default mode is Modem/Null Modem connection when shipping out from
factory. The status3 LED light (rightmost one) comes on when power up if there is
LAN
modem or null modem cable connected to VPON. You can change the operating
mode by setting the corresponding parameters through the System Configuration
function. Please refer to chapter 4 for details.
POWER LTR READY
POWER LAN READY
2.1 Use VPON through
Intranet
Static Internet IP
( )
First, make sure that you can assign a private IP to VPON. Then, read Chapter 3 for
the installation and Chapter 5 for the usage of VPON.(Figure 2.1)
2-1 2-2
Figure 2.4. VPON front panel
Figure 2.2b
ISP
Modem / ISDN TA
Internet
PSTN
POWER LTR READY VIDEO DATA STATUS
ISDN
POWER LAN
POWER LTR READY
?? Power LED
?? Flashing as LAN connected
?? VPON is ready
?? Flashing when capturing videos
?? Data transmitting/receiving
2.3 Use VPON through PSTN
If there is no Internet connection, VPON can transmit videos through PSTN. Under
Status3
this situation, you can still monitor the remote site. Please refer to Chapter 6 for
Status2
the installation and the usage of VPON. (Figure 2.3)
Status1
Figure 2.3
Modem / ISDN TA
PSTN
Modem / ISDN TA
ISDN
POWER LAN
POWER LTR READY
OYO
Viewer
2-3 2-4
Figure 2.5 VPON back panel
2.4 Power On VPON
Com1 Port Com2 Port Video Output Before power on VPON, you should check the followings:
1 2 3
2.4.1 Apply correct AC voltage to the external power supply. The AC power input
Power
6
4 5
range is 100-240 volts, 50-60 Hz.
Video Input
2.4.2 Connect the appropriate video inputs to the unite. Depends on the composite
DC Input Default
LAN GPI/GPO Audio I/O
video standard used at your local area, VPON automatically detects
NTSC/PAL video when power up. If you did not apply video signals when
Power Press “ I ” to turn on the unit, press “ O ” to shut down the unit
power up, it will set to default value which is NTSC standard. That will cause
DC Input Connect the DC power cord to external power supply
Horizontal Sync problem if your cameras are PAL standard.
COM1 Port RS-232 serial port for configuration or for modem/ISDN TA 2.4.3 If your VPON firmware is version 1.4 or later, VPON is set to Modem/Null
Modem connection after power up by default. You should hook it up with the
COM2 Port RS-232 serial port
RS232 cable provided with the unite to do further configurations. Please refer
Video Output A DB-9 connector for composite video output to TV set or monitor
to the LED lights for correct machine status. (Appendix B)
Default Reset to default values
2.4.4 After power up successfully and get correct LED status, you can refer to
LAN RJ-45 connector for 10BaseT
Chapter 4 for further operations.
Audio I/O Audio inputs and outputs (through one 8-pins mini-din connector)
GPI General purpose input
GPO General purpose output
Video Input Six RCA video connectors
- End of this chapter -
2-5 2-6
Chapter 3 : Connecting through LAN
(Local Area Network)
3.1 Configuration
1. Plug one end of external power supply to DC Input on the back panel of VPON
and the other end to an AC wall outlet (100V – 240V).
2. Connect the network cable (10BaseT) to the network socket marked 10BaseT
on the back panel of VPON. (Figure 3.1.1)
3. Make sure that VPON is set at LAN mode if your firmware is version 1.4 up.
For first time start up please refer to section 2.4.3 of Power On VPON at
Chapter 2.
Figure 3.1.1
POWER LTR READY
Ethernet (IP address: 192.168.10.xxx) Ethernet (IP address: 192.168.10.10)
4. Connect video sources to “Video Input” by RCA cables. You can choose to
connect up to 6 video sources.
Note: VPON can auto-sense the standard of video sources (NTSC or PAL). But
be sure that all video sources are the same standard.
5. Power on VPON and you will see “POWER” LED is lighted. After hearing two
“bi” sounds from VPON, VPON will start to diagnose H/W automatically.
During this period (around one minute), LEDs (except POWER and LAN) will
be lighted one by one from left to right and then all are off. When you hear a
long “bi” sound and “READY” and “STATUS1” LED (see Figure 3.1.2) are
lighted, it means the VPON is ready at LAN mode. You can go on to operate
VPON now.
2-7 3-1
Figure 3.1.2
POWER LTR READY VIDEO DATA STATUS
8. Choose “TCP/IP” and go to
? Properties? (Figure 3.1.4)
6. The default settings of VPON at LAN mode were as follows.
The default configuration of VPON:
User’s Name WEBMONITOR
Figure 3.1.4
User’s Password OYO
Administrator’s Name WEBMONITOR
Administrator’s Password OYO
Camera source 1 (1,2,3,4,5,6)
Brightness 50
9. Change IP address of the host PC to : 192.168.10.20
Contrast 70
10. Change Subnet Mask of the host PC to :
Saturation 95
Hue 50
255.255.255.0
Quality 70
(figure 3.1.5)
IP address 192.168.10.10
DNS IP address 0.0.0.0
Gateway IP address 0.0.0.0
Sub net mask 255.255.255.0
7. Go to Network on Control
? ? ?
Panel of the host PC. (Figure
?
3.1.3)
Figure 3.1.5
Figure 3.1.3
3-2 3-3
Note: Remember the original IP address and Subnet Mask. When the
configuration of VPON is finished, you need to reset the host PC to these
original values.
14. On the left side of the home page, choose “System Configuration”
(Figure 3.1.8)
Figure 3.1.8
11. Reboot the host PC.
12. Run a web browser and connect to http://192.168.10.10. When it is connected,
you will see a login homepage. Input the default Administrator’s name
“webmonitor” and Administrator’s password “oyo”. Click the “Done”
button. (Figure 3.1.6)
Figure 3.1.6
13. Then you will see the home page of VPON. (You can also see live videos when
15. Input IP Address, DNS IP Address, Gateway IP Address and Subnet Mask.
cameras are connected to VPON.) (Figure 3.1.7)
Note: Do not input any data into ISP information (ISP phone number, login
Figure 3.1.7
name, password and modem baud rate). If you want to connect VPON
directly to ISP through PSTN/ISDN, please read Chapter 4.
16. You may change account name and the password. In “Account Setting”,
input User Name, User Password, Administrator’s Name and Administrator’s
Password. (Figure 3.1.9)
3-4 3-5
Compression Format Video Quality Data Stream
JPEG Good High
Do not input M-JPEG Good High (Less than JPEG)
any data into
ISP H.263 Common Low
information
18. Click the “Done” button and go back to the home page of VPON. VPON will
save these parameters and reboot. During the period of rebooting, VPON will
not transmit any video.
Figure 3.1.9
19. Change IP address and Subnet Mask of the host PC to the original ones.
20. When you are connected to Internet, run a web browser and input IP address of
VPON at URL. You can login into the home page of VPON.(see chapter 5)
Note1: VPON provides two layers protection. You can limit users with User
Name and Password to login VPON. To set the configuration of VPON,
you must have Administrator’s Name and Administrator’s Password.
Note2: Keep the password carefully and remember it. When you forget the
3.2 Camera Setting
password, you can reset VPON. The user name and the password will be
reset to the default values. It also means you have to set the
configuration again.
3.2.1 Camera setting via a local monitor or TV set:
1. Connect Video-Out cable (One end is a 9-pin male port and the other end are
six RCA female ports) to Video Output on the back panel of VPON.
17. Choose “Video Compression Algorithm”. You may choose between JPEG,
2. Connect monitor(s) or TV set(s) to RCA female port(s). You can view the
M-JPEG and H.263. The different compressions mean different video quality
videos from a certain source by connecting a monitor or TV set to the RCA
and transfer speed.
cable marked the corresponding number. (You can view the videos of video
Note1: If the compression algorithm is M-JPEG or H.263, you need a plug-in source 1 from the monitor or TV set connected to RCA cable marked 1.)
program when you connect to VPON. You can get this plug-in program
from the Setup Disk or from our web site
Note: Make sure the standard of this monitor or TV set is the same as
If the compression algorithm is H.263, you can only view one video on
Note2:
cameras’.
firmware prior to version 1.4.
3. Adjust camera’s position, camera’s focus, iris… to get the best performance.
3-6 3-7
transmission.
4. When it is finished, disconnect Video-Out cable from VPON.
5. Click the “Done” button to make the new settings take effect.
3.2.2 Camera setting via the home page of VPON:
1. Run a web browser, connect to VPON and login as the administrator.
Note1: The video performance is changed by the algorithm. Through this way,
2. On the left side of home page, click “Camera Setting” and you will have
we cannot set the camera’s position, focus, iris... We suggest you to
prompted out Figure 3.2.1.
set cameras via a local monitor or TV set after a period to make sure
of the best performance of videos.
Note2: VPON will not save this setting. When you power off VPON, it will
Figure 3.2.1
reset to the default values.
6. If you have equipped a camera control device with VPON, you can use the
camera control interface to control a camera(Figure 3.2.2).
Figure 3.2.2
7. Select the proper camera control device and the camera it is attached and you
can use UP/DOWN/LEFT/RIGHT to make the camera move a little bit
3. Choose a certain camera to set the videos
toward the direction you clicked. Also you can use ZOOM and FOCUS
Note: You can choose a certain camera to set the video. After the video is
buttons to zoom or focus in and out. Due to the network transmission delay,
set, the parameters are applied to all video sources.
the video may not response as soon as you click the button.
4. You can set Brightness, Contrast, Saturation, Hue and Quality.
8. If the device has built in preset function, you can use the buttons described
?? Brightness: Higher value, brighter of the videos
above to move the camera to where you want and use Preset button to make
?? Contrast: Higher value, stronger contrast
the camera control device to remember the position. After presetting, you can
?? Saturation: Higher value, more color saturation
use Recall buttons to make the camera move to a preset position.
?? Hue: Higher value, higher hue
?? Quality: Higher value, better video quality
Note: With a higher value of quality, it also means a heavier data
3-8 3-9
3.5 Set Name of Server and Camera
3.3 Set Date and Time
You can choose the item " Set Name of Server & Camera " from VPON home
page to enter this page as figure 3.5.1 You can set the server name if you have
1. Run a web browser, connect to VPON and login as the administrator.
multiple VPONs on the LAN. You can also set the camera names to indicate
2. On the left side of home page, choose “Set Date & Time”.
the physical location of the cameras or any identification for easy
3. Follow the format to enter the date and the time.
understanding.
4. Click the “Done” button and go back to the home page of VPON. VPON will
save these parameters as the system date and time. (Figure 3.3)
Note: Please wait at least one minute for VPON rebooting to new system
Figure 3.3
parameters
Figure 3.5.1
3.4 Alarm and Remote Control
You can choose the item " Alarm and Remote Control " from VPON home
You can set a text string for each camera and this text will be overlaid directly
page to enter this page as figure 3.4. The Alarm Status Shows the "ON" or
on the video like time-stamp. You can specify the content and position of this
"OFF" state of the GPIs. You can also control the outputs of GPOs by selecting text(Figure 3.5.2).
Figure 3.5.2
the state of each GPO and clicking the output bottom. The output of the GPOs
will latch on the state you selected.
Figure 3. 4
3-10 3-11
Figure 3.6
On this page, you can also set the position of the time stamp of each camera.
There are 6 pre-defined position, just select the position you like (Figure 3.5.3).
Figure 3.5.3
3.7 Upload Resources
You can choose the item "Upload Resources" from VPON home page to enter
this page as Figure 3.7.1. Using this page, you can upload resources such as GIF
file for homepage, camera control definition file, etc.
3.6 Set User’s Authority
You can choose the item " Set User’s Authority" from VPON home page to
Figure 3.7.1
enter this page as figure 3.6. Besides setting the user’s and administrator’s name
and password, you can set up to 16 user’s name and password and their
authority. For example, enter “USER” and “1234” as the name and password of
User 1 and check camera 1 and 3. Later you can connect to VPON and login in
using “USER” and “1234” as user 1. After logging in, only camera 1 and
camera 3 will be displayed. If the name and password are left blank, this entry
then will be removed. If the name and password are both the word ---“BLANK”,
user logging without entering password will use this entry.
3-12 3-13
Firstly, select the type of the resource that you want to work with. Then use
Chapter 4: Connecting through COM Port
Delete button to remove the resource file that has been uploaded to server. Or
use Upload button to upload a resource file to server, you can enter directly or
On firmware 1.4 or later, VPON is configured to this mode after power up by default.
browse the path of the file in File field. Write Resources To FlashROM
You can change it to LAN mode or ISP mode by activating the configuration
button will actually write the uploaded resources to FlashROM.
function icon on the screen. OYO Viewer is the software you need for this
connection. By OYO Viewer, user can view the videos transmitted from VPON
through PSTN/ISDN. Besides viewing the videos, you can also record the videos,
play them back, make a snapshot of picture or print it out and more... For the
- End of this chapter -
professional version of OYO Viewer, you can set the callback conditions if you
connect some devices to VPON. In this way, VPON can automatically callback and
transmit the videos to the preset PC when even happens. In this chapter, we will use
OYO Viewer to make the configuration of VPON. Using the serial cable provided in
the package, you will find it is convenient to set up VPON if you don’t have a
network environment. (figure 4.0)
Figure 4. 0
4-1
3-14
lighted, it
Installation
4.1 OYO Viewer
means the this product is ready. You can go on to the configuration now.
1. Start Windows95 on the host PC. (Figure 4.2)
2. Insert Setup diskette into the diskette drive (3.5”) of host PC.
3. From the Windows Program Manager, select FILE, then RUN
Figure 4.2
4. Type “A:\setup.exe” (replace “A” with the letter of your 3.5” diskette drive),
then click OK.
POWER LTR READY VIDEO DATA STATUS
5. Follow installation instructions accordingly.
6. When it is installed successfully, you will find an icon of OYO Viewer
on the desktop of Windows. (You can also find it on the startup toolbar.)
Note: The Ready and Right Status3 LED lights indicate VPON is connected At
Modem / Null Modem Mode
4.2 Hardware Installation
4.3 Connecting
1. Connect the external power supply to DC Input on the back panel of this
product.
2. Connect one end of RS-232 null modem cable (included in the package) to 1. Run OYO Viewer on the Host PC by clicking the icon of OYO Viewer on
on the back panel of this product and the other end to one of the desktop of Windows.
COM1 Port
COM Port (1 - 4) on the host PC. When the main screen of OYO Viewer shows, click the icon
2. “Connect”
Connect video sources to by RCA cable. You can choose to on the left task bar. It will show the dialogue box. (Figure 4.3.1)
3. “Video Input”
connect up to 6 video sources.
Figure 4.3.1
Note1: It can auto-sense the standard of video sources (NTSC or PAL). But
be sure that all video sources are the same standard.
Note2: Please makes sure that you have connected video source to this
product before you power on it.
Power on and you will see LED are lighted. After
4. “POWER” and “LAN”
hearing two “bi” sounds (one low, another high), it will start to boot around
one minute. In The end of this period, LEDs (except POWER and LAN) will
be fast lighted one by one from left to right and then all are off. When you
hear a long “bi” sound and “STATUS3” LED (see below) are
4-2 4-3
3. You can connect through modem or using the null modem cable came with
VPON. Figure 4.3.1 shows connecting through COM1 using direct cable When the connection (between Client PC and VPON) is done, you can view the
connection. You can select COM port and baud rate you want, then click the videos transmitted from VPON immediately. Also, it shows “Call is
"Connect" button to make the connection. If you are using modem, you connected” on the center of the screen.
should click the "Modem Connection" button to bring up figure 4.3.2. You
can select the modem type that were installed on your machine and type in the
4.4 Configuration
login name, password ,phone number before making the connection.
Make sure the modem was installed properly.
Click the “Configuration” icon on the left task bar for configuration.
Figure 4.3.2
4.4.1 User Account
1. VPON provides two level protections. You can limit users with
Figure 4.4.1
4. After inputting all data, click on “CONNECT”. At this moment, you can get
the connection window pump up on your OYO Viewer’s main screen. As
figure 4.3.3
Figure 4.3.3
User’s Name and User’s Password to login into VPON. To set the
configuration of VPON, you must have Super user’s Name and Password.
2. Keep the password carefully and remember it. When you forget the password,
you can reset VPON by pushing the default button at the back panel. The user
name and the password will be reset to the default values. It also means you
4-4 4-5
have to set the configuration again.
4.4.4 Running Mode
4.4.2 Machine Identifier
Currently, there are two running modes for your selection, LAN and modem
1. You can enter the machine name of your VPON for identification if there are
modes. Click on the "Running Mode Setting" block of the configuration
multiple VPON in your system. Also you can enter the camera names for
window, will bring up figure 4.4.4 ,the running mode setting window. For
easier identification.
LAN mode operation, you are requested to fill in the TCP/IP configurations.
Check the "Switch to LAN mode" button. VPON will reboot from current
Figure 4.4.2
modem mode into LAN Mode. Please wait for at least one minute for the
reboot process. ISP mode is reserved for future release. After finishing the
reboot process, VPON will back to ready state, the LEDs on the front panel
will have "Ready" and "Status 1" lights on. You can login to VPON through
IE or Netscape browsers.
Figure 4.4.4
4.4.3 Multiple Account Management
This function enables you to add, remove and edit user accounts for accessing VPON.
There is a maximum of 16 accounts you can create with different access rights to the
cameras. The check boxes before the camera names that are not checked when adding
the user, will have no videos on the screen when the user connects to VPON. This
prevents the user from viewing critical videos defined by the super user. You can
remove or edit the access rights after users been created.
Figure 4.4.3
4.4.5 Camera Control Settings
In order to control the PAN,TILT, ZOOM functions of the remote cameras,
you have to set up the camera control driver before operation. Click on the
"Camera Control Setting" block and bring up the window as Figure 4.4.5.
If you are using SONY EVI-D30 camera, select the plug –in for it and click
OK. For details on camera control, please refer to Chapter 8," Controlling
Remote Cameras".
4-6 4-7
Figure 4.4.6
Figure 4.4.5
4.4.7 Call Back Setting
This function enables you to set the call back phone number, video quality,
frame rate and record duration of the call. Be remember to enable the call
4.4.6 GPIO Settings
back. The higher the quality setting, the smaller the frame rate and the smaller
There are 4 general purpose inputs and 4 general purpose outputs on the Back
the frames that can be recorded during the preset record time.
panel of VPON. These are dry contact IO points. That means they can survive
only under low voltage and low current. Suggested ratings are maximum 24
Figure 4.4.7
volts DC and 200 mA current. You can see the input status change on the
OYO viewer window. You also can set the status of the IO points from the
OYO windows. Fig 4.4.6 is for setting the relationship between the cameras
and input points. An N.O. means "Normally Open", N.C. for "Normally
Close" and "X" means don't care. The GPIs follow an OR combination. On
Fig 4.4.6 for example, VPON is going to fire a call back when GPI1 detects a
"Close" condition. Because GPI1 was set to a normally open condition and
other GPIs are ignored on video1 setting. When the link between VPON and
client OYO viewer sets up, the video from camera1 will be transmitted back.
4-8 4-9
4.4.8 Scheduled Call Back alarm panel finishes its job. VPON will record the video inside its memory
Please make sure the call back parameters at 4.4.7 are setting correctly before and sends back after link establishes with OYO client. Please refer to
working on scheduled call back. fig.4.4.9 for example.
The are three choices on this function. Regular, irregular and disable call back.
Figure 4.4.9
When regular call back, VPON will try to establish the link to remote client
between the preset time period at the preset time interval. This is good for
verification of the link and remote site. When non-regular call back, VPON
will make call when the preset time is reached. You can add or remove the
preset time from the time table. Please refer to fig 4.4.8 for example.
Figure 4.4.8
4.4.10 Firmware version
Click this block will show on the screen the firmware version currently used
4.4.9 Advance Call Back Setting
on this VPON.
This function is used mostly for security control. You can set 5 telephone
numbers plus the one on call back setting adds up 6 numbers for call back. If
4.4.11 Miscellaneous Setting
VPON fails on the number in call back setting, it will try the number in this
The function is for the setting of date, time, com port baud rate and modem
setting from call back number 2 until it makes through the call. The "wait
initialization stream. Some modems may have compatibility problem.
before dial" setting enables external alarm panel to use the same telephone
Setting the correct initialization stream makes it easier to resolve
line with VPON. You can set this number to give external alarm panel
compatibility problems. Please refer to fig.4.4.11 for example.
enough time for sending data back to control center and let VPON dial after
4-10 4-11
Chapter 5: Use VPON in
Figure 4.4.11
Internet/Intranet
When you finish the steps on Chapter 3 or 4, VPON should be connected to Internet
or Intranet. Now, VPON can transmit the videos captured from cameras through
Internet or Intranet. If you have connected to Internet or Intranet, you can follow the
following steps to view the real time videos.
1. Make your PC connected to Internet or Intranet.
2. Run a web browser at your PC.
Figure 5.1
End of this chapter
- -
3. Input URL of VPON as below:
http://
Frequently asked questions
What makes Elite.Parts unique?

What kind of warranty will the VP-200 have?
Which carriers does Elite.Parts work with?
Will Elite.Parts sell to me even though I live outside the USA?
I have a preferred payment method. Will Elite.Parts accept it?


What they say about us
FANTASTIC RESOURCE
One of our top priorities is maintaining our business with precision, and we are constantly looking for affiliates that can help us achieve our goal. With the aid of GID Industrial, our obsolete product management has never been more efficient. They have been a great resource to our company, and have quickly become a go-to supplier on our list!
Bucher Emhart Glass
EXCELLENT SERVICE
With our strict fundamentals and high expectations, we were surprised when we came across GID Industrial and their competitive pricing. When we approached them with our issue, they were incredibly confident in being able to provide us with a seamless solution at the best price for us. GID Industrial quickly understood our needs and provided us with excellent service, as well as fully tested product to ensure what we received would be the right fit for our company.
Fuji
HARD TO FIND A BETTER PROVIDER
Our company provides services to aid in the manufacture of technological products, such as semiconductors and flat panel displays, and often searching for distributors of obsolete product we require can waste time and money. Finding GID Industrial proved to be a great asset to our company, with cost effective solutions and superior knowledge on all of their materials, it’d be hard to find a better provider of obsolete or hard to find products.
Applied Materials
CONSISTENTLY DELIVERS QUALITY SOLUTIONS
Over the years, the equipment used in our company becomes discontinued, but they’re still of great use to us and our customers. Once these products are no longer available through the manufacturer, finding a reliable, quick supplier is a necessity, and luckily for us, GID Industrial has provided the most trustworthy, quality solutions to our obsolete component needs.
Nidec Vamco
TERRIFIC RESOURCE
This company has been a terrific help to us (I work for Trican Well Service) in sourcing the Micron Ram Memory we needed for our Siemens computers. Great service! And great pricing! I know when the product is shipping and when it will arrive, all the way through the ordering process.
Trican Well Service
GO TO SOURCE
When I can't find an obsolete part, I first call GID and they'll come up with my parts every time. Great customer service and follow up as well. Scott emails me from time to time to touch base and see if we're having trouble finding something.....which is often with our 25 yr old equipment.
ConAgra Foods