

 Manufacturers
WATLOW 988A-10DD-MARR

Description
Watlow Process Controller
Part Number
988A-10DD-MARR
Price
Request Quote
Manufacturer
WATLOW
Lead Time
Request Quote
Category
PRODUCTS - 9
Datasheet


Extracted Text
Series 988 User’s Manual Includes 986, 987, 988 and 989 1/8 DIN Microprocessor-Based Temperature/Process Controller User Levels: • New User........................... go to Introduction 9 6 • Experienced User................... go to page 4.1 Installers: • Set-up..................................... go to page 1.1 TOTAL • Wiring & Installation................ go to page 2.1 3 Y ear Warranty ISO 9001 Registered Company Winona, Minnesota USA Watlow Controls 1241 Bundy Blvd., P.O. Box 5580, Winona, MN, USA 55987-5580, Phone: (507) 454-5300, Fax: (507) 452-4507 0600-0009-0001 Rev V $10.00 December 1997 Made in the U.S.A. Supersedes: W988-XUMN Rev U00 Printed on Recycled Paper 10% Postconsumer Waste Series 988 User’s Manual Includes 986, 987, 988 and 989 The Series 988 User’s Manual is copyrighted by Watlow Winona, Inc., © 1997, with all rights reserved. (1233) Table of Contents Introduction to the Watlow Series 988 Chapter 6 Controllers The Factory Menus ii Using this Manual 6.1 Navigating the Factory Menus ii Document Every Step 6.2 Panel Lockout Menu iii Notes, Cautions and Warnings 6.7 Diagnostics Menu iii Technical Assistance 6.13 Calibration Menu iii We Value Your Feedback Chapter 7 Chapter 1 Tuning, Manual Operation, Hardware Setup Alarms and Error Codes 1.1 Dip Switch Locations and Functions 7.1 Auto-tuning (Heat and/or Cool) 7.2 Manual Tuning Chapter 2 7.4 Manual and Automatic Operation Installation and Wiring 7.5 Changing the Output 3 Alarm Jumper 2.1 Panel Cutout and Dimensions 7.6 Using Alarms 2.2 Installing the Series 988 7.8 Error Code E1 and E2 Messages 2.4 Wiring the Series 988 7.9 Error Code Actions 2.4 Input-to-output Isolation 2.4 Power Wiring Chapter 8 2.5 Sensor Installation Guidelines General Software 2.6 Wiring Example 8.2 Burst Fire 2.8 Input 1 Wiring 8.4 Communications 2.9 Input 2 Wiring 8.6 Dead Band 2.11 Event Input 1 Wiring 8.8 Digital Events 2.12 Output 1 Wiring 8.10 Heater Current 2.13 Output 2 Wiring 8.12 Input Filter 2.14 Output 3 Wiring 8.14 Input Linearization 2.15 Output 4 Wiring 8.16 Ramp to Set Point 8.18 Remote Set Point Chapter 3 8.20 Retransmit Front Panel and Display Loop 8.22 Slidewire Feedback 3.1 Keys and Displays 3.2 Display Loop Chapter 9 Enhanced Software Chapter 4 9.2 Cascade The Setup Menus 9.6 Differential 4.1 Navigating the Setup Menus 9.8 Dual PID Sets 4.2 Input Menu 9.10 Duplex 4.18 Output Menu 9.12 Ratio 4.34 Global Menu 4.44 Communications Menu Appendix A.2 Glossary Chapter 5 A.4 Specifications The Operation Menus A.5 Warranty and Returns 5.1 Navigating the Operation Menus A.6 Index 5.2 System Menu A.10 Menu Overview 5.9 PID A and PID B Menus A.11 Model Number – Ordering Information A.12 Declaration of Conformity Table of Contents WATLOW Series 988 User’s Manual Introduction to the Watlow Series 988 Controllers Figure Int.1 - The Series 988 Controllers. Watlow’s Series 988 controllers set a new standard in the controller indus- try by packing an impressive array of features into an 1/8-DIN package. No other controller offers the flexibility, compact size and durability of the Series 988. It can control a wide variety of temperature and process appli- cations, with a broad range of input and output options that allow control of virtually any process variable. The Series 988 is the only 1/8 DIN controller that can provide single-unit cascade control of a process. Its other features include heater current monitoring, remote set point input, ratio control and valve control through slidewire feedback. The Series 988 also delivers expanded auto-tuning capabilities, increased alarm functionality and several unique control algo- rithms. When we refer to the “Series 988” controller, we refer also to the horizontal and low-voltage versions of the Series 988: the 986, 987, 988 and 989. We recommend that you read all of this manual’s introduction to familiarize yourself with the conventions and content of this manual and the steps to setting up a Series 988 controller. Make sure you understand the “Caution” and “Warning” symbols we use in the book. Introduction WATLOW Series 988 User’s Manual i Introduction Using this Manual This manual provides the information you will need to install and operate a Series 988 controller. If you need information about Series 988 configurations and model num- bers, refer to the Appendix of this manual or, for more detailed informa- tion, to Optimizing Your Process System with the Series 988 Controller: An Application Guide for the Watlow Series 988 Family. If your Series 988 controller will be used for data communications, you will also need our communications manual, Data Communications with the Watlow Series 988 Family of Controllers (green cover). � Series 988 controllers are calibrated in the factory, but if you need to do NOTE: The 12-digit number periodic calibration you will need our calibration manual, Calibrating is printed on the top Watlow Process Controllers, (blue cover). of the stickers on each side of the This manual explains the five steps of setting up a Series 988 controller: controller’s case and on the right- 1. Set and document all of the DIP switches, if applicable: Chapter 1. hand or top circuit 2. Mount the controller: Chapter 2. board. 3. Wire and document the controller wiring: Chapter 2. 4. Configure and document the controller software: Chapters 3-6. 5. Run, test and adjust your application. Update documentation. � Chapters 7 and 8 and the Appendix provide detailed advice, definitions NOTE: and specifications along with application examples to help you optimize The Menu Overview the safety and performance of your application. Use the Table of Contents in the Appendix and Index to find specific information. shows all the menus and prompts. Document Every Step The Series 988 provides powerful and complex features. Carefully docu- ment each step of the setup and any subsequent changes. This will make it much easier to change, adjust and troubleshoot your application. Make the configuration documentation available to engineers and techni- cians, on all shifts, who may need to work with the Series 988. We provide space in this manual to record configurations. You may prefer to photo- copy the blank forms and keep them in a separate binder. However you maintain your documentation, be sure to replace all old copies of the doc- umentation with updated versions whenever the controller configuration is changed. Introduction ii WATLOW Series 988 User’s Manual Introduction Notes, Cautions and Warnings We use note, caution and warning symbols throughout this book to draw your attention to important operational and safety information. A bold text “NOTE” marks a short message in the margin to alert you to an important detail. A bold text “CAUTION” safety alert appears with information that is important for protecting your equipment and performance. Be especially careful to read and follow all cautions that apply to your application. A bold text “WARNING” safety alert appears with information that is important for protecting you, others and equipment from damage. Pay very close attention to all warnings that apply to your application. The � symbol (an exclamation point in a triangle) precedes a general CAUTION or WARNING statement. The � symbol (a lightning bolt in a triangle) precedes an electric shock hazard CAUTION or WARNING safety statement. Technical Assistance If you encounter a problem with your Watlow controller, review all of your configuration information for each step of the setup to verify that your selections are consistent with your applications. If the problem persists after checking all the steps, you can get technical assistance by calling Watlow Controls at (507) 454-5300, between 7 a.m. and 5 p.m. CST, and asking for an applications engineer. When you call have the following information on hand: the controller’s model number (the 12-digit number is printed on the top of the stickers on each side of the controller’s case and on the right-hand or top circuit board); your user’s manual; all configuration information; and the Diagnostics Menu readings. We Value Your Feedback Your comments and suggestions on this manual are welcome. Please send them to, Technical Writer, Watlow Controls, 1241 Bundy Blvd., P.O. Box 5580, Winona, MN 55987-5580 or call (507) 454-5300 or fax (507) 452- 4507.(1233) Introduction WATLOW Series 988 User’s Manual iii Chapter 1 Hardware Setup DIP Switch Locations and Functions The Watlow Series 988 has at least one and as many as six dual in-line package (DIP) switches inside the controller, depending on the model number. They allow users to configure the controller for a variety of input sensors, to provide power for external signal conditioners or to lockout front panel access to some functions. To set any DIP switch: • Remove the controller from the case by pressing firmly on the two release tabs on one side or the top of the bezel until they unsnap. Then firmly press the two release tabs on the opposite side or the bottom of the con- trol until they unsnap. You will need to gently rock the bezel back and forth to release it from the chassis. • Use the illustrations on the following pages to locate and set each DIP switch. WATL W PROCESS Release Release L1 L2 L3 L4 Tabs Tabs DEV DISPLAY % OUT AUTO MAN MODE SERIES 988 Release Tabs WATL W DSPY MODE Figure 1.1 - Press the release tabs to PROCESS remove the con- DEV AUTO troller chassis. % OUT MAN SERIES 989 L1 L2 L3 L4 Release Tabs Hardware Setup, Chapter 1 WATLOW Series 988 User’s Manual 1.1 DIP Switches 1. Set the input DIP Input 2 DIP switches to match the ON sensors you are using in your application. Input 1 DIP Only controllers with model number 98_ _- ON � 2_ _ _-_ _ _ _ or 98_ _- _2_ _-_ _ _ _ have an NOTE: Controller Chassis input DIP switch. The Input 2 DIP Rear View switch is mounted upside down. Input 1 Input 2 (98 _ _-2_ _ _-_ _ _ _)(98 _ _-_2_ _-_ _ _ _) � NOTE: 12 3 Only controllers O N ↑ with the indicated RTD (100 Ω) model numbers have these DIP 12 3 switches. O N ↑ thermocouple: R, S or B 12 3 O N ↑ thermocouple: J, K, T, N, E, C, D, Pt2 or 0-50mV (high impedance) 12 3 Figure 1.2 - O N ↑ Input DIP switches. 0-20 or 4-20mA; 0-5, 1-5 or 0-10V Hardware Setup, Chapter 1 1.2 WATLOW Series 988 User’s Manual 12 3 O N ↑ 12 3 O N ↑ 12 3 O N ↑ 12 3 O N ↑ DIP Switches 2. Set DIP switches for Output 1 outputs equipped with Option Board on off an external signal con- Output 2 Option Board and DIP ditioner power supply. Output 4 Only controllers with off on Option Board and DIP model number 98_ _-_ Output 3 Option Board and DIP off on _ _T-_ _ _ _, 98_ _-_ _ _ _-T_ _ _ or 98_ _-_ _ _ � _-_T_ _ have an exter- NOTE: nal signal conditioner For other voltages Controller Chassis power supply. or current settings Top View (986 & 988) Left-side View (987 & 989) contact the factory. � NOTE: Output 2 Output 3 Output 4 Only controllers (98 _ _-_ _ _T-_ _ _ _) (98 _ _-_ _ _ _-T_ _ _) (98 _ _-_ _ _ _-_T_ _) with the indicated model numbers have these DIP 12 12 12 O O O N N N switches. ↑ ↑ ↑ 20V ± 5% @ 30mA 12 12 12 O O O N N N ↑ ↑ ↑ 12V ± 5% @ 30mA Figure 1.3 - 12 12 12 O O O N N N External signal con- ↑ ↑ ↑ 5V ± 5% @ 30mA ditioner power sup- ply DIPs. 3. When the DIP switches are set, gently insert the controller chassis into the case and push it firmly into place until all four tabs snap into place. Hardware Setup, Chapter 1 WATLOW Series 988 User’s Manual 1.3 DIP Switches 4. The lockout DIP switch � hides the Setup Menus (Input, Output, Global and CAUTION: Communications) and the The lockout DIP Factory Menus (Panel switch makes the Setup and Factory Lockout, Diagnostics and menus unavailable. Calibration). All units have Configure all the a lockout DIP switch. Setup and Factory menus before lock- ing them out. Fail- ure to do so could result in damage to equipment in the event of a setup error. 12 12 O O N N ↑ ↑ no hardware lockout or (Switch 1 has no effect.) 12 12 O O N N ↑ ↑ lockout Setup and Factory menus or (Switch 1 has no effect.) Figure 1.4 - Lockout DIP switch. Commu- Input Output Global nications [InPt]� [OtPt]� [GLbL]� [COM [‘SEt]� [‘SEt]� [‘SEt]� [‘SEt]� ���� Panel Diagnostics Calibration ���Lockout� [PLOC]��[diAG]� [‘CAL]��� [Fcty]� [Fcty]� [Fcty]� Hardware Setup, Chapter 1 1.4 WATLOW Series 988 User’s Manual Chapter 2 Installation and Wiring WATL W � 4.03" NOTE: (102mm) Space panel PROCESS cutouts at least 1.66 WATL W inches (42.2mm) 4.03" apart. DSPY MODE L1 L2 L3 L4 (102mm) 2.18" DEV PROCESS DISPLAY (55 mm) % OUT DEV AUTO AUTO % OUT MAN MAN SERIES 989 L1 L2 L3 L4 MODE � SERIES 988 NOTE: 2.18" Adjustable mount- (55 mm) ing brackets can be side-mounted. Adjustable Panel Mounting Bracket Panel Cutout � Maximum Panel Thickness NOTE: 0.38" (9.65mm) Holes can be cut in the panel using a Greenlee 1/8 DIN Hydraulic Kit #60068 (punch 3.62" + 0.03 -0.00 (92mm + 0.8) #60069, die #60070). Figure 2.1 - Series 988 and 0.68" 4.06" 1.77 + 0.02 -0.00 Series 989 (17 mm) (103 mm) (45mm + 0.6) dimensions and terminal number layout. 1 11 21 22 2 12 3 13 11 20 4 14 15 16 12 13 14 17 18 19 22 24 5 15 6 16 23 21 3 45 2 67 89 7 17 1 10 8 18 9 19 23 24 10 20 Installation and Wiring, Chapter 2 WATLOW Series 988 User’s Manual 2.1 Installation Installing the Series 988 Installing and mounting requires access to the back of the panel. 1. Make a panel cutout using the panel cutout dimensions from the previ- ous page. 2. To remove the controller chassis from its case, press in firmly on the two tabs on one side or the top of the bezel until they unsnap, then unsnap the two tabs on the opposite side or the bottom. Pull the chassis out of � the case by gently rocking it. NOTE: 3. Slide the case into the panel cutout. Check to see that the gasket is not Removing the con- twisted, and is seated within the case bezel flush with the panel. Slide troller chassis from its case makes mounting easier. Side (986 or 988) or Top and Bottom (987 or 989) View Top and Bottom (986 or 988) Adjustable Panel or Side (987 or 989) View Mounting Bracket Figure 2.2 - Side and top view. Release Tabs Mounting Slots Bezel Mounting Collar External Gasket Installation and Wiring, Chapter 2 2.2 WATLOW Series 988 User’s Manual Installation the mounting collar over the back of the control. 4. Loosen the mounting bracket screws enough to allow for the mounting collar and panel thickness. Place each mounting bracket into the mounting slots (head of the screw facing the back of the controller). Push each bracket backward then down to secure it to the control case. To guarantee a proper NEMA 4X seal, Series 986 and 988 units (vertical) must have the mounting brackets located on either side of the unit. When installing Series 987 and 989 units (horizon- tal) the brackets must be on the top and bottom of the unit. 5. Make sure the case is seated properly. Tighten the installation screws � firmly against the mounting collar to secure the unit. To ensure a CAUTION: NEMA 4X seal, there should be no space between the bezel and Follow the installa- panel. Overtightening the screws will distort the case and make it diffi- tion procedure cult to remove or replace the controller. exactly to guarantee a proper NEMA 4X 6. Make sure the inside gasket is seated properly and not twisted. seal. Make sure the Insert the controller chassis into its case and press the bezel until all gasket between the four tabs snap. panel and the rim of the case is not 7. To release the mounting brackets, loosen the mounting bracket screws twisted and is seat- ed properly. Failure and push the brackets forward, then pull it up and out. to do so could result in damage to equipment. Installation and Wiring, Chapter 2 WATLOW Series 988 User’s Manual 2.3 Wiring Wiring the Series 988 ” WARNING: Wiring options depend on the model number and DIP switch settings. To avoid potential Check the terminal designation stickers on either side of the controller electric shock, use and compare your model number to those shown here and with the model National Electric number breakdown on the inside back cover of this manual. Code (NEC) safety practices when Input-to-output Isolation wiring and connect- ing this unit to a power source and The Series 988 uses optical isolation between the analog inputs and the to electrical sensors or peripheral controller outputs/digital input. This isolation provides a 500V� (ac) bar- devices. Failure to rier to prevent ground loops when using grounded sensors and/or periph- do so could result eral equipment. in injury or death. Here is a breakdown of the isolation barriers: • Analog inputs 1 and 2 are grouped together. • Outputs 1 through 4 and the standard event input are grouped together. This does not apply to Output 4 when configured as communications. � • The digital communications output (4) is separate from the above NOTE: groups. Input-to-output iso- lation is defeated Power Wiring when the external signal conditioner power supply is 100 to 240V� � (ac/dc) nominal, (85 to 264 actual) used to power a transmitter con- L1 L2 nected to input 1 or Vertical Package 98 8 _ - _ _ _ _ - _ _ _ _ + - input 2. fuse Horizontal Package 98 9 _ - _ _ _ _ - _ _ _ _ 21 22 11 earth ground 24 to 28 V� � (ac/dc) nominal, (20 to 30 actual) Vertical Package 98 6 _ - _ _ _ _ - _ _ _ _ Figure 2.4 - Horizontal Package 98 7 _ - _ _ _ _ - _ _ _ _ Power wiring. Installation and Wiring, Chapter 2 2.4 WATLOW Series 988 User’s Manual Wiring Sensor Installation Guidelines Maintain isolation between input 1 and input 2 to prevent a ground loop. � A ground loop may cause incorrect readings, dashes across the upper dis- CAUTION: play or the display of error codes. The Series 988 will not function with Thermocouple input: Extension wire for thermocouples must be of the two grounded ther- same alloy as the thermocouple itself to limit errors. mocouple inputs. Avoid using a Using grounded thermocouples for both input 1 and input 2 may create grounded thermo- ground loop problems. To correct this problem, replace at least one of the couple for both grounded thermocouples with an ungrounded thermocouple. If the appli- input 1 and input 2. cation requires grounded thermocouples, use an isolated transmitter, Failure to follow this guideline could such as a Watlow Gordon 5702 isolated transmitter. result in damage to equipment. RTD (100 Ω) input: Each 1Ω of lead wire resistance can cause a +2°C error when using a two-wire RTD. A three-wire RTD sensor overcomes this problem. All three wires must have the same electrical resistance (i.e., same gauge, same length, multi-stranded or solid, same metal). NOTE: Input-to-output iso- Process input: Isolation must be maintained between input 1 and input lation is defeated 2. If both input 1 and input 2 are used as process inputs, a separate when the external power supply and transmitter must be used for each input. Output option signal conditioner T (external signal conditioner power supply) can be used to supply power power supply is for only one input. used to power a transmitter connect- ed to input 1 or input 2. Installation and Wiring, Chapter 2 WATLOW Series 988 User’s Manual 2.5 Wiring Example ” WARNING: To avoid potential electric shock, use L1 National Electric 120V� (ac) L2 Code (NEC) safety high-temperature earth ground light practices when wiring and connect- high-limit mechanical coil ing this unit to a fuse contactor power source and 21 22 11 to electrical sen- 12 (+) 1 5 SSR-240-10A-DC1 sors or peripheral 92A3-1DJ1-0000 (-) 13 limit control out dc input devices. Failure to SSR 1 2 do so could result 4 3 in injury or death. in heater (+) 9 � 13 14 10 (-) 10 11 WARNING: red + - 988A-10CA-AARR Install high or low optional rear view normally open process sensor limit sensor temperature limit momentary switch control protection in systems where an over tempera- ture fault condition could present a fire hazard or other haz- ard. Failure to 120V� (ac) install temperature L2 L1 limit control protec- tion where a poten- 21 22 tial hazard exists 1 3 2 1 could result in dam- Series 988 4 (+) age to equipment, 2 9 988A-10CA-AARR property and injury 11 5 (-) temperature control 3 10 to personnel. 12 13 � 4 6 7 WARNING: SSR-240-10A-DC1 in solid-state relay, dc input 3-32Vº (dc) To avoid damage to (-) (+) property and equip- 1 CR-1 ment, and/or injury heater 5 out 2 8 9 10 1 of loss of life, use 24-240V� (ac) National Electric Code (NEC) stan- dard wiring prac- 6 1 2 11 1 2 tices to install and 7 12 13 Series 92 operate the Series 8 13 14 92A3-1DJ1-0000 988. Failure to do limit control (+) 14 9 10 so could result in 10 such damage, (-) 15 11 3 1CR 11 and/or injury or 16 2 4 12 death. 1 17 5 R 13 18 2 high-temperature light Figure 2.6 - System wiring example. Installation and Wiring, Chapter 2 2.6 WATLOW Series 988 User’s Manual Wiring Notes L1 L2 earth ground 11 21 22 power � WARNING: To avoid damage to property and equip- ment, and/or injury of loss of life, use National Electric Code (NEC) stan- dard wiring prac- tices to install and operate the Series 988. Failure to do so could result in such damage, and/or injury or death. � NOTE: Sketch in your application on this page or a copy of it. See wiring exam- ples in this chapter and in the Appen- dix. Figure 2.7 - Wiring notes. Installation and Wiring, Chapter 2 WATLOW Series 988 User’s Manual 2.7 Input 1 Wiring Figure 2.8a — Thermocouple or 0-50mV (high impedance) � NOTE: Thermocouple only Successful installa- 98 _ _ - 1 _ _ _ - _ _ _ _ (no DIP switches) tion requires five steps: Universal signal conditioner • Model number and 9 1 2 3 1 2 3 O O 98 _ _ - 2 _ _ _ - _ _ _ _ N N software choice 10 ↑ ↑ (Appendix); J, K, T, N, C, E, D, Pt2, R, S, B 9 • DIP switch set- Input impedance: 20MΩ 0-50mV DIP Settings DIP Settings 10 tings (Chapter 1); 0-50mV • Sensor match (Chapter 2 and Appendix); • Sensor installation Figure 2.8b — RTD (2- or 3-wire) (100 Ω) (Chapter 2); and • Wiring (Chapter 2). Jumper Universal signal conditioner #9 to #10 98 _ _ - 2 _ _ _ - _ _ _ _ for 2-wire RTD 1 2 3 S1 8 O S1 8 N ↑ S2 9 S2 9 DIP Switch S3 10 10 Setting Figure 2.8c — 0-5Vº º, 1-5Vº º or 0-10Vº º (dc) Process Universal signal conditioner 98 _ _ - 2 _ _ _ - _ _ _ _ 1 2 3 O N ↑ Input impedance: 10KΩ DIP Switch Setting + 9 - 10 Figure 2.8d — 0-20mA or 4-20mA Process Universal signal conditioner 98 _ _ - 2 _ _ _ - _ _ _ _ 1 2 3 O N ↑ - Input impedance: 7Ω 8 DIP Switch Setting + 10 Installation and Wiring, Chapter 2 2.8 WATLOW Series 988 User’s Manual - + - + Input 2 Wiring Figure 2.9a — Thermocouple or 0-50mV (high impedance) NOTE: Successful installa- Thermocouple only tion requires five 98 _ _ - _ 1 _ _ - _ _ _ _ (no DIP switches) steps: • Model number and Universal signal conditioner software choice 98 _ _ - _ 2 _ _ - _ _ _ _ 19 (Appendix); 20 • DIP switch set- 0-50mV R, S, B J, K, T, N, C, E, D, Pt2, tings (Chapter 1); Input impedance: 20MΩ 19 DIP Settings 0-50mV DIP Settings • Sensor match 20 (Chapter 2 and Appendix); • Sensor installation (Chapter 2); and • Wiring (Chapter 2). Figure 2.9b — RTD (2- or 3-wire) (100 Ω) Jumper Universal signal conditioner #19 to #20 98 _ _ - _ 2 _ _ - _ _ _ _ for 2-wire RTD 18 18 S1 S1 19 S2 S2 19 DIP Switch 20 S3 Setting 20 Figure 2.9c — 0-5Vº º, 1-5Vº º or 0-10Vº º (dc) Process Universal signal conditioner 98 _ _ - _ 2 _ _ - _ _ _ _ DIP Switch Setting Input impedance: 10KΩ 19 + - 20 Figure 2.9d — 0-20mA or 4-20mA Process Universal signal conditioner 98 _ _ - _ 2 _ _ - _ _ _ _ DIP Switch Setting - Input impedance: 7Ω 18 20 + Installation and Wiring, Chapter 2 WATLOW Series 988 User’s Manual 2.9 1 2 3 O N ↑ 1 2 3 O N ↑ 1 2 3 O N ↑ - + - 1 2 3 1 2 3 O O + N N ↑ ↑ Input 2 Wiring NOTE: Figure 2.10a — Slidewire Feedback or Potentiometer Input See Chapter 8 for information on slidewire feedback. 98 _ _ - _ 3 _ _ - _ _ _ _ 18 CCW 19 Wiper 20 CW � NOTE: A process output Figure 2.10b — Current Transformer Input cannot be installed on output 1 when 98 _ _ - _ 4 _ _ - _ _ _ _ using a current transformer input. L2 The current transformer must be pur- Load wire CT chased separately. See Appendix for 19 Watlow current transformer part 20 Center leg not used numbers. L1 Single-phase NOTE: Systems that use more than 50 Amps Successful installa- need an interstage transformer. For tion requires five example, if you use a 300A current steps: transformer, part #16-0073, and an • Model number and interstage transformer, part #16- Phase software choice 0176, the 300A current transformer dot (Appendix); T1 provides a 5A signal to the interstage 19 • DIP switch set- transformer. In turn, the transformer 20 tings (Chapter 1); sends a 20mA maximum signal to the T3 • Sensor match controller. T2 (Chapter 2 and 3-phase using 2 current transformers Appendix); • Sensor installation (Chapter 2); and • Wiring (Chapter 2). Figure 2.10c — Digital Event Input 2 98 _ _ - _ 5 _ _ - _ _ _ _ open 0-3Vº (dc) Event Input 2 off closed 14-36Vº (dc) Event Input 2 on 18 19 + +5Vº (VDC) 20 20 - Internal Circuitry 100Ω 4.7KΩ .01μf 1KΩ 750Ω 18 19 20 Installation and Wiring, Chapter 2 2.10 WATLOW Series 988 User’s Manual Event Input 1 Wiring Figure 2.11a — Digital Event Input 1 NOTE: Successful installa- tion requires five Available on all units. OPTO steps: ISOLATOR • Model number and open 14-36Vº (dc) Event Input 1 off software choice closed 0-3Vº (dc) Event Input 1 on (Appendix); 4.99KΩ .01μf • DIP switch set- 750Ω tings (Chapter 1); +24Vº (dc) 23 24 • Sensor match + - 10KΩ 4.99KΩ (Chapter 2 and Appendix); Internal Circuitry • Sensor installation (Chapter 2); and 23 24 • Wiring (Chapter 2). Installation and Wiring, Chapter 2 WATLOW Series 988 User’s Manual 2.11 Output 1 Wiring Figure 2.12a — AC Outputs NOTE: Successful installa- tion requires five Solid-state Relay with Contact Suppression steps: 98 _ _ - _ _ B _ - _ _ _ _ • Model number and 0.5 amps, minimum off-state impedance: 20KΩ software choice External Load (Appendix); 12 NO L2 Electromechanical Relay with Contact Suppression 13 COM • DIP switch set- L1 (Suppression between NO and COM contacts only) Fuse tings (Chapter 1); 14 NC 98 _ _ - _ _ D _ - _ _ _ _ (#14 for D & E outputs only) • Sensor match Form C, 5 amps, minimum off-state impedance: 20KΩ (Chapter 2 and Appendix); Electromechanical Relay without Contact Suppression • Sensor installation 98 _ _ - _ _ E _ - _ _ _ _ (Chapter 2); and Form C, 5 amps off-state impedance: 31MΩ • Wiring (Chapter 2). Solid-state Relay without Contact Suppression 98 _ _ - _ _ K _ - _ _ _ _ 0.5 amps, off-state impedance: 31MΩ NOTE: Switching inductive loads (relay coils, Figure 2.12b — Switched DC, Open Collector solenoids, etc.) with the mechanical 98 _ _ - _ _ C _ - _ _ _ _ relay or solid state 19 to 32Vº (dc) 12 + relay output options + 12 External 790Ω - 13 Load requires using an Maximum voltage: 42Vº º (dc) 13 14 COM R.C. suppressor. Maximum current: 1A 14 Watlow carries the Internal Circuitry R.C. suppressor Quencharc brand name, which is a trademark of ITW Paktron. Watlow Figure 2.12c — 0-20mA and 4-20mA Process Part No. 0804-0147- 0000. 98 _ _ - _ _ F _ - _ _ _ _ 12 + Maximum load impedance: 800Ω 14 - Figure 2.12d — 0-5Vº º, 1-5Vº º and 0-10Vº º (dc) Process 98 _ _ - _ _ F _ - _ _ _ _ 13 + Minimum load impedance: 1KΩ 14 - Installation and Wiring, Chapter 2 2.12 WATLOW Series 988 User’s Manual Output 2 Wiring Figure 2.13a — AC Outputs NOTE: Successful installa- Solid-state Relay with Contact Suppression tion requires five 98 _ _ - _ _ _ B - _ _ _ _ steps: 0.5 amps, minimum off-state impedance: 20KΩ • Model number and software choice Electromechanical Relay with Contact Suppression External (Appendix); Load 15 NO (Suppression between NO and COM contacts only) L2 • DIP switch set- COM 16 L1 98 _ _ - _ _ _ D - _ _ _ _ tings (Chapter 1); Fuse NC 17 Form C, 5 amps, minimum off-state impedance: 20KΩ • Sensor match (#17 for D & E outputs only) (Chapter 2 and Electromechanical Relay without Contact Suppression Appendix); • Sensor installation 98 _ _ - _ _ _ E - _ _ _ _ (Chapter 2); and Form C, 5 amps off-state impedance: 31MΩ • Wiring (Chapter 2). Solid-state Relay without Contact Suppression 98 _ _ - _ _ _ K - _ _ _ _ 0.5 amps, off-state impedance: 31MΩ Figure 2.13b — Switched DC, Open Collector NOTE: Switching inductive loads (relay coils, 19 to 32Vº (dc) 98 _ _ - _ _ _ C - _ _ _ _ solenoids, etc.) with + 15 790Ω the mechanical 16 Maximum voltage: 42Vº º (dc) 15 + relay or solid state 17 External Maximum current: 1A 16 - Load Internal Circuitry relay output options 17 COM requires using an R.C. suppressor. Watlow carries the R.C. suppressor Quencharc brand Figure 2.13c — 0-20mA and 4-20mA Process name, which is a 15 + trademark of ITW 17 98 _ _ - _ _ _ F - _ _ _ _ - Paktron. Watlow Part No. 0804-0147- 0000. Maximum load impedance: 800Ω Figure 2.13d — 0-5Vº º, 1-5Vº º and 0-10Vº º (dc) Process � 16 NOTE: + 98 _ _ - _ _ _ F - _ _ _ _ 17 Input-to-output iso- - lation is defeated Minimum load impedance: 1KΩ when the external signal conditioner power supply is used to power a transmitter connect- Figure 2.13e — External Signal Conditioner Power Supply ed to input 1 or Loop powered input 2. 15 1 Transmitter 98 _ _ - _ _ _ T - _ _ _ _ 16 2 4-20mA out Input 1 or 2 Installation and Wiring, Chapter 2 WATLOW Series 988 User’s Manual 2.13 + - -V - +V + Output 3 Wiring NOTE: Figure 2.14a — AC Outputs Successful installa- tion requires five NC Form B steps: Solid-state Relay with Contact Suppression External or Load 1 NO Form A • Model number and L2 98 _ _ - _ _ _ _ - B _ _ _ COM 2 L1 software choice 0.5 amps, minimum off-state impedance: 20KΩ Fuse (Appendix); • DIP switch set- Electromechanical Relay without Contact Suppression tings (Chapter 1); Form A or B 98 _ _ - _ _ _ _ - J _ _ _ _ alarm jumper • Sensor match settings (98__- Form A or B, 5 amps, off-state impedance: 31MΩ (Chapter 2 and ____-J___ only) Appendix); Form A Solid-state Relay without Contact Suppression • Sensor installation 98 _ _ - _ _ _ _ - K _ _ _ _ (Chapter 2); and 0.5 amps, off-state impedance: 31MΩ Form B • Wiring (Chapter 2). NOTE: Figure 2.14b — Switched DC Switching inductive loads (relay coils, solenoids, etc.) with 98 _ _ - _ _ _ _ - C _ _ _ 19 to 32Vº (dc) 1 + External the mechanical 1 + 2 - Load 790Ω relay or solid state Minimum load resistance: 500Ω 2 relay output options Internal Circuitry requires using an R.C. suppressor. Watlow carries the R.C. suppressor Quencharc brand name, which is a trademark of ITW Figure 2.14c — Process Retransmit Paktron. Watlow Part No. 0804-0147- 0000. 0-20mA, 4-20mA, Load impedance: 600Ω max. 1 2 98 _ _ - _ _ _ _ - M _ _ _ NOTE: 0-5Vº º, 1-5Vº º, 0-10Vº º (VDC), Load impedance: 500Ω min. Input-to-output iso- 98 _ _ - _ _ _ _ - N _ _ _ lation is defeated when the external signal conditioner power supply is used to power a transmitter con- Figure 2.14d — External Signal Conditioner Power Supply nected to input 1 or input 2. Loop powered 1 98 _ _ - _ _ _ _ - T _ _ _ Transmitter 2 � 4-20mA out NOTE: Input See Chapter 1 for 1 or 2 power supply DIP switch information. Installation and Wiring, Chapter 2 2.14 WATLOW Series 988 User’s Manual - + -V - +V + - + Output 4 Wiring NOTE: Figure 2.15a — AC Outputs Successful installa- tion requires five steps: Solid-state Relay with Contact Suppression • Model number and 98 _ _ - _ _ _ _ - _ B _ _ software choice 0.5 amps, minimum off-state impedance: 20KΩ (Appendix); • DIP switch set- External Electromechanical Relay with Contact Suppression Load 5 NO tings (Chapter 1); L2 (Suppression between NO and COM contacts only) COM 6 L1 • Sensor match Fuse 98 _ _ - _ _ _ _ - _ D _ _ _ NC 7 (Chapter 2 and (#7 for D & E outputs only) Form C, 5 amps, minimum off-state impedance: 20KΩ Appendix); • Sensor installation Electromechanical Relay without Contact Suppression (Chapter 2); and 98 _ _ - _ _ _ _ - _ E _ _ _ • Wiring (Chapter 2). Form C, 5 amps, off-state impedance: 31MΩ Solid-state Relay without Contact Suppression 98 _ _ - _ _ _ _ - _ K _ _ _ 0.5 amps, off-state impedance: 31MΩ NOTE: Switching inductive loads (relay coils, solenoids, etc.) with Figure 2.15b — Switched DC, Open Collector the mechanical relay or solid state relay output options 98 _ _ - _ _ _ _ - _ C _ _ 19 to 32Vº (dc) requires using an 5 + 5 + External 790Ω R.C. suppressor. - 6 Load Maximum voltage: 42Vº º (dc) 6 Watlow carries the COM 7 7 Maximum current: 1A R.C. suppressor Internal Circuitry Quencharc brand name, which is a trademark of ITW Paktron. Watlow Part No. 0804-0147- 0000. Figure 2.15c — External Signal Conditioner Power Supply NOTE: 98 _ _ - _ _ _ _ - _ T _ _ Input-to-output iso- Loop powered 5 lation is defeated Transmitter 6 when the external 4-20mA out transmitter power � supply is used to Input NOTE: power a signal con- 1 or 2 See Chapter 1 for ditioner connected power supply DIP to input 1 or input 2. switch information. For data communications wiring refer to Data Communications with the Watlow Series 988 Family of Controllers. Installation and Wiring, Chapter 2 WATLOW Series 988 User’s Manual 2.15 - + -V - +V + Chapter 3 Front Panel and Display Loop Keys and Displays Upper Display Lower Display Indicates the actual process value, Indicates the set point, deviation, prompt parameter value or error percent power, temperature unit, code. menu prompt name or alarm code. W WATL L1, L2, L3, L4 DEV LED These LED’s indicate when output When lit, the lower display shows 1, 2, 3 or 4 are active. Outputs can the most recent deviation unit from be configured as: the set point. Ot1 Control PROCESS Ot2 Control or Alarm Ot3 Alarm or Retransmit % OUT LED Ot4 Alarm or Communications When lit, the lower display shows (flashes on transmit and the current percent output. receive) L1 L2 L3 L4 Up-arrow Key Display Key DEV Increases the value or changes the DISPLAY Pressing this key enters the parameter in the upper display % OUT Display Loop. Press the Display (except for set point changes in the key at any time to return to this Display Loop, which occur in the AUTO loop. The next page has more lower display). Hold the key down information on the Display Loop. MAN to increase the value rapidly. New data takes effect in five seconds or when the Mode key or Display key Auto/Man Key MODE is pressed. In Manual mode the lower display shows percent output. Pressed SERIES 988 Down-arrow Key once, it clears any latched alarm. If Decreases the value or changes pressed again within five seconds the parameter in the upper display it will toggle between Auto and Mode Key (except for set point changes in the Manual mode. Display Loop, which occur in the Enters new data and steps to the next prompt in the current lower display). Hold the key down menu. to decrease the value rapidly. New Auto/Man LED data takes effect in five seconds or Lit when the control is in Manual when the Mode key or Display key operation. Press the Auto/Man key Mode + Up-arrow Keys is pressed. twice to enter Automatic operation. Hold the Mode key then press When blinking, press the Auto/Man Up + Down Keys the Up-arrow key to move key to toggle between Auto and backwards through the cur- Press simultaneously for three sec- Manual. After five seconds without onds to go to the Setup Menu. rent menu. Scrolling stops pressing the Auto/Man key, the Continue to press both keys for when you reach the top of the LED stops blinking and returns to another three seconds to go to the menu. its previous state. Factory Menu. Access to the Setup and Factory menus can be dis- abled with lockout DIP switch. Figure 3.1 - Series 988 Keys and Displays Front Panel and Display Loop, Chapter 3 WATLOW Series 988 User’s Manual 3.1 Display Loop Display Loop The Display Loop is the “home” state of the Series 988 controller. Pressing the Display key ¶ returns the controller to the Display Loop from any � prompt in any menu. The controller automatically returns to the Display NOTE: Loop from any menu when a minute passes without any keys being For information on pressed. input 1 [‘In1] and input 2 [‘In2] ranges, refer to Chapter 4. [‘988]� current input 1 reading [‘988] set point 1 (change with Up-arrow > or Down-arrow < key) DISPLAY [‘988]� current input 2 reading � [Pr‘2] input 2 process (appears only if controller equipped with input 2 hardware) NOTE: DISPLAY [‘988]� current input 1 reading If [‘‘no] is selected DISPLAY [‘988] deviation from set point, process 1 minus set point 1 (DEV light on) for [‘In2], in the DISPLAY [‘988]� current input 1 reading Input Menu, the [‘100] percent output (%OUT light on) [Pr‘2] prompt will DISPLAY not appear. DISPLAY [‘988]� current input 1 reading [‘‘¡C] units selected (units, °F or °C) Figure 3.2 - The Display Loop Front Panel and Display Loop, Chapter 3 3.2 WATLOW Series 988 User’s Manual Chapter 4 The Setup Menus Navigating the Setup Menus NOTE: When navigating To reach the Setup Menus, begin in the Display Loop and press both the Up- through menus, arrow > and Down-arrow < keys for three seconds. The Setup Menu outputs will be dis- prompt [‘SEt] will appear in the lower display, and the Input Menu prompt abled. [InPt] will appear in the upper display. The four Setup Menus are: Input [InPt]; Output [OtPt]; Global [GLbL]; and Communications [COM]. Use the Up-arrow > or Down-arrow < key to select a menu and the Mode key � to step through a menu. The Communications Menu appears only on units � equipped with the data communications option. NOTE: You will not see every prompt in any of these menus. The unit’s configuration Press the Display and model number determine which prompts appear. After stepping through key ¶ to return to each menu, the Series 988 returns to the Setup Menu prompt [‘SEt]. Use the Display Loop from any point in the Up-arrow > and Down-arrow < keys to select the next menu, or use any menu. the Mode key � to advance through the same menu again. To move back- wards through the menu hold the Mode key � down and press the Up- arrow key >. Use the Up-arrow > or Down-arrow < key to change the prompt setting. Refer to the Appendix for model number options. For information about communications and the communications prompts, refer to the supple- mental manual Data Communications with the Watlow Series 988 Family of Controllers. WATL W PROCESS ¶Begin in the Display Loop, and press the Up-arrow L1 L2 L3 L4 > and Down-arrow < keys simultaneously to DEV DISPLAY % OUT AUTO reach the Setup Menus. MAN MODE SERIES 988 [Inpt] [OtPt] [gLbL] [COm] [‘Set] [‘Set] [‘Set] [‘Set] Input Output Global Communications Figure 4.1 - Menu Menu Menu Menu Navigating the p. 4.2 p. 4.2 p. 4.18 p. 4.18 p. 4.34 p. 4.34 p. 4.44 p. 4.44 Setup Menus. WATL W � NOTE: PROCESS •Press the Up-arrow key > to select one of the The lockout DIP Setup Menus. L1 L2 L3 L4 switch hides the DEV DISPLAY % OUT Setup Menus. See AUTO MAN Chapter 1. MODE SERIES 988 Setup Menus, Chapter 4 WATLOW Series 988 User’s Manual 4.1 [Inpt]� Setup-Input [‘Set] Setup Prompt Enter your settings, from the controller's MODE upper display. [‘In1] Input 1 MODE Reaching the Input Menu [deC1] *Decimal 1 MODE [‘rL1] Range Low 1 MODE [‘rH1] Range High 1 W WA ATL TL W W Input 1 (p. 4.3) (p. 4.3) MODE [CAL1] Calibration Offset 1 PROCESS MODE [rtd1] *RTD Calibration Curve 1 L1 L2 L3 L4 DEV DISPLAY MODE % OUT AUTO [Ftr1] Software Filter 1 MAN MODE MODE SERIES 988 [Lin1] *Linearization 1 MODE ‚Select the Input Menu, then press [‘ln2] *Input 2 the Mode key � to step through the MODE prompts. [‘rSp] MODE *Remote Set Point MODE [deC2] *Decimal 2 MODE [‘RL2] *Range Low 2 MODE … [‘RH2] *Range High 2 … MODE Input 2 (p. 4.9) (p. 4.9) [LrnL] … *Learn Low [‘‘‘0] [‘‘‘1] [‘‘‘2] [‘‘60] [Ftr1] [Ftr1] [Ftr1] [Ftr1] MODE [LrnH] *Learn High � MODE [CAL2] *Calibration Offset 2 MODE [‘‘no]� [root]� [rtd2] [Lin1] [Lin1] *RTD Calibration Curve 2 MODE [Ftr2] *Software Filter 2 „Press the Up-arrow key > or the MODE Down-arrow key < to select one of [Lin2] *Linearization 2 the prompt values. MODE [Hunt] *Hunt Slidewire (p. 4.16) (p. 4.16) MODE *Prompts may not appear, [SHYS] *Slidewire Hysteresis depending on controller configuration. Figure 4.2 - The Input Menu. Setup Menus, Chapter 4 4.2 WATLOW Series 988 User’s Manual Setup-Input Input Prompts When you are in the Setup menus, the Series 988 displays the menu selec- � tion ( [InPt], [OtPt], [GLbL] or [COM] ) in the upper display, and [‘SEt] in NOTE: the lower display. Decimal points may not always be in the The Up-arrow > or Down-arrow key < selects another menu. Press the position specified Mode key � to display the prompt in the lower display and its value in the below depending on upper display. Use the Up-arrow > or Down-arrow < key to change the the the settings in value in the upper display. The new value will not take effect until after a the Decimal 1 five-second delay or until you press the Mode key �. [dEC1] and Decimal 2 [dEC2] parame- ters in the Input Menu. Input 1 [‘In1] Select sensor type for input 1. This selection must match the sensor type connected to terminals 8, 9 and 10. See Appendix for more information about sensors. • Changing the value of [‘In1] changes all other prompts to the factory default values, except the Communications and Lockout menus, the [‘C_F] prompt in the Global Menu and the [‘dFL] prompt in the � Calibration Menu. If you change the value, the default warning [dFLt] CAUTION: will flash in the upper display. Changing the value of [‘In1] changes • Changes do not take effect automatically after five seconds; you must most other prompts press the Mode key � to enter the sensor type change and advance to to the factory the next prompt. default values. Document all set- [‘In1] This prompt always appears. tings before chang- ing sensor type. If Default Verify the correct fl fl sensor type before 98_ _-1_ _ _-_ _ _ _ making a change. no DIP J K T N E W5 W3 Pt2 0-50mV Failure to follow [‘‘‘J] [‘‘‘H] [‘‘‘t] [‘‘‘n] [‘‘‘E] [‘‘‘C] [‘‘‘d] [‘Pt2] [0-50] this guideline could thermocouple [‘In1] [‘In1] [‘In1] [‘In1] [‘In1] [‘In1] [‘In1] [‘In1] [‘In1] result in damage to only equipment or prop- 98_ _-2_ _ _-_ _ _ _ erty. Document all Input 1 DIP J K T N E W5 W3 Pt2 0-50mV settings before changing sensor [‘‘‘J] [‘‘‘H] [‘‘‘t] [‘‘‘n] [‘‘‘E] [‘‘‘C] [‘‘‘d] [‘Pt2] [0-50] 1 2 3 O N type. ↑ [‘In1] [‘In1] [‘In1] [‘In1] [‘In1] [‘In1] [‘In1] [‘In1] [‘In1] thermocouple [‘In1] Input 1 DIP R S B Input 1 continued 1 2 3 [‘‘‘r] [‘‘‘S] [‘‘‘b] O N ↑ [‘In1] [‘In1] [‘In1] on next page. thermocouple Setup Menus, Chapter 4 WATLOW Series 988 User’s Manual 4.3 Setup-Input If Default [‘In1] flfl Input 1 continued Input 1 DIP RTD RTD(0.1°) from previous [‘rtd] [‘r�d] 1 2 3 O page. N [‘In1] [‘In1] ↑ RTD Input 1 DIP 4-20mA 0-20mA 0-5Vº 1-5Vº 0-10Vº (dc) [4-20] [0-20] [‘0-5] [‘1-5] [0-10] 1 2 3 O N [‘In1] [‘In1] [‘In1] [‘In1] [‘In1] ↑ process Decimal 1 [dEC1] Select the decimal point location for process type input 1 data. This prompt, in conjunction with the Range Low and Range High prompts, allows you to format and limit units of measure for process 1. • All prompts with units of measure related to input 1 will display in the selected decimal format. • This affects propbands, alarm set points, process set points, calibration offsets, deadbands and ranges. [dEC1] This prompt appears only if you have set input 1 [‘In1] to a process input or to a thermocouple input set to 0-50mV. Default fl [‘‘‘)] [‘‘)0] [‘)00] [)000] [dEC1] [DEC1] [dEC1] [dEC1] Setup Menus, Chapter 4 4.4 WATLOW Series 988 User’s Manual Setup-Input Range Low 1 and Range High 1 [‘rL1] Select the low and high limits for input 1. These prompts limit the [‘rH1] adjustment range for the set points. The default values are the same as the limits of the sensor you selected by setting the input 1 DIP switch and selecting a value for Input 1 [‘In1]. • Process inputs are scaled by these values. Range high is the value dis- played when the maximum process signal is present at the input. Range low is the value displayed when the minimum process signal is present � at the input. NOTE: Example: Set [‘In1] to [4-20]mA. These values do not Set [‘rL1] to [‘100]. affect the low or the Set [‘rH1] to [‘500]. high set point limit A 4mA input will display [‘100]. for process alarms. A 12mA input will display [‘300]. A 20mA input will display [‘500]. • The low and high values of each sensor type are listed on the specifica- tions page of the Appendix. • Choose between Fahrenheit and Celsius at the [‘C_F] prompt in the Global Menu. [‘rL1] [‘rH1] These prompts always appear. Default Default Default Default flflflfl [‘‘¡F] [‘‘¡C] � [‘rL1] [‘rH1] [‘rL1] [‘rH1] NOTE: [‘‘‘J] [‘‘32]…[1500] [‘‘‘0]…[‘816] 98_ _-1_ _-_ _ _ or When high imped- [‘‘in] [‘rL1] [‘rH1] [‘rL1] [‘rH1] 98_ _-2_ _-_ _ _ ance [0-50] is (K) selected for input 1 [‘‘‘H] [-328]…[2500] [-200]…[1371] the range high for both [‘‘¡C] and [‘‘‘t] [-328]…[‘750] [-200]…[‘399] [‘‘¡F] can be extended to [‘‘‘n] [‘‘32]…[2372] [‘‘‘0]…[1300] [9999]. The range low when [‘‘¡C] is [‘‘‘E] [-328]…[1470] [-200]…[‘799] selected can be extended to (W5) [‘‘‘C] [‘‘32]…[4200] [‘‘‘0]…[2316] [-999]. (W3) [‘‘‘d] [‘‘32]…[4200] [‘‘‘0]…[2316] [‘rL1] [‘Pt2] [‘‘32]…[2543] [‘‘‘0]…[1395] [‘rH1] high impedance [0-50] [-999]…[‘999] [-573]…[‘573] Range Low 1 and Range High 1 continued on next page. Setup Menus, Chapter 4 WATLOW Series 988 User’s Manual 4.5 Setup-Input [‘‘¡F] [‘‘¡C] [‘rL1] [‘rL1] [‘rH1] [‘rL1] [‘rH1] [‘rH1] [‘‘‘r] [‘‘32]…[3200] [‘‘‘0]…[1760] 98_ _-2_ _-_ _ _ Range Low 1 and only Range High 1 [‘in1] continued from previous page. [‘‘‘S] [‘‘32]…[3200] [‘‘‘0]…[1760] [‘‘‘b] [‘‘32]…[3300] [‘‘‘0]…[1816] � [‘rtd] [-328]…[1472] [-200]…[‘800] NOTE: [‘r�d] [-9(9]…[99(9] [-7#3]…[53&7] These values do not affect the low or the high set point limit [4-20] [-999]…[9999] units for process alarms. [0-20] [-999]…[9999] units [‘0-5] [-999]…[9999] units [‘1-5] [-999]…[9999] units [0-10] [-999]…[9999] units [CAL1] Calibration Offset 1 Offset the input 1 signal by a positive or negative value. This allows you to compensate for lead resistance, sensor errors or other factors. [CAL1] This prompt always appears. If Default flfl [‘‘¡F] [-999] … [‘‘‘0] … [9999] [‘C_F] [CAL1] [CAL1] [CAL1] (Global Menu) [‘‘¡F] & [‘r�d] [-9(9] … [‘‘)0] … [‘9(9] [‘C_F] [‘In1] [CAL1] [CAL1] [CAL1] (Global Menu) (Input Menu) [‘‘¡C] [-999] … [‘‘‘0] … [9999] [‘C_F] [CAL1] [CAL1] [CAL1] (Global Menu) [‘‘¡C] & [‘r�d] [-5%5] … [‘‘)0] … [‘5%5] [‘C_F] [‘In1] [CAL1] [CAL1] [CAL1] (Global Menu) (Input Menu) [-999] … [‘‘‘0] … [‘999] units [CAL1] [CAL1] [CAL1] a process input is selected Setup Menus, Chapter 4 4.6 WATLOW Series 988 User’s Manual Setup-Input RTD (100Ω) Calibration Curve 1 [rtd1] Select the calibration curve for the RTD 1 input. The RTD input uses either the European (DIN, 0.003850Ω/Ω/°C) or the Japanese (JIS, 0.003916Ω/Ω/°C) linearization standard. [rtd1] This prompt appears only if you have set [‘In1] to [‘rtd] or [‘r�d]. Default fl [‘din] … [‘JIS] [rtd1] [rtd1] Software Filter 1 [Ftr1] Select the filter time constant, in seconds, for input 1. This smooths a rapidly changing input signal for display or control purposes. • Select a positive value to filter only the display. • Select a negative value to filter the input signal. • Set the value to [‘‘‘0] to disable the filter. [Ftr1] This prompt always appears. Default fl [‘-60] … [‘‘‘0] … [‘‘60] [Ftr1] [Ftr1] [Ftr1] Setup Menus, Chapter 4 WATLOW Series 988 User’s Manual 4.7 Setup-Input Linearization 1 [Lin1] Select square root linearization for input 1. [Lin1] This prompt appears only if you have set [‘In1] to a process input � or to a thermocouple set to [0-50]mV. NOTE: See Chapter 8 for Default more information fl on input lineariza- [‘‘no] [root] tion. [Lin1] [Lin1] Setup Menus, Chapter 4 4.8 WATLOW Series 988 User’s Manual Setup-Input Input 2 [‘In2] Select sensor type for input 2. This selection must match the sensor type connected to terminals 18, 19 and 20. See Appendix for more infor-� mation about sensors. CAUTION: Changing the value • Changing the value of [‘In2] changes all other prompts to the facto- of [‘In2] changes ry default values, except the Communications and Lockout menus, most other prompts the [‘C_F] prompt in the Global Menu and the [‘dFL] prompt in the to the factory Calibration Menu. If you change the value, the default warning default values. [dFLt] will flash in the upper display. Document all set- tings before chang- • Changes do not take effect automatically after five seconds; you must ing sensor type. press the Mode key � to enter the sensor type change and advance to Verify the correct the next prompt. sensor type before making a change. [‘In2] This prompt and other Input 2 prompts appear only on controllers Failure to follow equipped with input 2 hardware (not 98_ _-_0_ _-_ _ _ _). this guideline could result in damage to equipment or prop- erty. Document all settings before If Default changing sensor fl fl type. 98_ _-1_ _ _-_ _ _ _ no DIP J K T N E W5 W3 Pt2 0-50mV [‘‘no] [‘‘‘J] [‘‘‘H] [‘‘‘t] [‘‘‘n] [‘‘‘E] [‘‘‘C] [‘‘‘d] [‘Pt2] [0-50] thermocouple [‘‘In2] [‘In2] [‘In2] [‘In2] [‘In2] [‘In2] [‘In2] [‘In2] [‘In2] [‘In2] � only NOTE: 98_ _-2_ _ _-_ _ _ _ If [‘‘no] is selected Input 2 DIP J K T N E W5 W3 Pt2 0-50mV for [‘In2] none of [‘‘no] [‘‘‘J] [‘‘‘H] [‘‘‘t] [‘‘‘n] [‘‘‘E] [‘‘‘C] [‘‘‘d] [‘Pt2] [0-50] 1 2 3 O the other input 2 N ↑ [‘In2] [‘In2] [‘In2] [‘In2] [‘In2] [‘In2] [‘In2] [‘In2] [‘In2] [‘In2] prompts will appear. thermocouple Input 2 DIP R S B 1 2 3 [‘‘no] [‘‘‘r] [‘‘‘S] [‘‘‘b] O N ↑ [‘In2] [‘In2] [‘In2] [‘In2] thermocouple Input 2 DIP RTD RTD (0.1°) 1 2 3 [‘‘no] [‘rtd] [‘r�d] O N ↑ [‘In2] [‘In2] [‘In2] RTD Input 2 DIP 4-20mA 0-20mA 0-5Vº 1-5Vº 0-10Vº (dc) 1 2 3 [‘‘no] [4-20] [0-20] [‘0-5] [‘1-5] [0-10] O N ↑ [‘In2] [‘In2] [‘In2] [‘In2] [‘In2] [‘In2] process [‘In2] Input 2 continued on next page. Setup Menus, Chapter 4 WATLOW Series 988 User’s Manual 4.9 Setup-Input [‘In2] If Default Input 2 continued fl fl from previous 98_ _-3_ _ _-_ _ _ _ page. no DIP slidewire potentiometer [‘‘no] [SLid] [‘POt] resistance [‘‘In2] [‘In2] [‘In2] only 98_ _-4_ _ _-_ _ _ _ no DIP current current [‘‘no] [SLid] transformer [‘‘In2] [‘In2] only 98_ _-5_ _ _-_ _ _ _ no DIP event 2 [‘‘no] [‘Ei2] digital event [‘‘In2] [‘In2] only Remote Set Point [‘rSP] Enable a remote set point signal. [‘rSP] This prompt appears only if the controller is equipped with input 2 hardware and if [‘In2] is not set to [‘‘no] and if [CntL] (in the Global Menu) is set to [‘nor]. Default fl [‘OFF] [‘‘On] [‘rSP] [‘rSP] Setup Menus, Chapter 4 4.10 WATLOW Series 988 User’s Manual Setup-Input Decimal 2 [dEC2] Select the decimal point location for process type input 2 data. This prompt, in conjunction with the Range Low and Range High prompts, allows you to format and limit units of measure for process 2. • All prompts with units of measure related to input 2 will display in the selected decimal format. • This affects propbands, alarm set points, process set points, calibration offsets, deadbands and ranges. [dEC2] This prompt appears only if you have set input 2 [‘In2] to a process input, [Curr] or a thermocouple input set to [0-50] mV. Default fl [‘‘‘)] [‘‘)0] [‘)00} [)000] [dEC2] [dEC2] [dEC2] [dEC2] Range Low 2 and Range High 2 [‘rL2] Select the low and high limits for input 2. These prompts limit the [‘rH2] adjustment range for the set points. The default values are the same as the limits of the sensor you selected by setting the input 2 DIP switch and selecting a value for Input 2 [‘In2]. • Process inputs are scaled by these values. Range high is the value dis- played when the maximum process signal is present at the input. Range low is the value displayed when the minimum process signal is present at the input. Example: Set [‘In2] to [4-20]mA. Set [‘rL2] to [‘100]. Set [‘rH2] to [‘500]. A 4mA input will display [‘100]. A 12mA input will display [‘300]. A 20mA input will display [‘500]. • The low and high values of each sensor type are listed on the specifica- [‘rL2] tions page of the Appendix. [‘rH2] • Choose between Fahrenheit and Celsius at the [‘C_F] prompt in the Range Low 2 and Global Menu. Range High 2 continued on next [‘rL2] [‘rH2] These prompts appear only if the controller is equipped page. with input 2 hardware and with Input 2 [‘In2] not set to [‘‘no] or [‘Ei2]. Setup Menus, Chapter 4 WATLOW Series 988 User’s Manual 4.11 Setup-Input Default Default Default Default [‘rL2] flflflfl [‘‘¡F] [‘‘¡C] [‘rH2] [‘rL2] [‘rH2] [‘rL2] [‘rH2] Range Low 2 and Range High 2 con- [‘‘‘J] [‘‘32]…[1500] [‘‘‘0]…[‘816] 98_ _-1_ _-_ _ _ or [‘in2] [‘rL2] [‘rH2] [‘rL2] [‘rH2] 98_ _-2_ _-_ _ _ tinued from previ- (K) ous page. [‘‘‘H] [-328]…[2500] [-200]…[1371] [‘‘‘t] [-328]…[‘750] [-200]…[‘399] [‘‘‘n] [‘‘32]…[2372] [‘‘‘0]…[1300] [‘‘‘E] [-328]…[1470] [-200]…[‘799] (W5) � [‘‘‘C] [‘‘32]…[4200] [‘‘‘0]…[2316] NOTE: (W3) These values do not [‘‘‘d] [‘‘32]…[4200] [‘‘‘0]…[2316] affect the low or the high set point limit [‘Pt2] [‘‘32]…[2543] [‘‘‘0]…[1395] for process alarms. high impedance [0-50] [-999]…[‘999] [-573]…[‘573] [‘‘‘r] [‘‘32]…[3200] [‘‘‘0]…[1760] 98_ _-2_ _-_ _ _ only [‘‘‘S] [‘‘32]…[3200] [‘‘‘0]…[1760] � NOTE: [‘‘‘b] [‘‘32]…[3300] [‘‘‘0]…[1816] When high imped- ance [0-50] is [‘rtd] [-328]…[1472] [-200]…[‘800] selected for input 1 the range high for [‘r�d] [-9(9]…[99(9] [-7#3]…[53&7] both [‘‘¡C] and [‘‘¡F] can be extended to [9999]. [4-20] [-999]…[9999] units The range low when [‘‘¡C] is selected [0-20] [-999]…[9999] units can be extended to [-999]. [‘0-5] [-999]…[9999] units [‘1-5] [-999]…[9999] units [0-10] [-999]…[9999] units [0-50] [-999]…[9999] units [0=00] [-999]…[9999] units slidewire [SLid] [‘100]…[1200] ohms current [Curr] [‘‘‘0]…[‘‘50] amps potentiometer [‘POt] [‘‘‘0]…[1200] ohms Setup Menus, Chapter 4 4.12 WATLOW Series 988 User’s Manual Setup-Input Learn Low [LrnL] Write the low-end resistance of the slidewire potentiometer to the range low 2 parameter. [LrnL] This prompt appears only on controllers equipped with input 2 � hardware and with Input 2 [‘In2] set to [SLid] or [‘POt]. NOTE: See Chapter 8 for Default more information fl on slidewire feed- [‘‘no] [‘YES] back. [LrnL] [LrnL] Learn High [LrnH] Write the high-end resistance of the slidewire potentiometer to the range low 2 parameter. [LrnH] This prompt appears only on controllers equipped with input 2 � hardware and with Input 2 [‘In2] set to [SLid] or [‘POt]. NOTE: See Chapter 8 for more information Default on slidewire feed- fl back. [‘‘no] [‘YES] [LrnH] [LrnH] Setup Menus, Chapter 4 WATLOW Series 988 User’s Manual 4.13 Setup-Input Calibration Offset 2 [CAL2] Offset the input 2 signal by a positive or negative value. This allows you to compensate for lead resistance, sensor errors or other factors. [CAL2] This prompt appears only if the controller is equipped with input 2 hardware and if [‘In2] is not set to [‘‘no] or [‘Ei2]. If Minimum Default Max. setting/range flfl [‘‘¡F] [-999] … [‘‘‘0] … [‘999] [‘C_F] [CAL2] [CAL2] [CAL2] (Global Menu) [‘‘¡F] [‘r�d] [-9(9] … [‘‘)0] … [‘9(9] & [‘C_F] [‘In2] [CAL2] [CAL2] [CAL2] (Global Menu) (Input Menu) [‘‘¡C] [-555] … [‘‘‘0] … [‘555] [‘C_F] [CAL2] [CAL2] [CAL2] (Global Menu) [‘‘¡C] [‘r�d] [-5%5] … [‘‘)0] … [‘5%5] & [‘C_F] [‘In2] [CAL2] [CAL2] [CAL2] (Global Menu) (Input Menu) [-999] … [‘‘‘0] … [‘999] units [CAL2] [CAL2] [CAL2] a process input is selected RTD Calibration Curve 2 [rtd2] Select the calibration curve for the RTD 2 input. The RTD input uses either the European (DIN, 0.003850Ω/Ω/°C) or Japanese (JIS, 0.003916Ω/Ω/°C) linearization standard. [rtd2] This prompt appears only on controllers equipped with input 2 hardware and with [‘In2] set to [‘rtd] or [‘r�d]. Default fl [‘din] [‘JIS] [rtd2] [rtd2] Setup Menus, Chapter 4 4.14 WATLOW Series 988 User’s Manual Setup-Input Software Filter 2 [Ftr2] Select the filter time constant, in seconds, for input 2. This smooths a rapidly changing input signal for display or control purposes. • Select a positive value to filter only the display. • Select a negative value to filter the input signal. • Set the value to [‘‘‘0] to disable the filter. [Ftr2] This prompt appears only on controllers equipped with input 2 hardware and with [‘In2] not set to [‘‘no] or [‘Ei2]. Default fl [‘-60] … [‘‘‘0] … [‘‘60] [Ftr2] [Ftr2] [Ftr2] Linearization 2 [Lin2] Select square root linearization for input 2. [Lin2] This prompt appears only if you have set Input 2 [‘In2] to a � process input or to a thermocouple input set to [0-50] mV. NOTE: See Chapter 8 for more information Default on input lineariza-fl tion. [‘‘no] [root] [Lin2] [Lin2] Setup Menus, Chapter 4 WATLOW Series 988 User’s Manual 4.15 Setup-Input Hunt [Hunt] Set the deadband, as a percentage of output, to keep the valve from hunting. � • The slidewire hysteresis [SHYS] setting provides additional control over a NOTE: valve. See Chapter 8 for more information [Hunt] This prompt appears only if the controller is equipped with slidewire on slidewire feed- hardware (98_ _-_3_ _-_ _ _) and with [‘In2] set to [SLid]. back. Default fl [‘‘)3] … [‘‘!0] … [10)0] [Hunt] [Hunt] [Hunt] Setup Menus, Chapter 4 4.16 WATLOW Series 988 User’s Manual Setup-Input Slidewire Hysteresis [SHYS] Set the inner hysteresis, the point at which the valve output turns off. • The figure below illustrates the interaction between slidewire hysteresis [SHYS] and hunt [Hunt]. � [SHYS] This prompt appears only if the controller is equipped with slidewire hardware (98_ _-_3_ _-_ _ _ _) and with Input 2 [‘In2] set to [SLid] NOTE: See Chapter 8 for more information on slidewire feed- Default back. fl [‘‘‘0] [Hunt] [SHYS] [SHYS] turn-on point (close) turn-off point (close) Slidewire Hunt Hysteresis slidewire position set point turn-off point (open) Figure 4.17 - Hunt and slidewire turn-on point (open) inner hysteresis. Setup Menus, Chapter 4 WATLOW Series 988 User’s Manual 4.17 [OtPt] [‘set] Setup Prompt Enter your settings, Setup-Output MODE from the controller's upper display. [‘Ot1] Output 1 MODE Output 1 (p. 4.19) (p. 4.19) [Prc1] Reaching the Output Menu *Process 1 MODE [HyS1} *Hysteresis 1 MODE ¶Begin in the Display Loop, and [‘Ot2] *Output 2 press the Up-arrow > and Down- MODE arrow < keys simultaneously for [Prc2] *Process 2 three seconds to reach the Setup MODE Menus. [Hys2]x *Hysteresis 2 MODE Output 2 (p. 4.21) (p. 4.21) [Sp2c] *Set Point 2 Control MODE [‘Al2] [OtPt] [gLbL] [COm] *Alarm 2 [Inpt] [‘Set] [‘Set] [‘Set] [‘Set] MODE [A25d] *Alarm 2 Side Input Output Global Communications MODE Menu Menu Menu Menu [LAt2] MODE *Latching 2 p. 4.2 p. 4.18 p. 4.34 p. 4.44 p. 4.2 p. 4.18 p. 4.34 p. 4.44 MODE [SIL2] *Silencing 2 •Press the Up-arrow key > to select MODE [‘Ot3] *Output 3 one of the Setup Menus. MODE [‘Al3] *Alarm 3 MODE Output 3 (p. 4.25) (p. 4.25) [A3sd] *Alarm 3 Side MODE [Hys3] *Hysteresis 3‚Press the Mode key � to step MODE through the prompts. [Lat3] *Latching 3 MODE [SIL3] *Silencing 3 MODE [‘Ot4] *Output 4 MODE [‘‘Ht] [‘‘CL] [‘AL4] *Alarm 4 [‘Ot1] [‘Ot1] MODE Output 4 (p. 4.28) (p. 4.28) [A4Sd} … *Alarm 4 Side … MODE [HyS4] *Hysteresis 4� � … MODE [‘‘‘1] [‘‘‘2] [‘‘‘3] [‘999] [Hys2] [Hys2] [Hys2] [Hys2] [LAt4] *Latching 4 MODE [SIL4} *Silencing 4 „Press the Up-arrow key > or the MODE [Aout] Down-arrow key < to select one of *Analog Output MODE the prompt values. [Prc3} *Process 3 MODE Output 3 retransmit *Prompts may not appear, [A‘rL] ((p. 4.31) p. 4.31) *Retransmit Low Limit depending on controller MODE configuration. [A‘rH] *Retransmit High Limit Figure 4.18 - MODE Navigating the Output Menu. [ACAL] *Retransmit Calibration Offset Setup Menus, Chapter 4 4.18 WATLOW Series 988 User’s Manual Setup-Output Output Prompts � NOTE: When you are in the Setup menus, the Series 988 displays the menu Decimal points may selection ( [InPt], [OtPt], [GLbL] or [COM] ) in the upper display, and not always be in the [‘SEt] in the lower display. position specified below depending The Up-arrow > or Down-arrow key < selects another menu. Press the on the the settings in the Decimal 1 Mode key � to display the first prompt in the lower display and its value [deC1] and Decimal in the upper display. Use the Up-arrow > and Down-arrow < keys to 2 [deC2] parame- change the value in the upper display. The new value will not take effect ters in the Input until after a five-second delay or until you press the Mode key �. Menu. Output 1 [‘Ot1] Set the way that output 1 will respond to a difference between the set point and an input variable. • [‘‘Ht] select reverse action, so that output 1 responds when the input signal is less than the setpoint. • [‘‘CL] select direct action, so that output 1 responds when the input signal is more than the setpoint. [‘Ot1] This prompt always appears. Default fl [‘‘Ht] [‘‘CL] [‘Ot1] [‘Ot1] Setup Menus, Chapter 4 WATLOW Series 988 User’s Manual 4.19 Setup-Output Process 1 [Prc1] Select the process range for output 1. [Prc1] This prompt appears only on controllers equipped with output 1 process hardware (98_ _-_ _F_-_ _ _ _). Default fl 4-20mA 0-20mA 0-5Vº 1-5Vº 0-10Vº (dc) [4-20] [0-20] [‘0-5] [‘1-5] [0-10] [Prc1] [Prc1] [Prc1] [Prc1] [Prc1] Hysteresis 1 [HYS1] Select the switching hysteresis for output 1. This determines the change in temperature or process units needed to turn the output from full on to full off. [HYS1] This prompt does not appear on controllers equipped with output 1 process hardware (98_ _-_ _F_-_ _ _ _). This prompt only appears with the controller set up as an on/off controller ( [PBIA] = [‘‘‘0] ). If Default flfl [‘‘¡F] [‘‘‘1] … [‘‘‘3] … [‘999] [‘C_F] [HYS1 ][HYS1] [HYS1] (Global Menu) [‘‘¡F] & [‘r�d] [‘‘)1] … [‘‘#0] … [‘9(9] [‘C_F] [‘In1] [HYS1] [HYS1] [HYS1] (Global Menu) (Input Menu) [‘‘¡C] [‘‘‘1] … [‘‘‘2] … [‘555] [‘C_F] [HYS1] [HYS1] [HYS1] (Global Menu) [‘‘¡C] & [‘r�d] [‘‘)1] … [‘‘@0] … [‘5%5] [‘C_F] [‘In1] [HYS1] [HYS1] [HYS1] (Global Menu) (Input Menu) [‘‘‘1] … [‘‘‘3] … [‘999] units [HYS1] [HYS1] [HYS1] a process input is selected Setup Menus, Chapter 4 4.20 WATLOW Series 988 User’s Manual Setup-Output Output 2 [‘Ot2] Set the way that output 2 will respond to a difference between the set point and an input variable. • [‘AL2] de-energizes output 2 in an alarm condition. • [AL2n] energizes output 2 in an alarm condition. • [‘‘Ht] select reverse action, so that output 2 responds when the input signal is less than the set point. • [‘‘CL] select direct action, so that output 2 responds when the input signal is more than the set point. [‘Ot2] This prompt appears only on controllers equipped with output 2 hardware (not 98_ _-_ _ _A-_ _ _ _). [‘AL2] and [AL2n] do not appear if out- put 2 is a process output (98_ _-_ _ _F-_ _ _ _). [‘‘Ht] and [‘‘CL] do not appear if [AL90] (in the Global Menu) is set to [dUPL]. Default fl [‘‘no] [‘AL2] [Al2n] [‘‘Ht] [‘‘CL] [‘Ot2] [‘Ot2] [‘Ot2] [‘Ot2] [‘Ot2] Process 2 [Prc2] Select the process range for output 2. [Prc2] This prompt appears only on controllers equipped with output 2 process hardware (98_ _-_ _ _F-_ _ _ _) and with [‘Ot2] not set to [‘‘no]. Default fl 4-20mA 0-20mA 0-5Vº 1-5Vº 0-10Vº (dc) [4-20] [0-20] [‘0-5] [‘1-5] [0-10] [Prc2] [Prc2] [Prc2] [Prc2] [Prc2] Setup Menus, Chapter 4 WATLOW Series 988 User’s Manual 4.21 Setup-Output Hysteresis 2 [HYS2] Select the switching hysteresis for output 2. This determines the change in temperature or process units needed to turn the output from off to on. • If [‘AL2] is set to [rAtE] settings for [HYS2] will be in degrees per minute or units per minute. • If the input referenced by [‘AL2] is set to [‘r�d] the range is affected as listed below. [HYS2] This prompt appears only on controllers equipped with output 2 hardware and with the controller set up as an on/off controller ([Pb2A} = [‘‘‘0]), and with [‘Ot2] not set to [‘‘no]. This prompt does not appear on controllers equipped with output 2 process hardware, ([‘In2} = [sLid], or if [ALg0} in the Global menu = [dUPL]). If Default flfl [‘‘¡F] [‘‘‘1] … [‘‘‘3] … [‘999] [‘C_F] [HYS2] [HYS2] [HYS2] (Global Menu) [‘‘¡F] & [‘r�d] [‘‘)1] … [‘‘#0] … [‘9(9] [‘C_F] [HYS2] [HYS2] [HYS2] Input 1 or 2 (Global Menu) (see note above) [‘‘¡C] [‘‘‘1] … [‘‘‘2] … [‘555] [‘C_F] [HYS2][ HYS2] [HYS2] (Global Menu) [‘‘¡C] & [‘r�d] [‘‘)1] … [‘‘@0] … [‘5%5] [‘C_F] [HYS2] [HYS2] [HYS2] Input 1 or 2 (Global Menu) (see note above) [‘‘‘1] … [‘‘‘3] … [‘999]units [HYS2] [HYS2] [HYS2] a process input is selected Set Point 2 Control [SP2c] Select a second set point. • [‘‘Pr] enables a set point independent from the Set Point 1 [‘SP1] value. • [‘‘dE] enables a set point at a deviation from the Set Point 1 [‘SP1] value. [Prc1] This prompt appears only if output 2 hardware is present and is equal to the output 1 setting. Default fl [‘‘Pr] [‘‘dE] [SPc2] [SPc2] Setup Menus, Chapter 4 4.22 WATLOW Series 988 User’s Manual Setup-Output Alarm 2 [‘AL2] Select the alarm type for alarm 2. Select the trigger points for the alarm with the [A2LO] and [A2HI] settings in the System Menu [‘SYS]. • [‘Pr1] uses the process signal from input 1. Changing the set point does not change the alarm response. � • [‘dE1] uses a deviation from the input 1 signal. Changing the set point changes the alarm response. NOTE: See Chapter 7 for • [‘Pr2] uses the process signal from input 2. This choice does not appear more information if the controller is not equipped with input 2 hardware or if [‘In2] is set on alarms. to [‘‘no] or [‘Ei2]. • [‘dE2] uses a deviation from the input 2 signal. This prompt does not appear if the controller is not equipped with input 2 hardware or if [‘In2] is set to [‘‘no] or [‘Ei2]. • [rAtE] uses the rate of change at input 1 in degrees per minute. [‘AL2] This prompt appears only on controllers equipped with output 2 hardware and with [‘Ot2] set to [‘AL2] or [AL2n]. Default fl [‘Pr1] [‘de1] [‘Pr2] [‘de2] [rAtE] [‘‘no] [‘AL2] [‘AL2] [‘AL2] [‘AL2] [‘AL2] [‘AL2] Alarm 2 Side [A2Sd] Select what triggers alarm 2. • [both] triggers an alarm when the signal ≤ [A2LO] or ‡[A2HI]. • [HigH] triggers an alarm when the signal ‡[A2HI]. • [LoW] triggers an alarm when the signal ≤ [A2LO]. [A2Sd] This prompt appears only on controllers equipped with output 2 hardware and with [‘Ot2] set to [‘AL2] or [AL2n]. Default fl [both] [HigH] [Low] [A2Sd] [A2Sd] [A2Sd] Setup Menus, Chapter 4 WATLOW Series 988 User’s Manual 4.23 Setup-Output Latching 2 [LAt2] Select whether alarm 2 will be latching or non-latching. A latching alarm [‘LAt] must be turned off manually. A non-latching alarm [‘nLA] turns off when an alarm condition no longer exists. [LAt2] This prompt appears only on controllers equipped with output 2 � hardware and with [‘Ot2] set to [‘AL2] or [AL2n]. NOTE: See Chapter 7 for Default more information on alarms.fl [‘nLA] [‘LAt] [LAt2] [LAt2] Silencing 2 [SIL2] Select silencing to inhibit alarm 2 on startup and to allow the opera- tor to reset the alarm output, not the visual display. • Silencing disables the alarm until the signal is between [A2LO] and [A2HI]. [‘AL2] This prompt appears only on controllers equipped with output 2 hardware and with [‘Ot2] set to [‘AL2] or [AL2n]. Default fl [‘OFF] [‘‘On] [SIL2] [SIL2] Setup Menus, Chapter 4 4.24 WATLOW Series 988 User’s Manual Setup-Output Output 3 [‘Ot3] Select the alarm condition for output 3. • [‘AL3] de-energizes output 3 in an alarm condition. • [AL3n] energizes output 3 in an alarm condition. � [‘Ot3] This prompt appears only on controllers equipped with output 3 NOTE: hardware for a relay (98_ _-_ _ _ _-B_ _ _, 98_ _-_ _ _ _-J_ _ _ or See Chapter 7 for 98_ _-_ _ _ _-K_ _ _) or switched dc (98_ _-_ _ _ _-C_ _ _). more information on alarms. Default fl [‘AL3] [AL3n] [‘‘no] [‘Ot3] [‘Ot3] [‘Ot3] Alarm 3 [‘AL3] Select the alarm type for alarm 3. • [‘Pr1] uses the process signal from input 1. • [‘dE1] uses a deviation from the input 1 signal. • [‘Pr2] uses the process signal from input 2. This prompt does not appear if the controller is not equipped with input 2 hardware or if [‘In2] is set to [‘‘no] or [‘Ei2]. • [‘dE2] uses a deviation from the input 2 signal. This prompt does not appear if the controller is not equipped with input 2 hardware or if [‘In2] is set to [‘‘no] or [‘Ei2]. • [rAtE] uses the rate of change at input 1 in degrees per minute. [‘AL3] This prompt appears only on controllers equipped with output 3 hardware for a relay (98_ _-_ _ _ _-B_ _ _, 98_ _-_ _ _ _-J_ _ _ or 98_ _-_ _ _ _-K_ _ _) or switched dc (98_ _-_ _ _ _-C_ _ _), and with [‘Ot3] set to [‘AL3] or [AL3n]. Default fl [‘Pr1] [‘de1] [‘Pr2] [‘de2] [rAtE] [‘‘no] [‘AL3] [‘AL3] [‘AL3] [‘AL3] [‘AL3] [‘AL3] Setup Menus, Chapter 4 WATLOW Series 988 User’s Manual 4.25 Setup-Output Alarm 3 Side [A3Sd] Select what triggers alarm 3. • [both] triggers an alarm when the signal ≤ [A3LO] or ‡[A3HI]. � NOTE: • [HiGH] triggers an alarm when the signal ‡[A3HI]. See Chapter 7 for more information • [LOW] triggers an alarm when the signal ≤ [A3LO]. on alarms. [A3Sd] This prompt appears only on controllers equipped with output 3 hardware for a relay (98_ _-_ _ _ _-B_ _ _, 98_ _-_ _ _ _-J_ _ _ or 98_ _-_ _ _ _-K_ _ _) or switched dc (98_ _-_ _ _ _-C_ _ _) and with [‘Ot3] set to [‘AL3] or [AL3n]. Default fl [both] [HiGH] [LOW] [A3Sd] [A3Sd] [A3Sd] [HYS3] Hysteresis 3 Select the switching hysteresis for alarm 3. This determines the change in temperature or process units needed to turn the output from off to on. • If [‘AL3] is set to [rAtE] settings for [HYS3] will be in degrees per minute or units per minute. • If the input referenced by [‘AL3] is set to [‘r�d] the range is affected as listed below. [HYS3] This prompt appears only on controllers equipped with output 3 hardware for a relay (98_ _-_ _ _ _-B_ _ _, 98_ _-_ _ _ _-J_ _ _ or 98_ _-_ _ _ _-K_ _ _) or switched dc (98_ _-_ _ _ _-C_ _ _). If Default flfl [‘‘¡F] [‘‘‘1] … [‘‘‘3] …[‘999] [‘C_F] [HYS3] [HYS3] [HYS3] (Global Menu) [‘‘¡F] & [‘r�d] [‘‘)1] … [‘‘#0] …[‘9(9] [‘C_F] [HYS3] [HYS3] [HYS3] Input 1 or 2 (Global Menu) (see note above) [‘‘¡C] [‘‘‘1] … [‘‘‘2] …[‘555] [‘C_F] [HYS3] [HYS3] [HYS3] (Global Menu) [‘‘¡C] & [‘r�d] [‘‘)1] … [‘‘@0] …[‘5%5] [‘C_F] [HYS3] [HYS3] [HYS3] Input 1 or 2 (Global Menu) (see note above) [‘‘‘1] … [‘‘‘3] …[‘999] units [HYS3] [HYS3] [HYS3] a process input is selected Setup Menus, Chapter 4 4.26 WATLOW Series 988 User’s Manual Setup-Output Latching 3 [LAt3] Select whether alarm 3 will be latching or non-latching. A latching alarm [‘LAt] must be turned off manually. A non-latching alarm [‘nLA] turns off when an alarm condition no longer exists. � [LAt3] This prompt appears only on controllers equipped with output 3 NOTE: hardware for a relay (98_ _-_ _ _ _-B_ _ _, 98_ _-_ _ _ _-J_ _ _ or See Chapter 7 for 98_ _-_ _ _ _-K_ _ _) or switched dc (98_ _-_ _ _ _-C_ _ _) and with [‘Ot3] set more information to [‘AL3] or [AL3n]. on alarms. Default fl [‘nLA] [‘LAt] [LAt3] [LAt3] [SIL3] Silencing 3 Select silencing to inhibit alarm 3 on startup and to allow the opera- tor to reset the alarm output, not the visual display. • Silencing disables the alarm until the signal is between [A3LO] and [A3HI]. � NOTE: [SIL3] This prompt appears only on controllers equipped with output 3 See Chapter 7 for hardware for a relay (98_ _-_ _ _ _-B_ _ _, 98_ _-_ _ _ _-J_ _ _ or more information 98_ _-_ _ _ _-K_ _ _) or switched dc (98_ _-_ _ _ _-C_ _ _) and with [‘Ot3] set on alarms. to [‘AL3] or [AL3n]. Default fl [‘OFF] [‘‘On] [SIL3] [SIL3] Setup Menus, Chapter 4 WATLOW Series 988 User’s Manual 4.27 Setup-Output Output 4 [‘Ot4] Select the alarm condition for output 4. • [‘AL4] de-energizes output 4 in an alarm condition. � • [AL4n] energizes output 4 in an alarm condition. NOTE: See Chapter 7 for [‘Ot4] This prompt appears only on controllers equipped with output 4 more information hardware for a relay (98_ _-_ _ _ _-_B_ _, 98_ _-_ _ _ _-_D_ _ , on alarms. 98_ _-_ _ _ _-_E_ _ or 98_ _-_ _ _ _-_K_ _) or switched dc (98_ _-_ _ _ _-_C_ _). Default fl [‘AL4] [AL4n] [‘Ot4] [‘Ot4] Alarm 4 [‘AL4] Select the alarm type for alarm 4. • [‘Pr1] uses a process signal from input 1. • [‘dE1] uses a deviation from the input 1 signal. • [‘Pr2] uses the process signal from input 2. This prompt does not appear if the controller is not equipped with input 2 hardware or if [‘In2] is set to [‘‘no] or [‘Ei2]. • [‘dE2] uses a deviation from the input 2 signal. This prompt does not appear if the controller is not equipped with input 2 hardware or if [‘In2] is set to [‘‘no] or [‘Ei2]. • [rAtE] uses the rate of change at input 1 in degrees per minute. [‘AL4] This prompt appears only on controllers equipped with output 4 hardware for a relay (98_ _-_ _ _ _-_B_ _, 98_ _-_ _ _ _-_D_ _ , 98_ _-_ _ _ _-_E_ _ or 98_ _-_ _ _ _-_K_ _) or switched dc (98_ _-_ _ _ _-_C_ _). Default fl [‘Pr1] [‘dE1] [‘Pr2] [‘dE2] [rAtE] [‘‘no] [‘AL4] [‘AL4] [‘AL4] [‘AL4] [‘AL4] [‘AL4] Setup Menus, Chapter 4 4.28 WATLOW Series 988 User’s Manual Setup-Output Alarm 4 Side [A4Sd] Select what triggers alarm 4. • [both] triggers an alarm when the signal ≤ [A4LO] or ‡[A4HI]. • [HiGH] triggers an alarm when the signal ‡[A4HI]. � NOTE: • [LOW] triggers an alarm when the signal ≤ [A4LO]. See Chapter 7 for [A4Sd] This prompt appears only on controllers equipped with output 4 more information on alarms. hardware for a relay (98_ _-_ _ _ _-_B_ _, 98_ _-_ _ _ _-_D_ _ , 98_ _-_ _ _ _-_E_ _ or 98_ _-_ _ _ _-_K_ _) or switched dc (98_ _-_ _ _ _-_C_ _) and with [‘Ot4] set to [‘AL4] or [AL4n]. Default fl [BOTH] [HIGH] [LOW] [A4SD] [A4SD] [A4SD] Setup Menus, Chapter 4 WATLOW Series 988 User’s Manual 4.29 Setup-Output Hysteresis 4 [HYS4] Select the switching hysteresis for alarm 4. This determines the change in temperature or process units needed to turn the output from off to on. • If [‘AL4] is set to [rAtE] settings for [HYS4] will be in degrees per minute or units per minute. • If the input referenced by [‘AL4] is set to [‘r�d] the range is affected as listed below. [HYS4] This prompt appears only on controllers equipped with output 4 hardware for a relay (98_ _-_ _ _ _-_B_ _, 98_ _-_ _ _ _-_D_ _ , 98_ _-_ _ _ _-_E_ _ or 98_ _-_ _ _ _-_K_ _) or switched dc (98_ _-_ _ _ _-_C_ _). If Default flfl [‘‘¡F] [‘‘‘1] … [‘‘‘3] … [‘999] [‘C_F] [HYS4] [HYS4] [HYS4] (Global Menu) [‘‘¡F] & [‘r�d] [‘‘)1] … [‘‘#0] … [‘9(9] [‘C_F] [HYS4] [HYS4] [HYS4] Input 1 or 2 (Global Menu) (see note above) [‘‘¡C] [‘‘‘1] … [‘‘‘2] … [‘555] [‘C_F] [HYS4] [HYS4] [HYS4] (Global Menu) [‘‘¡C] & [‘r�d] [‘‘)1] … [‘‘@0] … [‘5%5] [‘C_F] [HYS4] [HYS4] [HYS4] Input 1 or 2 (Global Menu) (see note above) [‘‘‘1] … [‘‘‘3] … [‘999] units [HYS4] [HYS4] [HYS4] a process input is selected [LAt4] Latching 4 Select whether alarm 4 will be latching or non-latching. A latching alarm [‘LAT] must be turned off manually. A non-latching alarm [‘nLA] turns off when an alarm condition no longer exists. � [LAt4] This prompt appears only on controllers equipped with output 4 hardware for a relay (98_ _-_ _ _ _-_B_ _, 98_ _-_ _ _ _-_J_ _ or NOTE: See Chapter 7 for 98_ _-_ _ _ _-_K_ _) or switched dc (98_ _-_ _ _ _-_C_ _). and with [‘Ot4] set more information to [‘AL4] or [AL4n]. on alarms. Default fl [‘nLA] [‘LAt] [LAt4] [LAt4] Setup Menus, Chapter 4 4.30 WATLOW Series 988 User’s Manual Setup-Output Silencing 4 [SIL4] Select silencing to inhibit alarm 4 on startup and to allow the opera- tor to reset the alarm output, not the visual display. • Silencing disables the alarm until the signal is between [A4LO] and � [A4HI]. NOTE: See Chapter 7 for [SIL4] This prompt appears only on controllers equipped with output 4 more information hardware for a relay (98_ _-_ _ _ _-_B_ _, 98_ _-_ _ _ _-_D_ _ , on alarms. 98_ _-_ _ _ _-_E_ _ or 98_ _-_ _ _ _-_K_ _) or switched dc (98_ _-_ _ _ _-_C_ _) and with [‘Ot4] set to [‘AL4] or [AL4n]. Default fl [‘OFF] [‘‘On] [SIL4] [SIL4] Analog Output [Aout] Select which value to retransmit as the output 3 signal. • [Prc1] retransmits the process 1 value. � • [StPt] retransmits the set point. NOTE: • [Prc2] retransmits the process 2 value. This prompt appears only if the See Chapter 8 for controller is equipped with input 2 hardware and if [‘In2] is not set to more information [‘‘no] or [‘Ei2]. on retransmit. • [‘‘no] turns off retransmit function. [Aout] This prompt appears only on controllers equipped with retransmit hardware (98_ _-_ _ _ _-M_ _ _ or 98_ _-_ _ _ _-N_ _ _). Default fl [Prc1] [StPt] [Prc2] [‘‘no] [Aout] [Aout] [Aout] [Aout] Setup Menus, Chapter 4 WATLOW Series 988 User’s Manual 4.31 Setup-Output Process 3 [Prc3] Select the range for the retransmit signal at output 3. [Prc3] This prompt appears only on controllers equipped with retransmit hardware (98_ _-_ _ _ _-M_ _ _ or 98_ _-_ _ _ _-N_ _ _) and with [Aout] not set to [‘‘no]. Default fl 4-20mA 0-20mA 0-5Vº 1-5Vº 0-10Vº (dc) [4-20] [0-20] [‘0-5] [‘1-5] [0-10] [Prc3] [Prc3] [Prc3] [Prc3] [Prc3] Retransmit Low Limit [A‘rL] Select the low limit for the retransmit signal at output 3. • The default value is equal to [‘rL1] or [‘rL2] (in the Input Menu) � depending on whether [Aout] is set to [Prc1] or [Prc2]. NOTE: • The decimal precision of [A‘rL] is determined by [dEC1] (Input Menu) if See Chapter 8 for [Aout] is set to [Prc1] or [StPt]; it is determined by [dEC2] if [Aout] is more information on retransmit. set to [Prc2]. [A‘rL] This prompt appears only on controllers equipped with retransmit hardware (98_ _-_ _ _ _-M_ _ _ or 98_ _-_ _ _ _-N_ _ _) and with [Aout] not set to [‘‘no]. [-999] … [A‘rH] [A‘rL] [A‘rL] Setup Menus, Chapter 4 4.32 WATLOW Series 988 User’s Manual Setup-Output Retransmit High Limit [A‘rH] Select the high limit for the retransmit signal at output 3. • The default value is equal to [‘rH1] or [‘rH2] (in the Input Menu) depending on whether [Aout] is set to [Prc1] or [Prc2]. • The decimal precision of [ACAL] is determined by [dEC1] (Input Menu) if [Aout] is set to [Prc1] or [StPt]; it is determined by [dEC2] if [Aout] is set to [Prc2]. [A‘rH] This prompt appears only on controllers equipped with retransmit hardware (98_ _-_ _ _ _-M_ _ _ or 98_ _-_ _ _ _-N_ _ _) and with [Aout] not set to [‘‘no]. [A‘rL] … [9999] [A‘rH] [A‘rH] Retransmit Calibration Offset [ACAL] Select an offset value for the retransmit signal at output 3. • The decimal precision of [ACAL] is determined by [dEC1] (Input Menu) if � [Aout] is set to [Prc1] or [StPt]; it is determined by [dEC2] if [Aout] is set to [Prc2]. NOTE: See Chapter 8 for [ACAL] This prompt appears only on controllers equipped with retransmit more information hardware (98_ _-_ _ _ _-M_ _ _ or 98_ _-_ _ _ _-N_ _ _) and with [Aout] not on retransmit. set to [‘‘no]. If Default flfl [‘‘¡F] [-999] … [‘‘‘0] … [‘999] [‘C_F] [ACAL] [ACAL] [ACAL] (Global Menu) [‘‘¡C] [-555] … [‘‘‘0] … [‘555] [‘C_F] [ACAL] [ACAL] [ACAL] (Global Menu) [-999] … [‘‘‘0] … [‘999] units a process input [ACAL] [ACAL] [ACAL] is selected Setup Menus, Chapter 4 WATLOW Series 988 User’s Manual 4.33 Setup-Global Reaching the Global Menu [GlbL] [‘Set] Setup prompt Enter your settings, MODE from the controller's upper display. [‘C_F] *Celsius-Fahrenheit ¶Begin in the Display Loop, and MODE press the Up-arrow > and Down- [FaIL] Failure Mode arrow < keys simultaneously for MODE three seconds to reach the Setup [‘Err] Menus. Error Latching MODE [CntL] *Control Type MODE [CSAC] *Cascade Action [OtPt] [gLbL] [COm] [Inpt] MODE [‘Set] [‘Set] [‘Set] [‘Set] [ALGO] *Algorithm Input Output Global Communications MODE Menu Menu Menu Menu [Pid2] *PID 2 Crossover Selection p. 4.2 p. 4.18 p. 4.34 p. 4.44 p. 4.2 p. 4.18 p. 4.34 p. 4.44� MODE (p. 4.38) PID (p. 4.38) [Proc] *Crossover Process Value •Press the Up-arrow key > to select MODE one of the Setup Menus. [StPt] *Crossover Set Point Value MODE [‘EiI] MODE Event Input 1 (p. 4.40) Event Input (p. 4.40) MODE [‘Ei2] *Event Input 2‚Press the Mode key � to step MODE through the prompts. [Anun] Annunciator MODE [‘LoP] Low Power Limit MODE [‘‘¡F] [‘‘¡C] [‘HiP] High Power Limit [‘C_F] [‘C_F] MODE [AtSp] Auto-tune Set Point … MODE … [‘‘rP] *Ramping Function (p. 4.43) Ramping (p. 4.43) MODE … [‘‘‘0] [‘‘‘1] [‘‘‘2] [9999] [Rate] [rate] [rate] [rate] [rate] *Ramp Rate „Press the Up-arrow key > or the *Prompts may not appear, depending on controller configuration. Down-arrow key < to select one of the prompt values. Figure 4.34 - Navigating the Global Menu. Setup Menus, Chapter 4 4.34 WATLOW Series 988 User’s Manual Setup-Global Global Prompts � NOTE: When you are in the Setup menus, the Series 988 displays the menu Decimal points may selection ([InPt], [OtPt], [GLbL] or [COM]) in the upper display, and not always be in the [‘SEt] in the lower display. position specified below depending on The Up-arrow > or Down-arrow key < selects another menu. Press the the settings in the Decimal 1 the Mode key � to display the first prompt in the lower display and its [dEC1] and Decimal value in the upper display. Use the Up-arrow > and Down-arrow < 2 [dEC2] parame- keys to change the value in the upper display. The new value will not take ters in the Input effect until after a five-second delay or until you press the Mode key �. Menu. Celsius-Fahrenheit [‘C_F] Select which temperature scale the controller will use. [‘C_F] This prompt appears only on controllers with either Input 1 or Input 2 set to something other than a process input. Default fl [‘‘¡F] [‘‘¡C] [‘C_F] [‘C_F] Failure Mode [FAIL] Select the output level that the controller will maintain if an input fails. • Bumpless transfer [bPLS] maintains the same output settings after an input failure. [FAIL] This prompt always appears. If Default flfl % [bPLS] [-100] … [‘100] a heat/cool [FAIL] [FAIL] [FAIL] application [bPLS] [‘‘‘0] … [‘100] % a heat-only [FAIL] [FAIL] [FAIL] application [bPLS] [-100] … [‘‘‘0] % a cool-only [FAIL] [FAIL] [FAIL] application Setup Menus, Chapter 4 WATLOW Series 988 User’s Manual 4.35 Setup-Global Error Latching [‘Err] Select whether errors will be latching or non-latching. • Non-latching alarms [‘nLA] turn off when there is no alarm condition. • Latching alarms [‘LAt] must be turned off manually. [‘Err] This prompt always appears. Default fl [‘nLA] [‘LAt] [‘Err] [‘Err] Control Type [CntL] Select a control method: normal [‘nor]; cascade [CSCd]; ratio [rAti]; or differential [diFF]. [CntL] This prompt appears only on controllers equipped with enhanced software (98_B-_ _ _ _-_ _ _ _) and input 2 hardware for a basic thermocou- ple signal conditioner (98_ _-_1_ _-_ _ _ _) or a universal signal conditioner (98_ _-_2_ _-_ _ _ _) and with [‘rSP] set to [‘OFF]. Default fl [‘nor] [CSCd] [rAti] [diFF] [CntL] [CntL] [CntL] [CntL] Setup Menus, Chapter 4 4.36 WATLOW Series 988 User’s Manual Setup-Global Cascade Action [CSAC] Select the control action between the inner and outer loop of a cas- cade system. • Direct action [‘dir] makes the percent output from the outer loop directly proportional to the set point of the inner loop (input 2). A 100% signal in the outer loop will set the inner loop to range high 2 [‘rH2] (Input Menu). A 0% signal in the outer loop will set the inner loop to range low 2 [‘rL2] (Input Menu). • Reverse action [‘rEU] makes the percent output from the outer loop inversely proportional to the set point of the inner loop (input 2). A 100% signal in the outer loop will set the inner loop to range low 2 [‘rL2] (Input Menu). A 0% signal in the outer loop will set the inner loop to range high 2 [‘rH2] (Input Menu). [CSAC] This prompt appears only on controllers equipped with enhanced software (98_B-_ _ _ _-_ _ _ _) and with [CntL] set to [CSCd]. Default fl [‘dir] [‘rEU] [CASC] [CASC] Setup Menus, Chapter 4 WATLOW Series 988 User’s Manual 4.37 Setup-Global Algorithm [ALGO] Select the control algorithm. • [‘Pid] selects one set of PID prompts. • [‘Pdr] selects proportional/derivative control with manual reset in per- cent power. • [Pid2] selects two complete sets of PID prompts. This selection does not appear if [CntL] is set to [CSCd]. • [dUPL] selects duplex (heating and cooling) control. This prompt does not appear unless output 1 is a process output. [ALGO] This prompt appears only on controllers equipped with enhanced software (98_B-_ _ _ _-_ _ _ _). Default fl [‘Pid] [‘Pdr] [Pid2] [dUPL] [ALGO] [ALGO] [ALGO] [ALGO] PID 2 Crossover Selection Select which parameter determines the crossover from PID A to PID [Pid2] B: process [Proc]; set point [StPt]; or none [‘‘no]. [Pid2] This prompt appears only on controllers with [ALGO] set to [Pid2]. Default fl [Proc] [StPt] [‘‘no] [Pid2] [Pid2] [Pid2] Setup Menus, Chapter 4 4.38 WATLOW Series 988 User’s Manual Setup-Global Crossover Process Value [Proc] Select the process value at which the control algorithm will crossover between PID A and PID B. PID A is active below this value and PID B is active above this value. • This value cannot be set lower than range low 1 [‘rL1] or higher than range high 1 [‘rH1]. [Proc] This prompt appears only on controllers with [Pid2] set to [Proc]. Default fl [‘rL1] [‘rH1] [Proc] [Proc] Crossover Set Point Value [StPt] Select the set point value at which the control algorithm will crossover between PID A and PID B. PID A is active below this value and PID B is active above this value. • This value cannot be set lower than range low 1 [‘rL1] or higher than range high 1 [‘rH1]. [StPt] This prompt appears only on controllers with [Pid2] set to [StPt]. Default fl [‘rL1] [‘rH1] [StPt] [StPt] Setup Menus, Chapter 4 WATLOW Series 988 User’s Manual 4.39 Setup-Global Event Input 1 [‘Ei1] Select the effect of closing the event input 1 switch. • [‘‘no] disables event input 1. • [‘LOC] locks out the front panel keys. • [‘ALr] resets an alarm. • [A-M] switches the controller to manual mode at the power level set at [FAIL] (Global Menu) and disables the Auto/Man �key. • [‘OFF] turns all control outputs off (de-energize relays). • [‘Pid] switches from PID A to PID B. • [Actn] selects the opposite control action for output 1 and 2. • [‘rSP] switches to a remote set point. • [IdSP] switches to an idle or second set point. [‘Ei1] This prompt always appears. Default fl [‘‘no] [‘LOC] [‘ALr] [A-M] [‘OFF] [‘Pid] [Actn] [‘rsp] [IdSP] [‘Ei1] [‘Ei1] [‘Ei1] [‘Ei1] [‘Ei1] [‘Ei1] [‘Ei1] [‘Ei1] [‘Ei1] [‘Ei2] Event Input 2 Select the effect of closing the event input 2 switch. The selections are the same as for event input 1. [‘Ei2] This prompt appears only on controllers equipped with hardware for a second event input (98_ _-_5_ _-_ _ _ _) and with [‘In2] set to [‘Ei2]. Default fl [‘‘no] [‘LOC] [‘ALr] [A-M] [‘OFF] [‘Pid] [Actn] [IdSP] [‘Ei2] [‘Ei2] [‘Ei2] [‘Ei2] [‘Ei2] [‘Ei2] [‘Ei2] [‘Ei2] Setup Menus, Chapter 4 4.40 WATLOW Series 988 User’s Manual Setup-Global Annunciator [Anun] Select whether alarm messages will flash in the lower display. [Anun] This prompt always appears. Default fl [‘‘on] [‘OFF] [Anun] [Anun] Low Power Limit [‘LoP] Select the low limit for the percent output. For cooling (direct acting) enter a negative number. [‘LoP] This prompt always appears. If Default flfl [-100]%… [‘Hip] a heat/cool [‘LoP] [‘LoP] application [‘‘‘0]%… [‘Hip] a heat only [‘LoP] [‘LoP] application [-100]%… [‘Hip] a cool only [‘LoP] [‘LoP] application Setup Menus, Chapter 4 WATLOW Series 988 User’s Manual 4.41 Setup-Global High Power Limit [‘HiP] Select the high limit for the percent output. For cooling (direct acting) enter a negative number. [‘HiP] This prompt always appears. If Default flfl [‘LoP] … [‘100]% a heat/cool [‘HiP] [‘HiP] application [‘LoP] … [‘100]% a heat only [‘HiP] [‘HiP] application [‘LoP] … [‘‘‘0]% a cool only [‘HiP] [‘HiP] application Auto-tune Set Point [AtSP] Select the percentage at which the controller will auto tune the cur- rent control set point. [AtSP] This prompt always appears. Default fl [‘‘50] … [‘‘90] … [‘150] % [AtSP] [AtSP] [AtSP] Setup Menus, Chapter 4 4.42 WATLOW Series 988 User’s Manual Setup-Global Ramping Function [‘‘rP] Select when the controller will ramp. Ramping limits the speed at which an element can heat up. Ramping is often used to protect parts that would crack or warp if they heat up too quickly. • [‘OFF] sets the system to heat as quickly as possible. • [Strt] sets the system to ramp only at startup. • [StPt] sets the system to ramp at startup and whenever the set point changes. [‘‘rP] This prompt appears only on controllers with [‘rSP] (Input Menu) set to [‘OFF] and with [‘Ei1] not set to [‘rSP] and with [CntL] (Global Menu) not set to [diff] or [rati]. Default fl [‘OFF] [Strt] [StPt] [‘‘rP] [‘‘rP] [‘‘rP] Ramp Rate [rAtE] Select the ramping rate in degrees per minute. [rAtE] This prompt appears only on controllers with [‘‘rP] set to [Strt] or [StPt]. Default fl [‘‘90] … [‘100] … [9999] °/min. [rAtE] ][rAtE] [rAtE] Setup Menus, Chapter 4 WATLOW Series 988 User’s Manual 4.43 Setup-Comm Reaching the Communications Menu ¶Begin in the Display Loop, and [COm] [‘Set] Setup Prompt press the Up-arrow > and Down- Enter your settings, MODE arrow < keys simultaneously for from the controller's three seconds to reach the Setup [BaUd] Baud Rate upper display. �Menus. MODE � MODE [Data] Data Bits and Parity MODE [Prot] Protocol Type [Inpt] [OtPt] [gLbL] [COm] MODE [‘Set] [‘Set] [‘Set] [‘Set] [addr] *Address Input Output Global Communications MODE Menu Menu Menu Menu [IntF] *Interface Type p. 4.2 p. 4.18 p. 4.34 p. 4.44�p. 4.2 p. 4.18 p. 4.34 p. 4.44 •Press the Up-arrow key > to select one of the Setup Menus. *Prompts may not appear, depending on controller config- uration. ‚Press the Mode key � to step through the prompts. � … NOTE: … The Communications Menu appears only on controllers … [9600] [1200] [4800] [‘300] equipped with communications [baUD] [baUD] [baUD] [baUD] hardware (98_ _-_ _ _ _-_R_ _, 98 _ _-_ _ _ _-_U_ _ or 98_ _-_ _ _ _-_S_ _). See Data Communications with [‘485] [‘422] the Series 988 Family of [Intf] [Intf] Controllers for detailed informa-� tion on communications. „Press the Up-arrow key > or the Down-arrow key < to select one of the prompt values. Figure 4.44 - Navigating the Communications Menu. Setup Menus, Chapter 4 4.44 WATLOW Series 988 User’s Manual Setup-Comm Communications Prompts When you are in the Setup menus, the Series 988 displays the menu selection ( [InPt], [OtPt], [GLbL] or [COM] ) in the upper display, and [‘SEt] in the lower display. The Up-arrow > or Down-arrow key < selects another menu. Press the Mode key � to display the first prompt in the lower display and its value in the upper display. Use the Up-arrow > and Down-arrow < keys to change the value in the upper display. The new value will not take effect until after a five-second delay or until you press the Mode key �. Baud Rate [bAUd] Select the communications speed. [bAUd] This prompt appears only on controllers equipped with communi- cations hardware (98_ _-_ _ _ _-_R_ _, 98_ _-_ _ _ _-_U_ _ or 98_ _-_ _ _ _- _S_ _). Default fl [9600] [‘300] [‘600] [1200] [2400] [4800] [bAUd] [bAUd] [bAUd] [bAUd] [bAUd] [bAUd] [dAtA] Data Bits and Parity Select the communications format (start bit = 1, stop bit = 1). • Setting [Prot] to [Mod] automatically sets [dAtA] to [‘‘8n]. [dAtA] This prompt appears only on controllers equipped with communi- cations hardware (98_ _-_ _ _ _-_R_ _, 98_ _-_ _ _ _-_U_ _ or 98_ _-_ _ _ _- _S_ _). Default fl [‘‘7o] [‘‘7E] [‘‘8n] [dAtA] [dAtA] [dAtA] Setup Menus, Chapter 4 WATLOW Series 988 User’s Manual 4.45 Setup-Comm Protocol Type [Prot] Select the communications protocol. • [FULL] selects ANSI X3.28 2.2 - A.3. • [‘‘on] selects Xon/Xoff. • [Mod] selects Modbus [Prot] This prompt appears only on controllers equipped with communi- cations hardware (98_ _-_ _ _ _-_R_ _, 98_ _-_ _ _ _-_U_ _ or 98_ _-_ _ _ _- _S_ _). Default fl [FULL] [‘‘On] [mod] [Prot] [Prot] [Prot] Address [Addr] Select an address for the controller. The computer will use this address when communicating with this controller. [Addr] This prompt appears only on controllers equipped with communica- tions hardware for EIA/TIA-485 and EIA/TIA-422. If Default flfl [‘485] [‘‘‘0]…[‘‘31] [IntF] [Addr] [Addr] [‘422] [‘‘‘0]…[‘‘‘9] [Intf] [Addr] [Addr] [Mod] [‘‘‘0]…[‘‘‘1]…[‘247] [Intf] [Addr] [Addr] [Addr] Setup Menus, Chapter 4 4.46 WATLOW Series 988 User’s Manual Setup-Comm Interface Type [IntF] Select the interface type for Output 4, Option S. • [‘485] selects EIA/TIA-485. • [‘422] selects EIA/TIA-422. [IntF] This prompt appears only on controllers equipped with communications hardware for EIA/TIA-485 and EIA/TIA-422 (98_ _-_ _ _ _-_S_ _). Default fl [‘485] [‘422] [IntF] [IntF] Interface Type [IntF] Select the interface type for Output 4, Option U. • [‘485] selects EIA/TIA-485. • [‘232] selects EIA/TIA-232. [IntF] This prompt appears only on controllers equipped with communications hardware for EIA/TIA-485 and EIA/TIA-232 (98_ _-_ _ _ _-_U_ _). Default fl [‘232] [‘485] [IntF] [IntF] Setup Menus, Chapter 4 WATLOW Series 988 User’s Manual 4.47 Chapter 5 The Operation Menus Navigating the Operation Menus To reach the Operation Menus, begin in the Display Loop and press the Mode key �. Depending on the controller configuration, either the Set Point 2 prompt [‘SP2], the Idle Set Point prompt [IdSP] or the Operation Menu prompt [OPEr] will appear in the lower display. The three Operation Menus are: System [‘SYS]; PID A [PidA]; and PID B [Pidb]. Use the Mode key � to step past the Set Point 2 prompt [‘SP2] or the Idle Set Point prompt [IdSP], if they appear (see prompt information). Upon reach- ing the Operation Menu prompt [OPEr] use the Up-arrow > or Down- � arrow < key to select a menu and the Mode key � to step through a NOTE: menu. Press the Display key ¶ to return to You will not see every prompt in any of these menus. The unit’s configura- the Display Loop tion and model number determine which prompts appear. After stepping from any point in through each menu, the Series 988 returns to the Operation Menu prompt any menu. [OPEr]. Use the Up-arrow > and Down-arrow < keys to select the next menu, or use the Mode key � to advance through the same menu again. To move backwards through the menu hold the Mode key � down and press the Up-arrow key >. Use the Up-arrow > or Down-arrow < key to change the prompt setting. WATL W¶Begin in the Display Loop, and press the Mode key � to reach the Set Point 2 prompt [‘SP2], the Idle PROCESS Set Point prompt [IdSP] or the Operation Menu L1 L2 L3 L4 [OPEr]. DEV DISPLAY % OUT AUTO MAN MODE SERIES 988 [‘988] [‘SP2] Set Point 2 MODE [‘988] [IdSP] Idle Set Point MODE [‘SyS] [PIDA] [PIdb] [OPEr] [OPEr] [OPEr] System PID A PID B Menu Menu Menu p. 5.2 p. 5.9 p. 5.9 p. 5.2 p. 5.9 p. 5.9 WATL W•Use the Mode key � to step past the Set Point 2 prompt [‘SP2] or the Idle Set Point prompt [IdSP], if PROCESS they appear (see prompt information). Upon reaching L1 L2 L3 L4 DEV the Operation Menu prompt [OPEr] use the Up-arrow DISPLAY % OUT AUTO > key to select a menu. MAN Figure 5.1 - MODE Navigating the SERIES 988 Operation Menus. Operation Menus, Chapter 5 WATLOW Series 988 User’s Manual 5.1 Operation-System Reaching the System Menu Enter your settings, from the controller's upper display. [‘SP2] *Set Point 2 Set Points (p. 5.3) (p. 5.3) MODE [IdSP] *Idle Set Point MODE [‘SyS] [‘SP2] Operation Prompt W WA ATL TL W W MODE PROCESS [Ei1S] *Event Input 1 Status (p. 5.4) Event Input (p. 5.4) L1 L2 L3 L4 MODE DEV DISPLAY % OUT AUTO [Ei2S] *Event Input 2 Status MAN MODE MODE SERIES 988 [A2LO] *Alarm 2 Low MODE [A2HI] *Alarm 2 High‚Select the System Menu, then MODE press the Mode key � to step [A3LO] MODE *Alarm 3 Low through the prompts. (p. 5.4) Alarms (p. 5.4) MODE [A3HI] *Alarm 3 High MODE [A4LO] *Alarm 4 Low MODE [A4HI] *Alarm 4 High … … MODE [‘AUT] *Auto-tune [-999]�[-998]�[-997]�… [‘‘‘0]� MODE [A2LO] [A2LO] [A2LO] [A2LO] [‘L-r] *Local-remote *Prompts may not appear, depending„Press the Up-arrow key > to step on controller configuration. through the prompt values. The Down-arrow key < backs through the values. Figure 5.2 - The System Menu. Operation Menus, Chapter 5 5.2 WATLOW Series 988 User’s Manual Operation-System System Prompts � NOTE: After you step past the Set Point 2 prompt [‘SP2] and the Idle Set Point Decimal points may prompt [IdSP] to the Operation menus, the Series 988 displays the menu not always be in the selection ( [‘SYS], [PidA] or [PidB] ) in the upper display and [OPEr] in position specified below depending the lower display. on the the settings in the Decimal 1 The Up-arrow > or Down-arrow key < selects another menu. Press the [dEC1] and Decimal Mode key � to display the first prompt in the lower display and its value 2 [dEC2] parame- in the upper display. Use the Up-arrow > and Down-arrow < keys to ters in the Input change the value in the upper display. The new value will not take effect Menu. until after a five-second delay or until you press the Mode key �. Set Point 2 [‘SP2] Select a second set point that will activate output 2. This allows you to boost the heating or cooling action of the output 1 device. • The range and default settings depend on the [‘In1], [‘rL1] and [‘rH1] settings (Input Menu). [‘SP2] This prompt appears only if [‘Ot1] and [‘Ot2] (Output Menu) are both set to [‘‘Ht] or [‘‘CL]. [‘rL1] … [‘rH1] [‘SP2] [‘SP2] Idle Set Point [IdSP] Select the set point to be activated by an event input. This allows you to select a temperature that will be maintained when the application is idle. • The range and default settings depend on the [‘In1], [‘rL1] and [‘rHI] settings (Input Menu). [IdSP] This prompt appears only if [‘Ei1] or [‘Ei2] (Global Menu) is set to [IdSP]. [‘rL1] … [‘rH1] [IdSP] [IdSP] Operation Menus, Chapter 5 WATLOW Series 988 User’s Manual 5.3 Operation-System Event Input 1 Status [Ei1S] Indicates whether the event input 1 circuit is open or closed (read only). [Ei1S] This prompt appears only if [‘Ei1] (Global Menu) is set to some- thing other than [‘‘no]. Default fl [OpEn] [CLOS] [Ei1S] [Ei1S] Event Input 2 Status [Ei2S] Indicates whether the event input 2 circuit is open or closed (read only). [Ei2S] This prompt appears only on controllers equipped with a second digital event input (98_ _-_5_ _-_ _ _ _) and with [‘Ei2] (Global Menu) set to something other than [‘‘no]. Default fl [OpEn] [CLOS] [Ei2S] [Ei2S] Alarm 2 Low [A2LO] Select the low trigger value for the output 2 alarm. [A2LO] This prompt appears only if [‘AL2] (Output Menu) is set to some- thing other than [‘‘no]. If Default flfl lowest [‘Pr1] or [‘pr2] value of … value of … [A2HI] [‘AL2] [‘AL2] sensor [‘rL1] (or [‘rL2] ) [A2LO] (Output Menu) range (Input Menu) [‘dE1] or [‘dE2] or [rAtE] [-999] … [‘‘‘0] [‘AL2] [‘AL2] [‘AL2] [A2LO] [A2LO] (Output Menu) Operation Menus, Chapter 5 5.4 WATLOW Series 988 User’s Manual Operation-System Alarm 2 High [A2HI] Select the high trigger value for the output 2 alarm. [A2HI] This prompt appears only if [‘AL2] (Output Menu) is set to some- thing other than [‘‘no]. If Default flfl highest [‘Pr1] or [‘pr2] [A2LO] … value of … value of [‘AL2] [‘AL2] [A2HI] [‘rH1] (or [‘rH2] ) sensor (Output Menu) (Input Menu) range [‘dE1] or [‘dE2] or [rAtE] [‘‘‘0] … [‘999] … [9999] [‘AL2] [‘AL2] [‘AL2] [A2HI] [A2HI] [A2HI] (Output Menu) Alarm 3 Low [A3LO] Select the low trigger value for the output 3 alarm. [A3LO] This prompt appears only if [‘AL3] (Output Menu) is set to some- thing other than [‘‘no]. If Default flfl lowest [‘Pr1] or [‘pr2] value of … value of … [A3HI] [‘AL3] [‘AL3] sensor [‘rL1] (or [‘rL2] ) [A3LO] (Output Menu) range (Input Menu) [‘dE1] or [‘dE2] or [rAtE] [-999] … [‘‘‘0] [‘AL3] [‘AL3] [‘AL3] [A3LO] [A3LO] (Output Menu) Operation Menus, Chapter 5 WATLOW Series 988 User’s Manual 5.5 Operation-System Alarm 3 High [A3HI] Select the high trigger value for the output 3 alarm. [A3HI] This prompt appears only if [‘AL3] (Output Menu) is set to some- thing other than [‘‘no]. If Default flfl highest [‘Pr1] or [‘pr2] [A3LO] … value of … value of [‘AL3] [‘AL3] [A3HI] [‘rH1] (or [‘rH2] ) sensor (Output Menu) (Input Menu) range [‘dE1] or [‘dE2] or [rAtE] [‘‘‘0] … [‘999] … [9999] [‘AL3] [‘AL3] [‘AL3] [A3HI] [A3HI] [A3HI] (Output Menu) Alarm 4 Low Select the low trigger value for the output 4 alarm. [A4LO] [A4LO] This prompt appears only if [‘AL4] (Output Menu) is set to some- thing other than [‘‘no]. If Default flfl lowest [‘Pr1] or [‘pr2] value of … value of …[A4HI] [‘AL4 [‘AL4] sensor [‘rL1] (or [‘rL2] ) [A4LO] (Output Menu) range (Input Menu) [‘dE1] or [‘dE2] or [rAtE] [-999] … [‘‘‘0] [‘AL4] [‘AL4] [‘AL4] [A4LO] [A4LO] (Output Menu) Operation Menus, Chapter 5 5.6 WATLOW Series 988 User’s Manual Operation-System Alarm 4 High [A4HI] Select the high trigger value for the output 4 alarm. [A4HI] This prompt appears only if [‘AL4] (Output Menu) is set to some- thing other than [‘‘no]. If Default flfl highest [‘Pr1] or [‘pr2] [A4LO] … value of … value of [‘AL4] [‘AL4] [A4HI] [‘rH1] (or [‘rH2]) sensor (Output Menu) (Input Menu) range [‘dE1] or [‘dE2] or [rAtE] [‘‘‘0] … [‘999] … [9999] [‘AL4] [‘AL4] [‘AL4] [A4HI] [A4HI] [A4HI] (Output Menu) Auto-tune [‘AUt] Initiate an auto-tune. [Pidb] appears only on controllers with enhanced software (98_B-_ _ _ _-_ _ _) and with [ALgO] (Global Menu) set to [Pid2] or [cscd]. [‘AUt] This prompt always appears. Default NOTE: fl For more informa- [‘OFF] [PidA] [Pidb] tion on auto-tune [‘AUt] [‘AUt] [‘AUt] see Chapter 7. Operation Menus, Chapter 5 WATLOW Series 988 User’s Manual 5.7 Operation-System Local-remote [‘L-r] Select a local or remote set point. With [‘‘‘r] selected the controller displays the remote set point rather than the internal (local) set point, and the set point cannot be changed with the Up-arrow or Down-arrow key. [‘L-r] This prompt appears only if [‘rSP] (Input Menu) is set to [‘‘On]. Default fl [‘‘‘L] [‘‘‘r] [‘L-r] [‘L-r] Operation Menus, Chapter 5 5.8 WATLOW Series 988 User’s Manual Operation-PID A or B [PIDA]� Reaching the PID Menus Operation Prompt [Oper] Enter your settings, MODE from the controller's [‘‘‘‘]� upper display. [Pb1A] Proportional Band, Output 1A¶Begin in the Display Loop, and MODE press the Mode key � to reach the [‘‘‘‘]� [RE1A] *Reset, Output 1A Set Point 2 prompt [‘SP2], the Idle MODE [‘‘‘‘]� Set Point prompt [IdSP] or the [It1A] *Integral, Output 1A System Menu [‘SYS]. (p. 5.10) Output 1 (p. 5.10) MODE [‘‘‘‘]� [rA1A] *Rate, Output 1A MODE [‘‘‘‘]� [dE1A] *Derivative, Output 1A MODE [‘‘‘‘]� [‘988] MODE [Ct1A] *Cycle Time, Output 1A [‘SP2] Set Point 2 MODE MODE [‘‘‘‘]� [‘988] [Pb2A] *Proportional Band, Output 2A [IdSP] Idle Set Point MODE [‘‘‘‘]� [Re2A] MODE *Reset, Output 2A MODE [‘‘‘‘]� [It2A] *Integral, Output 2A [‘SyS] [PIDA] [PIdb] Output 2 (p. 5.13) (p. 5.13) MODE [OPEr] [OPEr] [‘‘‘‘]� [OPEr] [rA2A] *Rate, Output 2A System PID A PID B MODE [‘‘‘‘]� Menu Menu Menu [dE2A] *Derivative, Output 2A p. 5.2 p. 5.9 p. 5.9 p. 5.2 p. 5.9 p. 5.9 MODE [‘‘‘‘]� [Ct2A] *Cycle Time, Output 2A MODE [‘‘‘‘]� [db‘A] *Dead Band A•Use Mode key � to step past � the Set Point 2 prompt [‘SP2] and [PIdb]� the Idle Set Point prompt [IdSP], if [OPer]� *Operation Prompt Enter your settings, they appear (see prompt informa-� from the controller's MODE� tion). Upon reaching the Operation {Pb1b]�upper display. *Proportional Band, Output 1B �Menu prompt [OPEr] use the Up- MODE� arrow > key to select a menu. [RE1b]� *Reset, Output 1B � MODE� [It1b]� *Integral, Output 1B �(p. 5.10) Output 1 (p. 5.10) MODE‚Press the Mode key � to step� [rA1b]� *Rate, Output 1B through the prompts.� MODE� [de1b]� *Derivative, Output 1B � MODE�… *Prompts may not {CT1b}� MODE *Cycle Time, Output 1B … appear, depending on � MODE�controller configuration. [Pb2b]� *Proportional Band, Output 2B [‘)00]�[‘)01]�[‘)02]�…[‘(99]� � MODE [dE1A] [dE1A] [dE1A] [dE1A]� [re2b]� *Reset, Output 2B � MODE „Press the Up-arrow key > to� [It2b} � *Integral, Output 2B step through the prompt values. Output 2 (p. 5.13)�(p. 5.13) MODE � The Down-arrow key < backs [rA2b]� *Rate, Output 2B through the values.� MODE � [dE2b]� *Derivative, Output 2B � MODE Figure 5.9 - � [Ct2b]� The PID Menus. *Cycle Time, Output 2B � MODE � [db‘b] *Dead Band B Operation Menus, Chapter 5 WATLOW Series 988 User’s Manual 5.9 Operation-PID A or B PID A or PID B Prompts � NOTE: After you step past the Set Point 2 prompt [‘SP2] and the Idle Set Point Decimal points may prompt [IdSP] to the Operation menus, the Series 988 displays the menu not always be in the position specified selection ( [‘SYS], [PidA] or [Pidb] ) in the upper display and [OPEr] in below depending the lower display. on the the settings in the Decimal 1 The Up-arrow > or Down-arrow key < selects another menu. Press the [dEC1] and Decimal Mode key � to display the first prompt in the lower display and its value 2 [dEC2] parame- in the upper display. Use the Up-arrow > and Down-arrow < keys to ters in the Input change the value in the upper display. The new value will not take effect Menu. until after a five-second delay or until you press the Mode key �. Proportional Band, Output 1A or 1B [Pb1A] Select the proportional band for PID output 1. If set to [‘‘‘0] it func- [Pb1b] tions as an on/off control, and the switching differential is determined by the [HYS1] value (Output Menu). The decimal precision is determined by [dEC1] (Input Menu). [Pb1A] This prompt always appears. If Default flfl [‘‘US] & [‘‘¡F] [‘‘‘0]…[‘‘25]…[9999] [‘dFL] [‘C_F] [Pb1A] [Pb1A] [Pb1A] � (Calibration Menu)(Global Menu) NOTE: & [‘r�d] [‘‘)0]…[‘‘25]…[99(9] The PID B Menu [Pb1A] [Pb1A] [Pb1A] Input 1 or 2 appears only on (Input Menu) controllers with [‘‘US] & [‘‘¡C] [‘‘‘0]…[‘‘14]…[9999] enhanced software [‘dFL] [‘C_F] [Pb1A] [Pb1A] [Pb1A] (98_B-_ _ _ _-_ _ _ _) (Calibration Menu)(Global Menu) and with [AhgO] set & [‘r�d] [‘‘)0]…[‘‘14]…[99(9] to [Pid2]. [Pb1A] [Pb1A] [Pb1A] Input 1 or 2 (Input Menu) [‘‘SI] & [Pid2] [‘‘)0]…[‘‘#0]…[99(9] % of span [‘dFL] [ALgO] [Pb1A] [Pb1A] [Pb1A] (Calibration Menu) (Global Menu) Operation Menus, Chapter 5 5.10 WATLOW Series 988 User’s Manual Operation-PID A or B Reset, Output 1A or 1B [rE1A] Tune reset to eliminate the offset or droop between the set point and [rE1b] the actual process temperature for PID output 1. When set to [‘‘‘0] reset is disabled. [rE1A] This prompt appears only if [‘dFL] (Calibration Menu) is set to [‘‘US] and [Pb1A] is not set to [‘‘‘0]. If Default flfl [00)0] … [99(9] repeats/min. [rE1A] [rE1A] [‘Pdr] [=0)0]% … [‘‘)0] % … [10)0] % [ALG0] [rE1A] [rE1A] [rE1A] (Global Menu) Integral, Output 1A or 1B [It1A] Tune integral to eliminate the offset or droop between the set point [It1b] and the actual process temperature for PID output 1. When set to [‘‘‘0] integral is disabled. [It1A] This prompt appears only if [‘dFL] (Calibration Menu) is set to [‘‘S1] and [Pb1A] is not set to [‘‘‘0]. � Default NOTE: fl The PID B Menu [‘)00] … [9(99] min. / repeat appears only on [It1A] [It1A] controllers with enhanced software (98_B-_ _ _ _-_ _ _ _). Operation Menus, Chapter 5 WATLOW Series 988 User’s Manual 5.11 Operation-PID A or B Rate, Output 1A or 1B [rA1A] Adjust the rate to eliminate overshoot on startup or after the set [rA1b] point changes. The rate setting will not influence the percent power if the process temperature is more than twice the proportional band from the set point. When set to [‘‘‘0] rate is disabled. [rA1A] This prompt appears only if [‘dfL] (Calibration Menu) is set to [‘‘US] and [Pb1A] is set higher than [‘‘‘0]. Default fl [‘)00] … [‘(99] min. [rA1A] [rA1A] Derivative, Output 1A or 1B [dE1A] Adjust the derivative to eliminate overshoot on startup or after the [dE1b] set point changes. The derivative setting will not influence the percent power if the process temperature is more than twice the proportional band from the set point. When set to [‘‘‘0] derivative is disabled. [dE1A] This prompt appears only if [‘dFL] (Calibration Menu) is set to [‘‘SI] and [Pb1A] is set higher than [‘‘‘0]. Default � fl NOTE: [‘)00] … [‘(99] min. The PID B Menu [dE1A] [dE1A] appears only on controllers with enhanced software (98_B-_ _ _ _-_ _ _ _). Operation Menus, Chapter 5 5.12 WATLOW Series 988 User’s Manual Operation-PID A or B Cycle Time, Output 1A or 1B [Ct1A] Select the time, in seconds, of a complete on/off cycle. [Ct1b] [Ct1A] This prompt appears only if [‘In1] (Input Menu) is not set to a process, [CntL] (Global Menu) is not set to [CSCd] and [Pb1A] is set high- er than [‘‘‘0]. If Default flfl mechanical [‘‘%0] … [‘1)0] … [99(9] min. relay [Ct1A] [Ct1A] [Ct1A] outputs open collector [brSt] [‘‘)1] … [‘‘!0] … [99(9] min. or solid-state [Ct1A] [Ct1A] [Ct1A] [Ct1A] relay outputs Proportional Band, Output 2A or 2B [Pb2A] Select the proportional band for PID output 2. If set to [‘‘‘0] it func- [Pb2B] tions as an on/off control, and the switching differential is determined by the [HYS2] value (Output Menu). Decimal precision is determined by the [‘dEC1] or [‘dEC2] setting (Input Menu). [Pb2A] This prompt appears only if [CntL] (Global Menu) is not set to [CSCd] and if [‘Ot2] (Output Menu) is set to [‘‘Ht] or [‘‘CL] or if [ALg0] � (Global Menu) is set to [dUPL]. NOTE: The PID B Menu If Default appears only on flfl controllers with [‘‘US] [‘‘¡F] [‘‘‘0]…[‘‘25]…[9999] & enhanced software [‘dFL] [‘C_F] [Pb2A] [Pb2A] [Pb2A] (98_B-_ _ _ _-_ _ _ _). (Calibration Menu) (Global Menu) & [‘r�d] [‘‘)0]…[‘‘25]…[99(9] [Pb2A] [Pb2A] [Pb2A] Input 1 or 2 (Input Menu) [‘‘US] [‘‘¡C] [‘‘‘0] [‘‘14]…[9999] & [‘dFL] [‘C_F] [Pb2A] [Pb2A] [Pb2A] (Calibration Menu) (Global Menu) & [‘r�d] [‘‘)0]…[‘‘14]…[99(9] [Pb2A] [Pb2A] [Pb2A] Input 1 or 2 (Input Menu) [‘‘SI] [‘‘)0]…[‘‘#0]…[99(9] % of span [‘dFL] [Pb2A] [Pb2A] [Pb2A] (Calibration Menu) Operation Menus, Chapter 5 WATLOW Series 988 User’s Manual 5.13 Operation-PID A or B Reset, Output 2A or 2B [rE2A] Tune reset to eliminate the offset or droop between the set point and [rE2b] the actual process temperature for PID A output 2. When set to [‘‘‘0] reset is disabled. [rE2A] This prompt appears only if [‘dFL] (Calibration Menu) is set to [‘‘US] and [Pb2A] is set higher than [‘‘‘0]. If Default flfl [00)0] … [99(9] repeats/min. [rE2A] [rE2A] [‘Pdr] [=0)0] %… [‘‘)0] %… [10)0] % [ALG0] [rE2A] [rE2A] [rE2A] (Global Menu) Integral, Output 2A or 2B [It2A] Tune integral to eliminate the offset or droop between the set point [It2b] and the actual process temperature for PID output 2. When set to [‘‘‘0] integral is disabled. [It2A] This prompt appears only if [‘dFL] (Calibration Menu) is set to � [‘‘SI] and [Pb2A] is set higher than [‘‘‘0]. NOTE: The PID B Menu Default appears only on fl controllers with [‘)00] … [9(99] repeats / min. enhanced software [It2A] [It2A] (98_B-_ _ _ _-_ _ _ _). Operation Menus, Chapter 5 5.14 WATLOW Series 988 User’s Manual Operation-PID A or B Rate, Output 2 [rA2A] Adjust the rate to eliminate overshoot on startup or after the set [rA2b] point changes. The rate setting will not influence the percent power if the process temperature is more than twice the proportional band from the set point. When set to [‘‘‘0] rate is disabled. [rA2A] This prompt appears only if [‘dFL] (Calibration Menu) is set to [‘‘US] and [Pb2A] is set higher than [‘‘‘0]. Default fl [‘)00] … [‘(99] min. [rA2A] [rA2A] Derivative, Output 2A or 2B [dE2A] Adjust the derivative to eliminate overshoot on startup or after the [dE2b] set point changes. The derivative setting will not influence the percent power if the process temperature is more than twice the proportional band from the set point. When set to [‘‘‘0] derivative is disabled. [dE2A] This prompt appears only if [‘dFL] (Calibration Menu) is set to [‘‘SI] and [Pb2A] is set higher than [‘‘‘0]. Default � fl NOTE: [‘)00] … [‘(99] min. The PID B Menu [dE2A] [dE2A] appears only on controllers with enhanced software (98_B-_ _ _ _-_ _ _ _). Operation Menus, Chapter 5 WATLOW Series 988 User’s Manual 5.15 Operation-PID A or B Cycle Time, Output 2A or 2B [Ct2A] Select the time, in seconds, of a complete on/off cycle. [Ct2b] [Ct2A] This prompt appears only if [CntL] (Global Menu) is not set to [CSCd] and [Pb2A] is set higher than [‘‘‘0]. If Default flfl mechanical [‘‘%0] … [‘1)0] … [99(9] relay [Ct2A] [Ct2A] [Ct2A] outputs open collector [brSt] [‘‘)1] … [‘‘!0] … [99(9] or solid-state [Ct2A] [Ct2A] [Ct2A] [Ct2A] relay outputs Dead Band A or B [db‘A] Select the width of the zone between the action of the heating output [db‘b] and the cooling output. If you select a positive value the heat and cool outputs cannot be energized at the same time. If you select a negative value, both outputs can be energized at the same time. • If a process input is selected the decimal precision will be determined by the [‘dEC1] setting (Input Menu). � [db‘A] This prompt appears only if [Pb2A] is set higher than [‘‘‘0] and NOTE: one output performs heating action and the other performs cooling action. The PID B Menu appears only on If Default controllers with flfl enhanced software [‘‘¡F] [-999] … [‘‘‘0] … [‘999] (98_B-_ _ _ _-_ _ _ _). [‘C_F] [db‘A] [db‘A] [db‘A] (Global Menu) [‘‘¡C] [-555] … [‘‘‘0] … [‘555] [‘C_F] [db‘A] [db‘A] [db‘A] (Global Menu) a process [-999] … [‘‘‘0] … [‘999] units input is selected [db‘A] [db‘A] [db‘A] Operation Menus, Chapter 5 5.16 WATLOW Series 988 User’s Manual Chapter 6 The Factory Menus Navigating the Factory Menus � To reach the Factory Menus, begin in the Display Loop and press the Up- arrow > and Down-arrow < keys together and hold for three seconds. NOTE: The [‘SEt] prompt will appear in the lower display. Press and hold the The Factory Menus will not appear if the Up-arrow > and Down-arrow < keys together again for three seconds hardware lockout until the [Fcty] prompt appears in the lower display. The Factory Menus DIP is set to on. will not appear if the hardware lockout DIP is set to on. (See Chapter 1 for See Chapter 1 for more information on DIP switch settings.) The three Factory Menus are: more information. Panel Lockout [PLOC]; Diagnostics [diAg]; and Calibration [‘CAL]. Upon reaching the Factory Menu prompt [Fcty] use the Up-arrow > or Down- arrow < key to select a menu and the Mode key � to step through a � menu. NOTE: You will not see every prompt in any of these menus. The unit’s configura- The Factory Menus tion and model number determine which prompts appear. After stepping can only be entered when the setup through each menu, the Series 988 returns to the Factory Menu prompt prompt [‘SEt] is [Fcty]. Use the Up-arrow > and Down-arrow < keys to select the next displayed. menu, or use the Mode key � to advance through the same menu again. To move backwards through the menu hold down the Mode key � and press the Up-arrow key >. Use the Up-arrow > or Down-arrow < key to change the prompt setting. � NOTE: W WATL¶Press the Up-arrow > and Down-arrow < keys Press the Display key ¶ to return to together and hold until the [‘SEt] prompt appears in PROCESS the Display Loop the lower display. Press and hold again until the L1 L2 L3 L4 from any point in DEV [Fcty] prompt appears in the lower display. DISPLAY % OUT any menu. AUTO MAN MODE SERIES 988 [PLOC]� [diAg]� [‘CAL]� [Fcty]� [Fcty]� [Fcty] Panel Diagnostics Calibration Lockout Menu Menu Menu p 6.7 p 6.13 Figure 6.1 - p 6.2 Navigating the Factory Menus. WATL W PROCESS•Use the Up-arrow key > to select one of the Factory Menus. L1 L2 L3 L4 DEV DISPLAY % OUT AUTO MAN MODE SERIES 988 Factory Menus, Chapter 6 WATLOW Series 988 User’s Manual 6.1 Factory-Panel Lockout Reaching the Panel � [PLOC]� Lockout Menu [Fcty] Factory Prompt Enter your settings, MODE ?� [‘‘‘‘]� from the controller’s [‘LOC]��Front Panel Lockout upper display. MODE ?� [‘‘‘‘]� [‘SYS]��System Menu W WA ATL TL W W MODE ?� [‘‘‘‘]� PROCESS [PidA]��PID A Menu MODE ?� [‘‘‘‘]� L1 L2 L3 L4 [PidB]��*PID B Menu DEV DISPLAY % OUT MODE ?� [‘‘‘‘]� AUTO MAN [Inpt]��MODE Input Menu MODE MODE ?� [‘‘‘‘]� SERIES 988 [Otpt]��Output Menu ‚Select the Panel Lockout Menu, MODE ?� [‘‘‘‘]� then press the Mode key � to step [GlbL]��Global Menu through the prompts. MODE ?� [‘‘‘‘]� [COM]��*Communications Menu MODE ?� [‘‘‘‘]� [Diag]��Diagnostics Menu MODE ?� [‘‘‘‘]� [‘CAL]�Calibration Menu � [FULL]� [rEAd]� [nonE]� [InPt]� [Inpt]� [Inpt] *Prompts may not appear, depending on controller configuration. [‘‘‘3]� [‘‘‘0]� [‘‘‘1]� [‘‘‘2]� [‘LOC]�[‘LOC]�[‘LOC]�[‘LOC]� � „Press the Up-arrow key > or the Down-arrow key < to select one of the prompt values. Figure 6.2 - The Panel Lockout Menu. Factory Menus, Chapter 6 6.2 WATLOW Series 988 User’s Manual Factory-Panel Lockout Panel Lockout Prompts When you are in the Factory menus, the Series 988 displays the menu selection ( [PLOC], [diAg] or [‘CAL] ) in the upper display and [FctY] in the lower display. The Up-arrow > or Down-arrow key < selects another menu. Press the Mode key � to display the first prompt in the lower display and its value in the upper display. Use the Up-arrow > and Down-arrow < keys to change the value in the upper display. The new value will not take effect until after a five-second delay or until you press the Mode key �. Front Panel Lockout Sets the Lockout level for the Front Panel. This allows you to disable [‘LOC] keys on the front of the controller. • [‘‘‘0] enables all keys. � • [‘‘‘1] disables the Mode key �. CAUTION: • [‘‘‘2] disables the Mode key � and the Auto/Man key �. Setting [‘LOC] to [‘‘‘2] or [‘‘‘3] • [‘‘‘3] disables the Mode key � and the Auto/Man key � and locks disables the the set point value. Auto/Man key � and will force the [‘LOC] This prompt always appears. controller into man- Default ual mode if an open flsensor occurs. Verify that the con- [‘‘‘0] [‘‘‘1] [‘‘‘2] [‘‘‘3] troller is operating [‘LOC] [‘LOC] [‘LOC] [‘LOC] in the desired mode (auto or manual) before setting the lockout level. Failure to do so could result in dam- age to equipment and or property. Factory Menus, Chapter 6 WATLOW Series 988 User’s Manual 6.3 Factory-Panel Lockout The prompts within the Panel Lockout Menu allow you to lockout an entire menu. You can set the level of lockout to none [nonE], read only [rEAd], or lockout read and write [FULL]. System Menu [‘SYS] Select the lockout level for the System Menu. Set the System Menu lockout to no lockout [none], read only [read] or full lockout [FULL]. [‘LOC] This prompt always appears. Default fl [none] [read] [FULL] [‘SYS] [‘SYS] [‘SYS] PID A Menu [PidA] Select the lockout level for the PID A Menu. Set the PID A Menu lock- out to no lockout [none], read only [read] or full lockout [FULL]. [PidA] This prompt always appears. Default fl [none] [read] [FULL] [PiDA] [pida] [pida] PID B Menu [PidB] Select the lockout level for the PID B Menu. Set the PID B Menu lock- out to no lockout [none], read only [read] or full lockout [FULL]. [PidB] This prompt appears only on controllers with enhanced software (98_B-_ _ _ _-_ _ _ _) and with [ALgO] (Global Menu) set to [Pid2] or [CntL] (Global Menu) set to [CSCd]. Default fl [none] [read] [FULL] [PiDb] [pidb] [pidb] Factory Menus, Chapter 6 6.4 WATLOW Series 988 User’s Manual Factory-Panel Lockout Input Menu [Inpt] Select the lockout level for the Input Menu. Set the Input Menu lock- out to no lockout [none], read only [read] or full lockout [FULL]. [InPt] This prompt always appears. Default fl [none] [read] [FULL] [Inpt] [InPt] [Inpt] Output Menu [Otpt] Select the lockout level for the Output Menu. Set the Output Menu lockout to no lockout [none], read only [read] or full lockout [FULL]. [OtPt] This prompt always appears. Default fl [none] [read] [FULL] [Otpt] [Otpt] [Otpt] Global Menu [GLBL] Select the lockout level for the Global Menu. Set the Global Menu lock- out to no lockout [none], read only [read] or full lockout [FULL]. [gLbL] This prompt always appears. Default fl [none] [read] [FULL] [GLBL] [GLBL] [GLBL] Factory Menus, Chapter 6 WATLOW Series 988 User’s Manual 6.5 Factory-Panel Lockout Communications Menu [COM] Select the lockout level for the Communications Menu. Set the Communications Menu lockout to no lockout [none], read only [read] or full lockout [FULL]. [COM] This prompt appears only on controllers equipped with Communications hardware (98_ _ -_ _ _ _-_R_ _ or 98_ _ -_ _ _ _-_S_ _ ). Default fl [none] [read] [FULL] [COM] [COM] [COM] Diagnostics Menu [diag] Select the lockout level for the Diagnostics Menu. Set the Diagnostics Menu lockout to no lockout [none], read only [read] or full lockout [FULL]. [diAg] This prompt always appears. Default fl [none] [read] [FULL] [Diag] [diag] [diag] Calibration Menu [‘CAL] Select the lockout level for the Calibration Menu. Set the Calibration Menu lockout to no lockout [none], read only [read] or full lockout [FULL]. [‘CAL] This prompt always appears. Default fl [none] [read] [FULL] [‘CAL] [‘CAL] [‘CAL] Factory Menus, Chapter 6 6.6 WATLOW Series 988 User’s Manual Factory-Diagnostics [Diag]� Reaching the Diagnostics Menu [Fcty] Factory Prompt Enter your settings, MODE from the controller's ?� [date]� upper display. Factory Ship Date ¶Press the Up-arrow > and Down-arrow MODE ?� < keys together and hold until the [SOft]� Software Revision [‘SEt] prompt appears in the lower dis- MODE ?� play. Press and hold again until the [Fcty] [Sn--]� Serial Number prompt appears in the lower display. MODE ?� [AMB]� Ambient Temperature MODE ?� [Acnt]� Ambient A/D count MODE ?� [‘gnd]� Ground A/D count � [PLOC]� [diAg]� [‘CAL]� MODE ?� � [Fcty]� [Fcty]� [Fcty] [cnt1]� Input 1 A/D count Panel Diagnostics Calibration MODE ?� Lockout Menu Menu [cnt2]� Input 2 A/D count Menu p 6.7 p 6.13 p 6.2 MODE ?� [ity1]� Input 1 Module Type •Use the Up-arrow > key to step from MODE ?� the Panel Lockout Menu [PLOC] to the [ity2]� Input 2 Module Type MODE Diagnostics Menu [diag]. MODE ?� [Oty1]� Output 1 Module Type MODE ?� [Oty2]� Output 2 Module Type ‚Press the Mode key � to step through MODE ?� the prompts. [Oty3]� Output 3 Module Type MODE ?� [Oty4]� Output 4 Module Type MODE ?� [dISP]� Test Display [‘‘no]�[‘YES]� MODE ?� �[dISP]�[dISP] [tout]� Test Outputs MODE ? [OPLP] Open Loop [‘OFF]�[out1]� …� [out4]� �[tout]�[tout]�� [tout] „Press the Up-arrow key > or the Down- Figure 6.7 - arrow key < to select one of the prompt The Diagnostics Menu. values. In the Diagnostics Menu only the values of [dISP], [tout] and [OPLP] can be changed. Factory Menus, Chapter 6 WATLOW Series 988 User’s Manual 6.7 Factory-Diagnostics Factory Ship Date [DAte] Shows the date that the final factory control test was performed. The first two digits represent the week as numbered from [01--] to [52--]. The second two digits represent the year [--94], [--95], etc… [dAtE] This prompt always appears. Software Revision [sOft] Shows the controller’s software revision code when set to [[‘ ‘y ye es s]]. This letter should match the software revision code on the cover of the manual that came with your controller; [‘‘‘n] and W988-XUMN Rev N00. [SOFt] This prompt always appears. Serial Number [Sn--] Shows the controller’s serial number. The first two letters in the upper display are to indicate that the controller is in serial number mode. The right half of the upper display shows the first two digits of the serial num- ber. The lower display shows the last four digits of the serial number. [Sn34] [5678] This is what the controller with the serial number 0988345678 would dis- play. [Sn--] This prompt always appears. Ambient Temperature [AMB] Shows the ambient temperature at the Input 1 terminals. The temper- ature is shown in °F in the form [00)0] regardless of the settings of [deC1], [deC2], [‘dfL] or [‘C_F]. [AMb] This prompt always appears. Factory Menus, Chapter 6 6.8 WATLOW Series 988 User’s Manual Factory-Diagnostics Factory Use Only [acnt] These prompts are used only at the factory. [‘gnd] [Acnt] [‘gnd] [cnt1] [cnt2] These prompts always appear. [cnt1] [cnt2] Inputs 1 and 2 Module Types [ity1] Displays which input module is installed in the controller. Please doc- [ity2] ument this value before contacting the factory for technical assistance. Input Types • [none] No input module • [‘‘tc] Thermocouple only module • [Curr] Current detect • [SLid] Slidewire module • [UOFF] Universal off • [Urtd] Universal rtd • [Utch] Universal high-gain thermocouple • [UtcL] Universal low-gain thermocouple • [UMu] Universal millivolts • [UPrc] Universal process • [‘Ei2] Event input 2 [ity1] [ity2] These prompts always appear. Factory Menus, Chapter 6 WATLOW Series 988 User’s Manual 6.9 Factory-Diagnostics Outputs 1, 2, 3 and 4 Module Types [Oty1] Display the controller’s output module. Please document this value [Oty2] before contacting the factory for technical assistance. [Oty3] Output Types • [none] no output module (A) [Oty4] • [SSr1] 0.5A solid-state relay (K) • [SS1S] 0.5A solid-state relay with suppression (B) • [‘‘dc] switched dc open collector (C) • [rLyc] form C relay (E) • [rLcS] form C relay with suppression (D) • [rLAb] relay A/B (J) • [Proc] process output (F) • [Uret] voltage/retransmit (N) • [Iret] current/retransmit (M) • [SpLy] power supply (T) • [‘232] EIA/TIA-232 communications (R) • [‘485] EIA/TIA-485 or EIA/TIA-422 communications (S) • [‘232] EIA/TIA-232 or EIA/TIA-485 communications (U) [Oty1] [Oty2] [Oty3] [Oty4] These prompts always appear. Factory Menus, Chapter 6 6.10 WATLOW Series 988 User’s Manual Factory-Diagnostics Test Displays [disp] Runs a brief test of the controller’s displays and LEDs. To run the test, scroll through the Diagnostics Menu until [disp] is shown in the lower display. Use the Up-arrow key > or Down-arrow key < to select [‘YES] from the upper display and press the mode key �. The controller will run pattern tests, blink all the LEDs on and off, and end with the model number in both displays. [diSP] This prompt always appears. Default fl [‘‘no] [‘yes] [disp] [disp] Test Outputs [tout] This prompt tests each output. To run the test, scroll through the Diagnostics Menu until [tout] is shown in the lower display. Use the Up- arrow key > or Down-arrow key < to select an output [out1], [out2], [out3], or [out4]. The LED for that output should light after a second or two indicating that the output has been successfully energized. Do not press the mode key � to activate the test; it starts automatically when anything other than [‘OFF] is selected. If any of the LEDs fail to light contact the factory. [tout] This prompt always appears. Default fl [‘OFF] [out1] [out2] [out3] [out4] [tout] [tout] [tout] [tout] [tout] Factory Menus, Chapter 6 WATLOW Series 988 User’s Manual 6.11 Factory-Diagnostic Open Loop [OPLP] Checks the control loop, consisting of the controller output, power control, heater and sensor. With open loop enabled, the controller moni- tors the output power level and checks for a change in the process input value. If the output power is at maximum for a period of time equal to the reset time and the process input has not changed by at least –5°F, the controller will switch to manual mode at 0% output power and [OPLP] will be displayed in the lower display. To clear this error, enter the Setup Menu and press the display key ¶. To get back into auto mode, press the Auto/Man key �. [OPLP] This prompt always appears. Default fl [‘OFF] [‘‘on] [OPLP] [OPLP] Factory Menus, Chapter 6 6.12 WATLOW Series 988 User’s Manual Factory-Calibration [‘CAL]� Diagnostics Prompt Enter your settings, [Fcty] Reaching the Calibration from the controller's MODE ?� Menu upper display. [A‘50]� ¶Begin in the Display Loop, and MODE ?� press the Up-arrow > and Down- [A‘00]� arrow < key simultaneously for six MODE ?� seconds until the Setup Menu [‘SEt], [‘‘tc]� then the Factory Menu [fcty] ?� MODE ?� appear. [b380]� [a‘0H]� MODE •Use the Up-arrow key > or Down- ?� MODE ?� arrow key < to step through the [b10U]� [A‘20]� MODE Factory Menu to the Calibration Menu ?� [‘CAL]. MODE ?� [b‘0U� [A‘15]� MODE ?� MODE ?� [b20A]� [A380]� MODE ?� � [PLOC]� [diAg]� [‘CAL]� MODE ?� [b‘4A]� � [Fcty]� [Fcty]� [Fcty] [A10U]� MODE ?� MODE Panel Diagnostics Calibration MODE ?� [b‘0U]� Lockout Menu Menu [A‘0U]� MODE Menu p 6.7 p 6.13 ?� p 6.2 MODE ?� [b100]� ‚Press the Mode key � to step [A20A]� MODE MODE ?� through the prompts. MODE ?� [1‘4‘]� [A‘4A]� MODE ?� MODE ?� [1‘20]� [A‘OU]� MODE [‘‘no]�[‘YES]� ?� MODE ?� �[‘rSt]�[‘rSt] [1‘0‘]� [A100]� MODE ?�„Press the Up-arrow key > or the MODE ?� [1‘10]� Down-arrow key < to select one of [b‘50]� MODE the prompt values. ?� MODE ?� [2‘4‘]� [b‘00]� MODE Refer to Calibrating Watlow Process ?� MODE ?� Controls for information about the [2‘20]� [b‘0H]� MODE Calibration Menu. ?� MODE ?� [2‘0‘]� [b‘20]� MODE � ?� MODE ? [2‘10]� CAUTION: [b‘15] MODE Before attempting to calibrate, make sure ?� you have the proper equipment called for in [‘3LO]� each procedure. The Series 988 is calibrat- MODE ?� ed and tested before it leaves the factory. [‘3HI]� Attempting to calibrate the controller with- MODE out the proper equipment could result in ?� damage to property and/or equipment. [‘rSt]� Restore MODE ? [‘dFL] Default Figure 6.13 - The Calibration Menu. Factory Menus, Chapter 6 WATLOW Series 988 User’s Manual 6.13 Factory-Calibration Restore [‘rst] Restores the original factory calibration values when set to [[‘ ‘Y YE ES S]]. This is a simple way to recover from a mistake made while calibrating the controller. [‘rSt] This prompt always appears. Default fl [‘‘no] [‘yes] [‘rSt] [‘rSt] [‘dfl] Default Set the operating parameter defaults to domestic or international measures. • [‘‘US] (domestic) sets the controller to °F; rate in minutes; proportional band in degrees or units; and reset in repeats per minute. • [‘‘SI] (international) sets the controller to °C; derivative in minutes; proportional band in percent of span; and integral in minutes per repeat. [‘dFL] This prompt always appears. Default fl [‘‘US] [‘‘sI] [‘dFL] [‘dFL] Factory Menus, Chapter 6 6.14 WATLOW Series 988 User’s Manual Chapter 7 Tuning, Manual Operation, Alarms and Error Codes Auto-tuning (Heat and/or Cool) The Series 988 can automatically tune the PID parameters to fit the char- acteristics of your particular thermal system. Standard software units (98_ A -_ _ _ _-_ _ _ _) have 1 set of PID parame- � ters. Units with enhanced software (98_ B -_ _ _ _-_ _ _ _) and [AlgO] set to [Pid2] (Global Menu) have two sets of PID parameters, PID A and PID NOTE: A useful reference B. Only one PID set can be auto-tuned at a time. For information on tun- on tuning is Tuning ing a cascade system, see Chapter 8. of Industrial Control Systems by Arman- Before beginning the auto-tune sequence, make sure the [AtSP] parame- do B. Corripio, pub- ter located in the Global Menu is at the proper setting. This allows the lished by the user to select the tuning set point as a percentage of the current control Instrument Society set point. See Chapter 4 for more information on this parameter. The fig- of America. ure below uses the default setting, 90%, to define the auto-tuning process. Once the auto-tune sequence has begun, the output 1 and output 2 pro- portional band is set to 0 and the control goes into an on/off mode of con- NOTE: Auto-tune can be trol at the set point percentage determined by the [AtSP] parameter. The initiated if [‘rSp] displayed set point remains unchanged. is set to [‘‘on]. NOTE: For information about tuning a cas- cade system, see Chapter 9. Auto-tuning at a set point of 200°F auto-tune auto-tune NOTE: begins complete Before attempting to set point 200° auto-tune a cascade system, see Cascade Setup in 180° Chapter 9. process 90% of set point 100° ( [AtSP] default setting) Figure 7.1 - Auto-tuning example. Time Tuning, Manual Operation, Alarms and Error Codes, Chapter 7 WATLOW Series 988 User’s Manual 7.1 Temperature Tuning When the control finishes “learning” the system, it resumes standard PID control using the PID values established by the auto-tuning process. Changing the set point during an auto-tune restarts the auto-tune proce- dure. During auto-tuning the process must cross the set point four times within an 80-minute time span for the Series 988 to successfully complete the � auto-tune. If this does not happen within the 80-minute time limit, the CAUTION: Series 988 chooses PID values based on the 80-minute tuning cycle per- If a mechanical formed. relay or contactor is switching power to To start auto-tuning: the load, a longer 1. Press the Mode key � to advance to the System Menu [‘SyS]. cycle time may be desirable to mini- Press the Mode key � to advance through the menu until the [‘AUt] mize wear on the prompt appears in the lower display. mechanical compo- nents. The typical 2. Use the Up-arrow > or Down-arrow < key to select [PidA] or [Pidb], life of a mechanical if your controller is equipped with enhanced software (98_ B -_ _ _ _-_ _ _ _). relay is 100,000 Only one PID set can be auto-tuned at a time. cycles. Verify that the cycle time 3. Press the Display key ·. While the control is in the tuning mode selected is appro- priate for the output the lower display alternates every second between the normal informa- device type. Failure tion and the [tunE] prompt. to do so could result in damage to 4. When tuning is complete, the displays return to their previous state equipment and/or and [‘AUt] reverts to [‘OFF]. The Series 988 installs the PID tuning property. parameters it has calculated and saves them in non-volatile memory. To abort auto-tuning either reset the [‘AUt] prompt to off, press the Auto/Man key � twice, or cycle power off and on. In all cases, aborting auto-tune restores all values to their state before auto-tuning began. Manual Tuning For optimum control performance, tune the Series 988 to your thermal system. The tuning settings here are for a broad spectrum of applications; your system may have somewhat different requirements. NOTE: This is a slow procedure that may take hours to obtain optimum values. Tune heating outputs at a set point above the ambient process value. Tune cooling outputs at a set point below the ambient process value. If your controller is equipped with enhanced software (98_B-_ _ _ _-_ _ _ _), the [Pidb] parameters may need to be tuned also. Perform this procedure on both PID sets, they are functionally identical. The para- meters within the procedure apply to both output 1 and 2, and PID A and B. 7.2 WATLOW Series 988 User’s Manual Tuning, Manual Operation, Alarms and Error Codes, Chapter 7 Tuning 1. Apply power to the Series 988 and enter a set point. Begin with [‘‘Pb] set to [‘‘‘1]; [‘‘rE] or [‘‘It] set to [‘0)0]; [‘‘rA] or [‘‘dE] set to [‘0)0]; [‘‘Ct] set to [‘‘%0]; [‘CAL] set to [‘‘‘0]; and [‘AUt] set to [‘OFF]. 2. Proportional Band Adjustment: Gradually increase [‘‘Pb] until the upper display process value stabilizes at a constant value. The process value will not be right on set point because the initial reset value is 0.00 repeats per minute. (If [‘‘Pb] is set to [‘‘‘0] then [‘‘rE], [‘‘It], [‘‘rA] and [‘‘dE] are inoperative, and the Series 988 func- tions as a simple on/off control.) The [‘HYS] prompt determines the switching differential value. 3. Reset/Integral Adjustment: Gradually increase [‘‘rE] or [‘‘It] until the upper display process value begins to oscillate or “hunt.” Then slowly decrease [‘‘rE] or [‘‘It] until the upper display stabilizes again near set point. 4. Cycle Time Adjustment: Set [‘‘Ct] as required. Faster cycle times sometimes achieve the best system control. See Chapter 8 for more information on the burst fire feature. However, if a mechanical contac- tor or solenoid is switching power to the load, a longer cycle time may be desirable to minimize wear on the mechanical components. Experiment until the cycle time is consistent with the quality of control you want. [‘‘Ct] will not appear on units with a process output (98_ _ -_ _ F _-_ _ _ _ or 98_ _ -_ _ _ F -_ _ _ _). 5. Rate/Derivative Adjustment: Increase [‘‘rA] or [‘‘dE] to 0.10 minute. Then raise set point by 20° to 30°F, or 11° to 17°C. Observe the system’s approach to the set point. If the load process value overshoots the set point, increase [‘‘rA] or [‘‘dE] to 0.50 minutes. Raise the set point by 20° to 30°F, or 11° to 17°C and watch the approach to the new set point. If you increase [‘‘rA] or [‘‘dE] too much, the approach to set point will be very sluggish. Repeat as neces- sary until the system rises to the new set point without overshooting or approaching the set point too slowly. 6. Calibration Offset Adjustment: You may want your system to control to a process value other than the value coming from the input sensor. If so, measure the difference between that process value (perhaps at another point in the system) and the process value showing in the upper display. Then enter the [‘CAL] offset value you want. Calibration offset adds or subtracts degrees from the value of the input signal. Tuning, Manual Operation, Alarms and Error Codes, Chapter 7 WATLOW Series 988 User’s Manual 7.3 Auto/Man Manual and Automatic Operation To change from auto to manual operation, press the Auto/Man key � twice. Manual operation provides open-loop control of the outputs from a range of -100% to 100% output. The Series 988 allows a negative output value � only when [‘Ot1] or [‘Ot2] (Output Menu) is set to [‘‘CL] (cool). Automatic operation provides closed-loop on/off or PID control. When the NOTE: operator transfers from a closed loop to an open loop, the Series 988 sets When a sensor the power level to the setting of the [FAIL] parameter. If [FAIL] is set to opens, the con- [BPLS] the controller retains the power level from the closed-loop control. troller switches from automatic to When the Series 988 returns to closed-loop control, it restores the previ- manual operation. ous set-point process value. The Auto/Man LED (located on the Auto/Man key �) indicates whether the controller is in automatic or manual operation. When the LED is lit, the control is in manual operation. When the LED is off, it is in automatic operation. When the LED flashes, press the key again within five seconds to complete the change in operation. • If [FAIL] is set to [BPLS] and the process has stabilized at a power level less than 75% ( ± 5%) for a two-minute period prior to the sensor break, then the Series 988 switches to manual operation at the last automatic power level. If these conditions are not met, the output goes to 0% power (output disabled). When transferring from automatic to manual operation, the control out- put, or outputs, remain stable — a bumpless, or smooth, transition. The lower display changes from the set point to the % output value. • If [FAIL] is set from [‘=00] to [‘100], the Series 988 switches to man- ual operation at that percent power. 7.4 WATLOW Series 988 User’s Manual Tuning, Manual Operation, Alarms and Error Codes, Chapter 7 Alarms Changing the Output 3 Alarm Jumper If you have model number 98 _ _ -_ _ _ _- J _ _ _ , output 3 can be con- figured as a Form A (NO and common contact) or Form B (NC and com- mon contact) alarm. To change the alarm jumper: 1. Remove the control from the case. Release the two tabs on one side of the control, then release the two tabs on the opposite side. You may need to rock the bezel back and forth several times to release the chas- sis. 2. Set the jumper to the position you want. See below for jumper location. NC NO Contacts Figure 7.5 - Contacts (Form B) Alarm jumper (Form A) location. Controller Chassis - Top View 3. Return the controller chassis to the case. Be sure you have it oriented correctly. Press firmly, but gently, to seat the chassis. If you select Form A, the contact is open when power is removed from the control. If you select Form B, the contact closes when power is removed. Tuning, Manual Operation, Alarms and Error Codes, Chapter 7 WATLOW Series 988 User’s Manual 7.5 Alarms Using Alarms Output 2, 3, and 4 of the Series 988 can function as alarms. This is accomplished with the [‘Ot2], [‘Ot3] or [‘Ot4] prompt (Output Menu). If [‘AL2], [‘AL3] or [‘AL4] is selected, the output is energized in the non- alarm condition and de-energizes the output in the alarm condition. Selecting [AL2n], [AL3n] or [AL4n] reverses this action: de-energizing the output in a non-alarm condition and energizing it in an alarm condition. If the L2, L3 or L4 LED on the front panel is lit, this indicates an alarm condition for output 2, 3 or 4 respectively. Once you’ve configured the outputs as alarms, enter the Output Menu again and select the [‘AL2], [‘AL3] or [‘AL4] prompt. At these prompts you can select the type of alarm: process; deviation; or rate. Each may be independently set low and high. Choose between [‘Pr1] (process alarm input 1), [‘Pr2] (process alarm input 2), [‘dE1] (deviation alarm input 1), [‘dE2] (deviation alarm input 2) or [rAtE] (rate alarm referenced to input 1). Example: [‘Pr1] can reference the input 1 process value against the [A2LO] and [A2HI] settings, or [‘Pr2] can reference the input 2 process � value against the [A2LO] and [A2H1] settings. NOTE: An alarm display A process alarm sets an absolute temperature range or process value will be masked by range. When the temperature or process leaves the range an alarm occurs. an error condition A process alarm is not tied to the set point. or when the control is in the Calibration Example: If your set point is 100°F and a process alarm high limit is set or Setup menus. to 150°F and the low limit is set to 50°F, the high limit trips at 150°F, and the low alarm at 50°F. If you change the set point, the process alarm lim- its remain the same. A deviation alarm alerts the operator when the process strays too far from the set point. The operator can enter independent high and low alarm settings. The reference for the deviation alarm is the set point. Any change in set point causes a corresponding shift in the deviation alarm. Low alarms are usually set at a negative deviation while high alarms are a positive deviation. Example: If your set point is 100°F, a deviation alarm high limit is set to +7°F and the low limit is set to -5°F, then the high alarm trips at 107°F, and the low alarm at 95°F. If you change the set point to 130°F, the alarms follow the set point and trip at 137°F and 125°F. 7.6 WATLOW Series 988 User’s Manual Tuning, Manual Operation, Alarms and Error Codes, Chapter 7 Alarms A rate alarm alerts the operator when the process monitored by input 1 is increasing at a rate higher than the alarm high setting ( [A2HI], [A3HI] or [A4HI] ) or decreasing at a rate lower than the alarm alarm low setting ( [A2LO], [A3LO] or [A4LO] ). The rate is sampled once a second. Alarms can be latching or non-latching. When the alarm condition is removed, a non-latching alarm automatically clears the alarm output and alarm message, if one is present. You must manually clear a latching alarm before it will disappear. The alarm output is indicated by the corresponding LED on the front panel: L2; L3; or L4. There may be an alarm message flashing in the lower display, but if the [‘Anun] prompt is set to [‘OFF] (Global Menu), no alarm message is displayed. When an alarm message is displayed, it alter- nately flashes with the current prompt at a one-second interval in the lower display. To clear a latching alarm, first correct the condition then press the Auto/Man key � once. Alarm silencing is available with all alarms. This function overrides the alarm on initial power up. On power up, the alarm message will not appear and the appropriate L2, L3 or L4 LED and output will reflect a non-alarm condition. Silencing is active until the process has entered the safe region located between the low- and high-alarm settings. Then devia- tion outside this safe zone triggers an alarm. If an alarm occurs at this point, the output can be silenced by pressing the Auto/Man key � once, but the controller still displays the alarm message. Tuning, Manual Operation, Alarms and Error Codes, Chapter 7 WATLOW Series 988 User’s Manual 7.7 Error Codes Error Code E1 and E2 Messages Four dashes, [----], in the upper display indicate a Series 988 error. The � � control goes into the manual mode and maintains the percent output selected at the [FAIL] prompt (Global Menu). That value (percent of out- NOTE: put) is shown in the lower display. To view the error code press the Auto/Man key � [E1‘1] [E2‘1]: A/D underflow error once. The upper dis- The analog-to-digital (A/D) converter of the input indicated by the first play shows the number is under range. An open or reversed polarity sensor is the most error code for five likely cause. Check the sensor. Make sure the input prompt is set to the seconds before correct sensor. returning to the [----] display. W WA ATL TL W W PROCESS L1 L2 L3 L4 DEV DISPLAY % OUT AUTO MAN Figure 7.8 - MODE Error code display. SERIES 988 [E1‘2] [E2‘2]: Sensor under-range error The sensor at the input indicated by the first number generated a value lower than that allowed for the range of the sensor, or the analog-to-digital (A/D) converter malfunctioned. Make sure the setting for the input (Input Menu) matches the sensor type and that the sensor range falls within the range of the process being controlled. [E1‘3] [E2‘3]: Sensor over-range error The sensor at the input indicated by the first number generated a value higher than that allowed for the range of the sensor, or the analog-to-digi- � tal (A/D) converter malfunctioned. Make sure the setting for the input NOTE: (Input Menu) matches the sensor type and that the sensor range falls An alarm display within the range of the process being controlled. will be masked by an error condition [E1‘4] [E2‘4]: A/D overflow error or when the control The analog-to-digital (A/D) converter at the input indicated by the first is in the Calibration or Setup menus. number is over range. An open or reversed polarity sensor is the most like- ly cause. Check the sensor. Make sure the input (Input Menu) is set to the correct sensor type. The analog-to-digital (A/D) converter input voltage may be too high to con- vert an A/D signal. 7.8 WATLOW Series 988 User’s Manual Tuning, Manual Operation, Alarms and Error Codes, Chapter 7 Error Codes [‘Er3]: Ambient temperature error The ambient temperature of the Series 988 has dropped below 32°F/0°C or risen above 149°F/65°C. Calibration errors can also cause this error code. Try setting [‘rSt] (Calibration Menu) to [‘yES]. (Read about Factory Calibration in Chapter 6.) [‘Er4]: RAM verification error An internal RAM failure has occurred. Contact the factory. [‘Er5]: Non-volatile checksum error An EEPROM checksum error was detected. Turn the power off then back on again. If this does not clear the error, contact the factory. [OPLP]: Open-loop detect This error is not available while in the on/off mode. It is only active when [OPLP] is set to [‘‘on] (Diagnostics Menu). [‘Er9]: Configuration error An incorrect module has been installed in the control. Contact the factory. Error Code Actions All of the above error codes except [‘Er4], [‘Er5] and [‘Er9] will result in these conditions: • If [FAIL] is set to [bPLS] (Global Menu)… …and the control was in automatic operation when the error occurred, it goes into manual (% power) operation. If the output power is less than 75% (± 5%) power and there was a change in power (< 5%) within the last two minutes, the Series 988 switches to manual opera- tion at the last automatic power level (bumpless transfer). If the con- trol was in manual operation, it remains there. (Press the Auto/Man key � once to see the error code.) The error code is shown in the upper display for five seconds and the lower display shows the % power. After five seconds the upper display reverts to the [----] dis- play. • If the control was operating with stable output values when the error occurred, it continues to operate at those levels on a percent-power basis. • If output values were not stable, or the percent output was greater than 75%, the control outputs drop to 0% power (off). • If [FAIL] is not set to [bPLS]… … and the control was in automatic operation when the error occurred, it goes into manual (% power) operation. The power level is determined by the [FAIL] prompt value ([‘=00] to [‘100] percent). Tuning, Manual Operation, Alarms and Error Codes, Chapter 7 WATLOW Series 988 User’s Manual 7.9 Error Codes To clear an error code… • If [‘Err] is set to [‘nLA], the error code should clear once the prob- lem is corrected. • If [‘Err] is set to [‘LAt], correct the problem and cycle power. You can also clear the error by pressing both the Up-arrow > and Down- arrow < keys to enter the Setup Menu, then press the Display key ·. Error codes [‘Er4], [‘Er5] and [‘Er9] will result in these conditions: • The control is in automatic operation with both control outputs off. • The alarm outputs are in their alarm state (de-energized with the LED lit). • The lower display is blank. • The upper display indicates the error code. • All keys are inactive. • With [‘Er5], all Setup Menu prompts return to default values. � • The above conditions occur regardless of the [FAIL] value, or the set- tings in the Setup and Factory menus. NOTE: An alarm display will be masked by Cycle power to the control. If the error is still present contact the factory. an error condition or when the control is in the Calibration or Setup menus. 7.10 WATLOW Series 988 User’s Manual Tuning, Manual Operation, Alarms and Error Codes, Chapter 7 Chapter 8 General Software Burst Fire 8.2 Communications 8.4 Dead Band 8.6 Digital Events 8.8 Heater Current 8.10 Input Filter 8.12 Input Linearization 8.14 Ramp to Set Point 8.16 Remote Set Point 8.18 Retransmit 8.20 Slidewire Feedback 8.22 General Software Features, Chapter 8 WATLOW Series 988 User’s Manual 8.1 General Software Burst Fire Requirements • This feature only works with zero-cross, solid-state devices. It will not function correctly with random-fire devices. • To enable burst fire the Series 988 must have an open collector or solid- � state relay output: controllers with option “B,” “C” or “K” selected for output 1 (98_ _-_ _*_-_ _ _ _), output 2 (98_ _-_ _ _*-_ _ _ _), output 3 (98_ CAUTION: _-_ _ _ _-*_ _ _) or output 4 (98_ _-_ _ _ _-_*_ _). The burst fire fea- ture only func- • The time burst is appropriate for fast loads or very tight control. It pro- tions with zero- vides advantages only for PID control, not for on/off control. cross, solid-state devices. It will not • The short time bases used by burst fire makes it incompatible with the function correctly heater current feature (98_ _-_4_ _-_ _ _ _). The heater current option with random-fire requires a minimum of 300 milliseconds on time to get a reading. devices. Verify that the output • The Series 988 has built in zero-cross detection circuitry, eliminating the switching device need for external firing circuitry to trigger SCR’s. The controller will not is compatible allow burst fire to be selected if its zero-cross detection circuitry is not before selecting functioning. burst fire. Failure to follow this • The feature is enabled by selecting burst fire [brst] at the cycle time guideline could prompt for the appropriate output in the PID Menu — [Ct1A], [Ct1b], result in damage to equipment. [Ct2a] or [Ct2b]. • Only the 988 and 989 can use the burst fire feature. The low-voltage units (986 and 987) cannot use burst firing. Overview Variable, time-base burst firing from the Series 988 provides the most even distribution of power with the lowest level of noise generation (RFI). An SSR or SCR firing card translates a command signal into a burst of ac cycles. The output is zero-cross fired, which always allows at least one full ac cycle to pass within the variable time base. Burst firing is the preferred mode to control resistive loads. The Series 988 detects when the ac sine wave of the load will cross the 0- volt point. It uses this information to switch the load on or off only at a 0- volt point, minimizing RFI. The burst fire time base in the Series 988 varies from a maximum 1.66- second time base (1-percent output; 1 cycle on, 99 off) down to a 33.3-mil- lisecond time base (50-percent output; 1 cycle on, 1 off). The graphs on the next page show how the time base varies with the percent output. General Software Features, Chapter 8 8.2 WATLOW Series 988 User’s Manual General Software 100% output 66% output 10 on, 0 off 2 on, 1 off 50% output 10% output 1 on, 9 off 1 on, 1 off Figure 8.3a - Sine waves of burst fire settings. Semiconductor Oven QPAC WATL W input 1 output 1 with temperature limit PROCESS QCD sensor limit input L1 L2 L3 L4 sensor DEV DISPLAY % OUT AUTO MAN heated platen MODE SERIES 988 Figure 8.3b - Semiconductor Sample Application oven with burst fire. A Series 988 controls a heated platen in a semiconductor oven. Previously it used a power control requiring a 4-20mA signal to implement burst-fire control. We have replaced the power control with a Watlow Loyola QPAC with a QCD card that accepts a signal directly from an open-collector out- put of the Series 988. This gives smooth control at a lower overall system cost. General Software Features, Chapter 8 WATLOW Series 988 User’s Manual 8.3 General Software Communications Requirements Choose which interface your application will use: EIA/TIA-232 serial com- munications (98_ _-_ _ _ _-_R_ _), EIA/TIA-485 or EIA/TIA 232 serial com- munications (98_ _-_ _ _ _-_U_ _), or EIA/TIA-485 or EIA/TIA-422 serial communications (98_ _-_ _ _ _-_S_ _). The computer must have a compati- ble serial port or an appropriate converter must be used. Overview The serial communications feature allows the Series 988 family to receive commands from and transmit data to a master device, usually a comput- er. Any function that can be performed via the front panel, can also be accomplished using a serial communications port, allowing you to operate the controller from a computer and to store process data on a computer. L4 acts as the RX/TX indicator on the front display panel of the 988. The Series 988 is available with a choice of serial hardware interfaces. An EIA/TIA-232 interface allows for one master (computer) and one con- troller, with a maximum network length of 50 feet (15 meters). The EIA/TIA-485 or EIA/TIA-422 option equips the controller for a multi- drop interface: up to 32 total network devices with EIA/TIA-485 and up to 10 total network devices with EIA/TIA-422. Each controller will have its own unique address. The total maximum network length is 4,000 feet (1,219 meters). All interfaces are isolated. To select between EIA/TIA-485 or EIA/TIA-422, enter the Setup Menus by holding the up-arrow > and down-arrow < keys simultaneously until setup [‘SEt] appears in the bottom display. Use the up-arrow key to select the Communications Menu [COM]. At the interface prompt [Intf] select between [‘422] or [‘485]. Other parameters that must be configured in the Communications Menu [COM] are the baud rate [bAUd], data bits and parity [data], protocol [Prot], and device address [Addr]. The protocol prompt must be set to full (ANSI X3.28 2.2-A3) or RTU Modbus if multiple devices are used with the EIA/TIA-485 or EIA/TIA-422 interface. If the full protocol or RTU Modbus is selected, a device address must be selected at the address prompt. For EIA/TIA-232, full [FULL] or on [‘‘on] (XON/XOFF) protocol may be selected. General Software Features, Chapter 8 8.4 WATLOW Series 988 User’s Manual General Software Test Test Test Test Test Chamber 1 Chamber 2 Chamber 3 Chamber 4 Chamber 5 W WA ATL TL W W W WA ATL TL W W W WA ATL TL W W W WA ATL TL W W W WA ATL TL W W PROCESS PROCESS PROCESS PROCESS PROCESS L1 L2 L3 L4 L1 L2 L3 L4 L1 L2 L3 L4 L1 L2 L3 L4 L1 L2 L3 L4 DEV DEV DEV DEV DEV DISPLAY DISPLAY DISPLAY DISPLAY DISPLAY % OUT % OUT % OUT % OUT % OUT AUTO AUTO AUTO AUTO AUTO MAN MAN MAN MAN MAN MODE MODE MODE MODE MODE SERIES 988 SERIES 988 SERIES 988 SERIES 988 SERIES 988 output 4 output 4 output 4 output 4 output 4 personal computer with EIA/TIA-422 port Figure 8.5 - Test Sample Application chambers with communications. A test engineer uses Series 988s to control the temperatures of several automated test chambers. His computer is linked to the controllers through its EIA/TIA-422 serial communications port. His computer pro- gram monitors the temperatures of the chambers and initiates automatic test sequences when certain program parameters are met. After complet- ing a sequence, the computer loads the next temperature to the controller. The computer periodically interrogates each controller for its process tem- perature, set point and alarm status. This information is stored on a disk to provide test verification data for the completed products. General Software Features, Chapter 8 WATLOW Series 988 User’s Manual 8.5 General Software Dead Band Requirements The dead band feature is standard on any Series 988 controller with two control outputs. The dead band prompts will appear if the control outputs are configured for heat/cool or cool/heat. � WARNING: Overview If the dead band is The dead band prompts, [db‘A] and [db‘b], located in the PID menus, set to a negative determine the amount of interaction between heat (reverse acting) and cool value, the heat (direct acting) control outputs. The dead band directly offsets the target set and cool outputs point of the cool control output. can both be ON at the same time. With a positive dead band, both control outputs will never be ON at the same time. With the process in a positive dead band, the output value is determined by adding the percent heat output to the percent cool output and only applying the result to the correct output — cooling action if the sum is negative and heating action if it is positive. General Software Features, Chapter 8 8.6 WATLOW Series 988 User’s Manual General Software cool cooling action 75 + 2 = 77° set point ( [‘SP1] [‘dbA] cool set point) 77° 2° dead band no action 75° primary set point heating action set point Figure 8.7a - Dead band graph. Environmental Chamber W WA ATL TL W W input 1 output 1 chiller PROCESS output 2 temperature limit sensor L1 L2 L3 L4 sensor limit DEV DISPLAY % OUT AUTO MAN MODE heater SERIES 988 Figure 8.7b - Environmental Sample Application chamber with dead An engineer for an environmental chamber manufacturer, who is design- band. ing the heating and cooling system for a new chamber, wants to minimize the energy costs of operating the chamber. She has chosen the Series 988 and will configure the heat and cool outputs with a positive dead band. When the chamber temperature is near ambient the cooling and heating systems had a tendency to buck one another, resulting in inefficient use of energy. The engineer started with a dead band of five degrees, but in the process of tuning the system for optimal control, the setting was reduced to two degrees. This made the chamber more energy efficient and reduced wear on the refrigeration system. General Software Features, Chapter 8 WATLOW Series 988 User’s Manual 8.7 General Software Digital Events Requirements A single digital event input is standard on all controls. A second digital input is available as an option for input 2 (98_ _-_5_ _-_ _ _ _). Overview The digital event input options on the Series 988 controller allow the oper- ator to select one of several software functions with the close of a cus- tomer-supplied switch or by a change in dc voltage (See Chapter 2 for volt- age and wiring information.). The list below outlines the functions that can be controlled with a digital event input: • Idle set point [IdSP] lets the operator select a second (idle) set point. • Turn control outputs off [‘OFF] inhibits the control outputs. • Alarm reset [‘ALr] resets alarms from a remote location. • Switch PID sets [‘Pid] selects between PID set A or B (requires enhanced software, 98_B-_ _ _ _-_ _ _ _). • Remote set point [‘rsp] switches to remote set points. • Front panel lockout [‘LOC] locks out the front panel keys to prevent tampering. • Control output action [Actn] switches the control action of outputs 1 and 2 from heating to cooling, or vice versa. • Auto/Manual operation [A-M] switches to the manual mode of opera- tion at the percent power selected with [FAIL] (Global Menu) and disables the Auto/Man key. General Software Features, Chapter 8 8.8 WATLOW Series 988 User’s Manual General Software W WA ATL TL W W input 1 output 1 temperature limit limit PROCESS sensor sensor L1 L2 L3 L4 DEV DISPLAY % OUT AUTO heater MAN MODE SERIES 988 switch input 3 (event input 1) Figure 8.9 - Heater with digital event. Sample Application A manufacturing engineer is building an application that needs to switch to an idle temperature at the end of a batch and maintain that tempera- ture until the next batch is loaded, with minimum operator interaction. By connecting an external switch to the digital event input, he can select either the operating temperature or the idle temperature with the flip of a switch. The idle set point prompt is enabled by setting the Event Input 1 prompt [‘Ei1], in the Global Menu, to idle set point [Idsp]. The idle set point value is accessed by pressing the MODE key � from anywhere in the display loop. When the switch closes, the lower display will indicate the idle set point, and the controller will maintain this new set point. General Software Features, Chapter 8 WATLOW Series 988 User’s Manual 8.9 General Software Heater Current Requirements Choose the heater current option (98_ _-_4_ _-_ _ _ _) for input 2 and an appropriate current transformer. A current transformer must be ordered separately. � Output 1 cannot be used as a process output. The heater current feature NOTE: To obtain a reading, monitors only output 1. the output ON-time must be a minimum Overview of 0.3 seconds. The heater current feature measures and responds to heater current in a system. This is an ideal method for detecting heater loss in applications with multiple heaters. The current is measured when output 1 is on. For instance, if a system has five, 10-amp heaters, the heater current input � measures 50 amps regardless of the percent output. NOTE: The heater current To view the heater current press the DISPLAY key and advance to the feature will not Process 2 prompt [Pr‘2]. The upper display indicates the last valid cur- function with burst- rent reading. fire outputs. The Input 2 prompt [‘In2] under the Input Menu [InPt] can be set to current [Curr] or loop error detect [LooP]. Current [Curr] allows you to monitor heater current and set alarm set points based on high and low � heater current values. Alarms can only be configured as process alarms NOTE: (see Alarms, in Chapter 7). Setting to loop error detect [LooP] enables The heater current monitoring and alarm functions, and also triggers an error and shuts off feature will not all outputs if current is present with output 1 off or when no current is function when the present and output 1 power is more than zero. Series 988 has a process output for There are limits associated with this feature: output 1. • To obtain a reading, the output on-time must be a minimum of 0.3 sec- onds. To calculate this, multiply the percent output by the cycle time set- ting. Example: With 30-percent output and a 2.0 second cycle time, the on-time would be: 0.30 x 2.0 = 0.6 seconds. This would yield a valid read- ing. If a valid reading is not possible, the 988 will display the last valid reading. • The heater current feature will not function with burst-fire outputs: Controllers with option “B,” “C” or “K” selected for output 1 (98_ _-_ _*_-_ _ _ _), output 2 (98_ _-_ _ _*-_ _ _ _), output 3 (98_ _-_ _ _ _-*_ _ _) or output 4 (98_ _-_ _ _ _-_*_ _). This does not neces- sarily apply to the loop error detect feature. If enabled, any current detect- ed with no output triggers an error. • This feature will not function when the Series 988 has a process output for output 1 (98_ _-F _ _ _-_ _ _ _). A known cycle time is required to detect the current. There is no cycle time associated with process outputs. The maximum signal the input can accept from the current transformer secondary is 50mA. So, you must calculate the output range of the cur- rent transformer before wiring the system. General Software Features, Chapter 8 8.10 WATLOW Series 988 User’s Manual General Software W WA ATL TL W W Compression Molding Press input 1 output 1 limit PROCESS input 2 current L1 L2 L3 L4 DEV DISPLAY % OUT transformer AUTO MAN MODE 10A heaters SERIES 988 limit temperature sensor sensor Figure 8.11 - Sample Application Compression mold- ing press using the The Series 988 controls the lower platen of a compression molding press heater current fea- that contains five, 10-ampere heaters. A 50A:50mA current transformer is ture. used to monitor heater current. Set the Input 2 prompt [‘In2] to current [Curr], the Range Low 2 prompt [‘rL2] to 0 and the Range High 2 prompt [‘rH2] to 50. Find the range high 2 value with the following equation: range high 2 = (maximum CT primary current (load current)) x 50mA (maximum output from CT secondary (input)) The application uses a Watlow current transformer (CT) part# 16-0233, which has a maximum input of 50 amperes, which corresponds to a maxi- mum output of 50mA. range high 2 = (50Amps) x 50mA 50mA Solving for rH2 gives you 50. This is the range high 2 setting. General Software Features, Chapter 8 WATLOW Series 988 User’s Manual 8.11 General Software Input Filter Requirements This feature is standard on all Series 988 controllers. Overview In certain applications the process being measured can be unstable, which makes it difficult to control and also makes the constantly changing NOTE: display difficult to read. The Series 988 input filter can solve these prob- Use this feature lems by smoothing out just the display or the display and the input signal. with caution, because a large time constant could You can set a time constant in seconds for a low-pass filter that will, if you hide system select a positive value, affect the display only. Select a negative value to fil- upsets. ter the input signal itself. General Software Features, Chapter 8 8.12 WATLOW Series 988 User’s Manual General Software Display readings with input filter ON Display readings with input filter OFF time time Figure 8.13a - Display readings with input filtering. Humidity Chamber W WA ATL TL W W input 1 output 1 limit limit PROCESS sensor L1 L2 L3 L4 DEV DISPLAY % OUT AUTO humitidy MAN MODE transmitter heater SERIES 988 Figure 8.13b - Humidity chamber with input filtering. Sample Application A Series 988 controls the humidity in an environmental chamber. The rel- ative humidity (RH) sensor provides a 4-20mA signal over a 0-100% RH range. The sensor is very sensitive to changes caused by air flow in the chamber. The turbulence in the chamber makes the controller display jump two to three percent. To remove this display dithering set the filter time constant [Ftr1] for input 1 to two seconds. This will smooth the dis- play and provide a more realistic reading. General Software Features, Chapter 8 WATLOW Series 988 User’s Manual 8.13 %RH %RH General Software Input Linearization Requirements The square root extraction feature is standard on any Series 988 con- troller with universal signal conditioner inputs. The linearization prompt will appear if a process input is selected with the DIP switches (see Chapter 1). Overview In many flow applications the output signal from a flow transmitter repre- sents a squared value of the actual flow. The square root must be extract- ed from the signal to make it useful to the operator. Many flow transmit- ters offer this feature in the transmitter itself, but this can add significant- ly to the cost. Using the square root extraction option in the Series 988 controller can save the operator money. The feature is enabled simply by setting input 1 linearization [lin1] or input 2 linearization [lin2] to square root extraction [root]. General Software Features, Chapter 8 8.14 WATLOW Series 988 User’s Manual General Software 16 O 14 O 12 O linearized signal O 10 flow in O 8 gallons per O O minute 6 non-linearized signal O 4 O O O 2 O O O O 0 O O 4 6 8 10 12 14 16 18 20 Figure 8.15a - 4-20mA input signal Graph of linearized signal. W WA ATL TL W W input 1 output 1 PROCESS L1 L2 L3 L4 DEV DISPLAY % OUT AUTO MAN MODE SERIES 988 flow transmitter Water Treatment Pond Figure 8.15b - Sample Application Waste-water treat- A waste water process engineer needs to control the flow of a solution to ment with input lin- earization. be mixed with wastewater to treat it. The transmitter provides a 4-20mA output without square root extraction. The engineer used the Series 988 with a universal signal conditioner input and a 4-20mA process output to control the flow. The input signal was linearized using the square root extraction feature of the 988. The above system has a flow range of 0 to 16 gallons per minute. The range low and range high parameters for input 1 would be set to 0 and 16 respectively. The input 1 linearization prompt [lin1] would then be set to square root extraction [root]. You can see from the above graph that without square root extraction to linearize the signal it would not be use- ful for controlling the process. General Software Features, Chapter 8 WATLOW Series 988 User’s Manual 8.15 General Software Ramp To Set Point Requirements This feature is standard on all units. Overview Ramp to set point enables the Series 988 to ramp the set point at a user- defined rate. This allows the controller to start up a system or change between set points at a rate that will not stress the product or system components. The ramp rate is defined in degrees per minute. Ramp to set point can be initiated at start up only, or at start up and also on any set point changes. When a ramp is initiated, the starting point for the ramp is the current process value. If the ramp is initiated on start up, the Series 988 looks at the process value upon power up, and uses that value as the starting point for the ramp. If a set point change initiates the ramp to set point function, the controller looks at the process value when the change is made and uses that value as the starting point for the ramp. If the set point is changed during a ramp, the process value at the time of the change becomes the starting point for the new ramp. General Software Features, Chapter 8 8.16 WATLOW Series 988 User’s Manual General Software heaters Muffle Furnace W WA ATL TL W W input 1 output 1 limit limit PROCESS sensor temperature sensor L1 L2 L3 L4 DEV DISPLAY % OUT AUTO MAN MODE heaters SERIES 988 Figure 8.17 - Sample Application Muffle furnace with ramp to set point. An engineer needs to control the temperature of a muffle furnace. The fur- nace set point must be ramped up at a defined rate to prevent stressing the muffle and other system components. By enabling the ramp to set point function in the Series 988, the engineer can control the rate at which the set point will rise. Ramp to set point is enabled in the Global Menu using the Ramping Function prompt [‘‘rp]. To ramp on start up only, select start [Strt]. To ramp on start up and on any set point changes, select set point [StPt]. The ramp rate [rate] is in degrees per minute. For further protection of the system, output 2, 3 or 4 can be configured as a rate alarm, monitoring the rate of increase or decrease in the process variable on input 1. The Alarm Low [A2LO] and Alarm High [A2HI] prompts (The “2” in these examples refers to output 2.) establish the ramp-down and ramp-up rate set points, respectively, in degrees per minute. General Software Features, Chapter 8 WATLOW Series 988 User’s Manual 8.17 General Software Remote Set Point Requirements Input 2 must be either a thermocouple (98_ _-_1_ _-_ _ _ _ ) or universal signal conditioner (98_ _-_2_ _-_ _ _ _). NOTE: Make sure all input To use a Series 988 as a master controller, choose one of the retransmit and output options for output 3 of the master (98_ _-_ _ _ _-M_ _ _ for 0-20mA or 4- impedances are 20mA; or 98_ _-_ _ _ _-N_ _ _ for 0-5Vº (dc), 1-5Vº or 0-10Vº). compatible. Overview NOTE: The remote set point feature allows the Series 988 to use a thermocouple, Input 1 and 2 are not RTD or process signal at input 2 to establish the set point. This feature isolated from each gives the Series 988 the ability to have its set point value manipulated by other. an external source. A common application would use one ramping con- troller with a set-point retransmit output to ramp multiple controllers using the remote set point. Or you could use an analog output from a PLC to send set point values to a Series 988. You may select between local and remote set points at the front panel, with an event input, from a remote computer using the communicatons feature or from an external switch using an event input. General Software Features, Chapter 8 8.18 WATLOW Series 988 User’s Manual General Software zone 1 zone 2 zone 3 zone 4 zone 5 zone 6 zone 7 zone 8 Master W WA ATL TL W W PROCESS Remote Remote Remote Remote Remote Remote Remote W WA ATL TL W W W WA ATL TL W W W WA ATL TL W W W WA ATL TL W W W WA ATL TL W W W WA ATL TL W W W WA ATL TL W W L1 L2 L3 L4 DEV DISPLAY % OUT PROCESS PROCESS PROCESS PROCESS PROCESS PROCESS PROCESS AUTO MAN MODE L1 L2 L3 L4 L1 L2 L3 L4 L1 L2 L3 L4 L1 L2 L3 L4 L1 L2 L3 L4 L1 L2 L3 L4 L1 L2 L3 L4 SERIES 988 DEV DEV DEV DEV DEV DEV DEV % OUT DISPLAY % OUT DISPLAY % OUT DISPLAY % OUT DISPLAY % OUT DISPLAY % OUT DISPLAY % OUT DISPLAY AUTO AUTO AUTO AUTO AUTO AUTO AUTO MAN MAN MAN MAN MAN MAN MAN MODE MODE MODE MODE MODE MODE MODE SERIES 988 SERIES 988 SERIES 988 SERIES 988 SERIES 988 SERIES 988 SERIES 988 output 3 input 2 input 2 input 2 input 2 input 2 input 2 input 2 Figure 8.19 - Sample Application Zone heating with An engineer has a machine with eight independent zones of heat. He remote set point. wants to change set points on all zones without having to adjust each con- trol individually. This can be achieved using a Series 988 with a 0-5Vº (dc) retransmit output as the master controller. The seven remote 988s will use the 0-5Vº (dc) signal on input 2 as a remote set point. When the set point is changed on the master controller, the retransmit output changes the set points of the seven remote controllers. By enabling the ramp to set point feature in the master controller, all eight zones are ramped up to set point at a user-defined rate on power up. The retransmit output from the master Series 988 is set so that 0Vº (dc) represents 0°F and 5Vº (dc) represents 800°F. On the remote controllers, set the input 2 DIP switch to the position for the 0-5, 1-5, 0-10Vº (dc) process input. In the Input Menu, under the Input 2 prompt [‘In2], select 0-5. The Remote Set Point prompt [‘rsp] should be set to ON [‘‘on] and decimal 2 [deC2] set to 0. The range low 2 [‘rL2] and the range high 2 [‘rH2] parameters will establish the scaling for the remote set point input. Range low 2 [‘rL2] should be set to 0 and range high 2 [‘rH2] should be set to 800. To operate a specific zone ten degrees hotter than the others, increase the range low 2 [‘rL2] to 10 and the range high 2 [‘rH2] to 810. With remote set point [‘rSP] enabled and local [‘‘‘L] selected under the Local-remote prompt [‘L-r] in the System Menu, the set point is adjusted using the up-arrow and down-arrow keys. Selecting remote [‘‘‘r] under the Local-remote prompt [‘L-r], disables the up-arrow and down-arrow keys, allowing the set point value to be manipulated by the input 2 signal. General Software Features, Chapter 8 WATLOW Series 988 User’s Manual 8.19 General Software Retransmit Requirements Output 3 is used for the retransmit option. Choose either a milliamp (98_ _-_ _ _ _-M_ _ _) or a voltage (98_ _-_ _ _ _-N_ _ _) signal. Select the output range in the Output Menu. Overview The retransmit feature can be used to transmit an analog signal repre- NOTE: senting the value of either input process variable or the target set point Enhanced software variable. The retransmit signal is factory configured as either a milliamp is not required for (98_ _-_ _ _ _-M_ _ _) or a voltage (98_ _-_ _ _ _-N_ _ _) signal. In choosing this feature. the type of retransmit signal the operator must take into account the input impedance of the device to be retransmitted to and the required sig- nal type, either voltage or milliamps. Typically applications might use the retransmit option to record one of the variables with a chart recorder or to generate a set point for other controls in a multi-zone application (see page 8.19). General Software Features, Chapter 8 8.20 WATLOW Series 988 User’s Manual General Software Heat-treat Oven W WA ATL TL W W input 1 output 1 temperature limit PROCESS sensor limit L1 L2 L3 L4 sensor output 3 DEV DISPLAY % OUT AUTO MAN heaters MODE SERIES 988 Chart Recorder Figure 8.21 - Sample Applications Heat-treat oven with A Series 988 is being used to control the temperature of a heat-treat oven. retransmit. The temperature of the process must be recorded on a chart recorder. The oven temperature range stays between 600° and 900° F. The chart recorder requires a 4-20mA signal. In the Output Menu [OtPt] set analog output [Aout] to [Prc1] to tag the input 1 process value as the parameter to be retransmitted. Set retransmit low limit [‘ArL] to 600 to set the low range for the retransmit signal to 600. Set retransmit high limit [‘ArH] to 900 to set the high range for the retransmit signal to 900. Set retransmit calibrate offset [ACAL] to 0, assuming there is no calibration offset required. The retransmit output will be 4mA until the oven temperature is greater than 600 degrees F, at which point the signal will increase with tempera- ture to 20mA at 900° F and will not exceed 20mA. General Software Features, Chapter 8 WATLOW Series 988 User’s Manual 8.21 General Software Slidewire Feedback Requirements A slidewire configuration uses at least two inputs and two control out- puts. Input 2 can only be selected as a slidewire input (98_ _-_3_ _-_ _ _ _). NOTE: Outputs must be Overview compatible with the slidewire valve actu- The Series 988 can control the position of a valve with a slidewire feed- ators. back position indicator. The controller senses the resistance of the slidewire and compares it to the range low and range high settings to determine the valve position. The controller compares this to the percent output and takes action to match the two by opening or closing the valve. Set the hunt [hunt] parameter to limit valve hunting. The value is set for the percent of output (0.0 to 100.0). When the valve is within this dead band, a change in output greater than half the hunt parameter is required to trigger action. Output 1 responds to “close” commands and output 2 responds to “open” commands. General Software Features, Chapter 8 8.22 WATLOW Series 988 User’s Manual General Software Gas-fired Furnace Valve Actuator W WA ATL TL W W input 1 output 1 (close) temperature limit PROCESS sensor output 2 (open) limit input 2 L1 L2 L3 L4 sensor DEV DISPLAY % OUT AUTO MAN gas MODE SERIES 988 flow gas valve cut-off valve slidewire input Figure 8.23 - Sample Application Gas-fired furnace A Series 988 controls the gas valve for a gas-fired furnace to heat treat with slidewire feed- large metal parts. First the controller must be “married” to the slidewire back. feedback from the valve actuator. To do this, first set the Input 2 prompt [‘In2] to slidewire [Slid]. Advance to the Learn Low Resistance prompt [LrnL]. Close the valve manually to the minimum resistance reading from the slidewire. Select [‘yes] in the upper display and press the Mode key � to advance to the Learn High Resistance prompt [LrnH]. Manually open the valve (maximum slidewire resistance). Select [‘YES] in the upper display and press the Mode key �. At this point both the high and low resistance values have been learned and stored in the range low 2 and range high 2 parameters. You can also manually set the range low and range high values. From the slidewire specifications, determine the low and high resistance values and enter these at the Range Low [‘rL2] and Range High [‘rH2] prompts. Once the control is operating, adjust the hunt [hunt] parameter, to mini- mize valve oscillations. The hunt parameter sets up a dead band on both sides of the current valve position. The desired valve position is then com- pared to the actual position. If the difference is greater than the one-half of the hunt value, the Series 988 repositions the valve to achieve the temper- ature set point. Once repositioning is complete, the dead band is recalcu- lated for the new valve position. General Software Features, Chapter 8 WATLOW Series 988 User’s Manual 8.23 Chapter 9 Enhanced Software Cascade 9.2 Differential 9.6 Dual PID 9.8 Duplex 9.10 Ratio 9.12 Enhanced Software Features, Chapter 9 WATLOW Series 988 User’s Manual 9.1 Enhanced Software Cascade Requirements Cascade control requires enhanced software and two analog inputs, input 1 to monitor the primary, or outer, loop and input 2 to monitor the sec- ondary, or inner, loop. At least one control output is required to control the process. Overview Cascade control can handle a difficult process with minimal overshoot, while reaching the set point quickly. This minimizes damage to system components and allows for oversizing heaters for optimal heat-up rates. Heater life is also extended by reducing thermal cycling of the heater. Systems with long lag times between the energy source (heater, steam, etc.) and the measured process value cannot be controlled accurately or efficiently with a single control loop, because a lot of energy can build up before a response is detected. This can cause the system to overshoot A the set point, which could damage set the heater, product or heat transfer point B medium, such as a heat transfer fluid. This graph illustrates a system with C Figure 9.2a - System a long lag time. Curve A represents heat-up profiles a single-control system with PID using three different parameters that allow a maximum control methods. heat-up rate. Too much energy is time introduced and the set point is over- shot. In most long-lag-time systems the process value may never settle out to an acceptable error. Curve C represents a single-control system tuned to minimize overshoot. This results in unacceptable heat-up rates, with the final value taking hours to reach. Curve B shows a cascade system that limits the energy Two controllers in one introduced into the sys- tem, allowing an opti- output 1 input 1 input 2 In2 mal heat-up rate with In1 % out minimal overshoot. Figure 9.2b - The SP SPint cascade feature % int This drawing shows two allows one Series 988 controller to controllers configured Outer-loop Inner-loop internalize the func- as a cascade system. Controller Controller tions of two con- The second controller trollers. generates the internal set point. The Series 988 effectively combines both controllers into a single package. The primary controller measures the process in the outer, or primary, loop with input 1 and compares the value to the desired set point. The differ- Enhanced Software Features, Chapter 9 9.2 WATLOW Series 988 User’s Manual Enhanced Software ence between the set point and the process temperature generates an internal percent output value for the second, or inner loop, controller. This value cannot be seen by the operator. This internal percent (% int) output generates the internal set point for the secondary, or inner loop. The sec- ondary loop uses this set point and the value of input 2 (typically attached to the heater sheath) to control the heat source temperature. Algorithm The following formulas show how the primary control sends a set point (based on input 2 range-high and range-low values) to the secondary con- trol. The secondary control uses this set point (SP int) to generate a per- cent output (% out) to the heater. 1.) % = PID Set A [In1 - SP] int 2.) SP = (rH2 - rL2) * % + rL2 int int 3.) % = PID Set B [In2 - SP ] out int The critical parameters are the range settings for input 2 of the inner loop controller. The range-high value (rH2) is the maximum allowed set point for the secondary, or inner, loop. The range-low value (rL2) is the mini- mum allowed set point. In a system controlling a heater this would be the maximum and minimum desired sheath temperatures of the heater. Typically the range-low term is set below the ambient temperature. Otherwise the system could never fully cool down. Setup When tuning a cascade system, the inner loop must be tuned first. In a heating system the inner loop is comprised of the output device and the input 2 sensor, which usually measures the heater sheath temperature. The output device controls a power switching device, which, in turn switches the heater. The set point for the inner loop is generated by the outer loop and will have a range between range low 2 [‘rL2] and range high 2 [‘rH2]. Before tuning the inner loop you must make sure [‘rL2] and [‘rH2] are set properly. Set the value of [‘rL2] slightly lower than the ambient tem- perature, otherwise the system will never fully cool down. Set [‘rH2] to the maximum desired heat source temperature. The inner loop can be auto-tuned by setting [‘AUt] to [Pidb]. While auto-tuning, the inner loop will be controlled in an ON/OFF mode at a set point equal to [AtSP] x [‘rH2]. Once the inner loop, PID B, has completed auto-tuning, we can then auto- tune the outer loop, PID A. The outer loop will generate the set point for the inner loop. This is done by comparing the value of the input 1 sensor to the process set point, performing the control algorithm by using the val- ues of [PidA], then generating a set point between [‘rL2] and [‘rH2]. Enhanced Software Features, Chapter 9 WATLOW Series 988 User’s Manual 9.3 Enhanced Software The outer loop can be auto-tuned by setting [‘AUt] to [PidA]. While auto- tuning, the outer loop will be controlled in an on/off mode at a set point equal to [AtSP] x [‘SP1]. In a heating application, make sure the set point is set at a value above ambient temperature. In most cases, the auto-tuning feature will tune [PidA] for acceptable control. If not, you must then manually tune the outer loop. Before beginning manual tuning, record the values of [Pb1A] and [rE1A] generated by the auto-tuning feature. The auto-tune for the outer loop will not generate a value for [rA1A], because rate (derivative) in the outer loop seems to cause instability in most systems. Start manual tuning by setting [rE1A] to [‘)00]. Enter the desired process set point and let the system stabilize. Once the system stabilizes, observe the value of [‘Pr2] in the Display Menu. If the [‘Pr2] value fluc- tuates, make the proportional band setting [Pb1A] wider until the [‘Pr2] value stabilizes. Make adjustment [Pb1A] in 5° to 10° increments, allowing time between adjustments for the system to stabilize. Once [‘Pr2] has stabilized, observe percent power in the display loop. It should be stable, ±10%. At this point, the process temperature should also be stable, but will exhibit droop (stabilized below set point). The droop can be eliminated with reset of integral. Start with a setting of 0.01; allow 10 minutes for the process temperature to come up to set point. If it has not, increase the setting to 0.05 and wait another 10 minutes. After this, double the reset setting until process value equals the set point. If the process becomes unstable, the reset value is too large. Decrease the setting until the process stabilizes. Enhanced Software Features, Chapter 9 9.4 WATLOW Series 988 User’s Manual Enhanced Software outer-loop thermocouple WATL W oil in oil out input 1 output 1 PROCESS input 2 L1 L2 L3 L4 DEV DISPLAY % OUT AUTO MAN MODE SERIES 988 inner-loop heater limit thermocouple limit sensor Lube Oil Tank Figure 9.5 - Lube oil Sample Application tank with cascade A Series 988 controller is used to heat lube oil to 125°F with a screw-plug- control. style heater. To protect the oil from breaking down and maximize its life, it is desirable to limit the maximum heater sheath temperature to 250° F. The Series 988 is ordered with two thermocouple inputs. Input 2, the inner loop in the cascade configuration, measures the heater sheath. Input 1, the outer loop, measures the lube oil temperature before it leaves the tank. The external set point is 125°. By setting range high 2 [‘rH2] to 250° the set point for the heater sheath will be limited, thus extending the lube oil life. Enhanced Software Features, Chapter 9 WATLOW Series 988 User’s Manual 9.5 Enhanced Software Differential Requirements Two inputs and the enhanced software option are required. Overview Differential control allows the Series 988 to control one process at a differ- ence to another process. Input 2 acts as a remote set point input. However the displayed set point indicates the desired difference between input 1 and input 2. The set point that input 1 will use is determined by the equa- tion: internal set point = input 2 + differential set point The lower display shows the differential set point, which can be adjusted with the increment (up-arrow) and decrement (down-arrow) keys. Please note that while in the differential control mode the internal set point for input 1 cannot be viewed and must be calculated with the equa- tion. Enhanced Software Features, Chapter 9 9.6 WATLOW Series 988 User’s Manual Enhanced Software Water Boiler W WA ATL TL W W outside input 1 output 1 limit PROCESS temperature temperature limit sensor input 2 sensor L1 L2 L3 L4 sensor DEV DISPLAY % OUT AUTO MAN MODE SERIES 988 heating element Figure 9.7 - Water Sample Application boiler with differen- tial control. The most common application using differential control is to maintain water temperature in a boiler at a differential to the outside air tempera- ture. A thermocouple at input 2 senses the outside air temperature and adjusts the internal set point to maintain the boiler water temperature 120 degrees higher. Substituting values we have: boiler temperature = outside temperature + 120°. In this application the system uses two type J thermocouples: one to sense boiler water temperature (input 1) and one to sense the outside air temperature (input 2). To configure the controller, first enable input 2 (set [‘In2] to [‘‘‘J] ). To enable the differential control algorithm set the control prompt [CntL] in the Global Menu to differential [diFF]. Press the DISPLAY key. The lower display will read 0, indicating no differential between input 1 and input 2. Adjust the set point to 120. The internal set point for input 1 is now equal to the input 2 value plus 120, which will maintain the boiler water tem- perature 120 degrees higher than the outside air temperature. Enhanced Software Features, Chapter 9 WATLOW Series 988 User’s Manual 9.7 Enhanced Software Dual PID Sets Requirements The Series 988 controller needs the enhanced software option to use dual PID sets. Overview Standard software units have a single set of PID parameters. Units with enhanced software can use two independent sets of heat/cool PID para- meters, PID A [PidA] and PID B [Pidb]. To enable dual PID, enter the Global Menu and set the algorithm prompt [ALgO] to dual PID [Pid2]. This second set of PID parameters enables the controller to switch between two sets of PIDs, to compensate for changes in the system char- acteristics. This need can arise from a variety of circumstances, such as significant set point changes (controlling at 250, then controlling at 750), operating a furnace with half a load versus a full load of steel, changing the speed of a conveyor through a curing oven or using different materials in an extruder. Series 988 controllers can be configured to switch between PID A and PID B based on a process value, a set point value or the event input status. • At [Pid2] PID 2 Crossover Selection (Global Menu) select what will cause the switch: • [Proc] Crossover Process Value, (input 1), PIDs will switch based on the crossover process value; • [StPt] Crossover Set Point (1) Value, PIDs will switch at the crossover set point value, PID A used below the crossover point and PID B above; • [‘‘no] no crossover. • At [‘Ei1] Event Input 1 or [‘Ei2] Event Input 2 select [‘Pid]: • PID A is used when the event input switch is open; • PID B when the event input switch is closed. (Note: One event input is standard on all units, a second event input is an option.) Enhanced Software Features, Chapter 9 9.8 WATLOW Series 988 User’s Manual Enhanced Software Test Chamber chiller W WA ATL TL W W input 1 output 1 temperature PROCESS output 2 limit sensor input 2 L1 L2 L3 L4 sensor limit DEV DISPLAY % OUT pressure AUTO MAN switch MODE heater SERIES 988 Figure 9.9 - Test Sample Application chamber controlled with dual PID sets. A test engineer needs to control the temperature in a test chamber that can be operated at normal atmosphere or under vacuum conditions. If he tunes the controller for normal atmospheric conditions, when he reaches the portion of his test that requires a vacuum, he must stop the test and enter new PID parameters to maintain stable temperatures. The system characteristics are so very different, that one set of PIDs will not give satis- factory results under both normal and vacuum conditions. The Series 988 solves this problem with the dual PID option. Auto-tuning PID A under normal atmospheric conditions, then auto-tuning PID B under vacuum conditions, establishes PID values for two sets of system characteristics. A pressure switch connected to the event input tells the controller when to switch between PID A and PID B, eliminating the need to change PID values manually. Enhanced Software Features, Chapter 9 WATLOW Series 988 User’s Manual 9.9 Enhanced Software Duplex Requirements The duplex control feature requires enhanced software and a process out- put. NOTE: Overview Duplex applications Certain systems require that a single process output control both heating require a special and cooling outputs. A Series 988 controller configured with enhanced valve. software and a process output can function as two separate outputs. With a 4 to 20mA output the heating output will operate from 12 to 20mA (0 to +100 percent) and the cooling output will operate from 12 to 4mA (0 to - 100 percent). In some cases this type of output is required by the device that the 988 controls, such as a three-way valve that opens one way with a 12 to 20mA signal and opens the other way with a 4 to 12mA signal. This feature reduces the overall system cost by using a single output to act as two outputs. Enhanced Software Features, Chapter 9 9.10 WATLOW Series 988 User’s Manual Enhanced Software Fluid Sample Container W WA ATL TL W W input 1 output 1 hot water PROCESS temperature L1 L2 L3 L4 transmitter DEV DISPLAY % OUT AUTO MAN MODE SERIES 988 cold water Figure 9.11 - Fluid Sample Application sample container with duplex control. The system outlined above uses a three-way valve for heating and cooling a fluid sample. Coils surround the container holding the fluid. When the temperature needs to be raised, the signal to the valve will be between 12 and 20mA, sending hot water through the coils. When cooling is required, the signal will be between 12 and 4mA, sending cold water through the coils. Enhanced Software Features, Chapter 9 WATLOW Series 988 User’s Manual 9.11 Enhanced Software Ratio Requirements Ratio control requires enhanced software. Two analog inputs are required to monitor the process, and at least one output adjusts the controlled part of the process. Overview This feature allows the Series 988 to control one process as a ratio of another process. This is especially useful in applications that mix two materials, whether steam, paint or food ingredients. Input 2 of the controller measures the part of the process that is either uncontrolled or controlled by another device. The part of the process con- trolled by the 988 will be maintained at a level equal to the quantity mea- sured at input 2 multiplied by the ratio term set by the user. Input 1 mon- itors the controlled part of the process. Enhanced Software Features, Chapter 9 9.12 WATLOW Series 988 User’s Manual Enhanced Software W WA ATL TL W W input 1 output 1 mixed paint PROCESS input 2 L1 L2 L3 L4 DEV DISPLAY % OUT flow flow controlled flow AUTO MAN transmitter transmitter of pigment MODE Mixing Tank SERIES 988 uncontrolled motorized flow of valve unmixed paint Figure 9.13 - Mixing Sample Application tank with ratio con- Blue pigment must be added to paint at a ratio of one part per 100 to cre- trol. ate a mixed paint of the desired color. The uncolored paint flows into the mixer in an uncontrolled stream that is set manually and sensed by input 2. A motorized valve controls the flow of pigment, which is monitored by the flow sensor to input 1. The flow rate of the uncolored paint determines the set point for the motorized valve that controls the pigment flow. If an operator needs to change the rate of flow for the uncolored paint, the set point will shift accordingly to maintain the correct ratio in the mixing tank. The application engineer set up this feature in software by choosing ratio [rAti] as the control [CntL] parameter in the Global Menu. The set point value displayed was then a ratio value. He entered 0.01 to maintain an input 1:input 2 ratio of 1:100. Enhanced Software Features, Chapter 9 WATLOW Series 988 User’s Manual 9.13 Appendix Glossary A.2 Specifications A.4 Warranty and Returns A.5 Index A.6 Menu Overview A.10 Model Number A.11 Declaration of Conformity A.12 Appendix WATLOW Series 988 User’s Manual A.1 Glossary, A - L annunciator — A visual display that uses pilot lights to (RC) filter. indicate the former or existing condition of several items in digital adaptive filter — A filter that rejects high a system. frequency input signal noise (noise spikes). heat/cool output filter — A filter that slows the change in the response of the heat or cool output. The out- bumpless transfer — A smooth transition from auto (closed loop) to manual (open loop) operation. The control put responds to a step change by going to approximately output(s) does not change during the transfer. 2/3 its final value within the number of scans that are set. burst fire — A power control method that repeatedly turns form A — A single-pole, single-throw relay that uses only the normally open (NO) and common contacts. These con- on and off full ac cycles. Also called zero-cross fire, it switches close to the zero-voltage point of the ac sine wave. tacts close when the relay coil is energized. They open Variable-time-base burst fire selectively holds or transits when power is removed from the coil. ac cycles to achieve the desired power level. form B — A single-pole, single-throw relay that uses only the normally closed (NC) and common contacts. These calibration offset — An adjustment to eliminate the dif- ference between the indicated value and the actual process contacts open when the relay coil is energized. They close value. when power is removed from the coil. cascade — Control algorithm in which the output of one form C — A single-pole, double-throw relay that uses the normally open (NO), normally closed (NC) and common control loop provides the set point for another loop. The second loop, in turn, determines the control action. contacts. The operator can choose to wire for a Form A or Form B contact. closed loop — A control system that uses a sensor to measure a process variable and makes decisions based on hunting — Oscillation of process temperature between the set point and the process variable. that feedback. cold junction — See junction, cold. hysteresis — A change in the process variable required to re-energize the control or alarm output. Sometimes called cold junction compensation — Electronic means to com- switching differential. pensate for the effective temperature at the cold junction. integral — Control action that automatically eliminates current transformer — A transformer designed for mea- offset, or droop, between set point and actual process tem- suring electrical current. perature. See reset, automatic. isolation — Electrical separation of sensor from high volt- dead band — The range through which a variation of the input produces no noticeable change in the output. In the age circuitry. Allows use of grounded or ungrounded sens- dead band, specific conditions can be placed on control ing element. output actions. Operators select the dead band. It is usu- ally above the heating proportional band and below the Joint Industrial Standards (JIS) — A Japanese agency that establishes and maintains standards for equipment cooling proportional band. and components. Also known as JISC (Japanese Industrial default parameters — The programmed instructions that Standards Committee), its function is similar to Germany’s are permanently stored in the microprocessor software. Deutsche Industrial Norm (DIN). JIS — Joint Industrial Standards. derivative — The rate of change in a process variable. Also known as rate. See PID. junction — The point where two dissimilar metal conduc- Deutsche Industrial Norm (DIN) — A set of technical, sci- tors join to form a thermocouple. entific and dimensional standards developed in Germany. cold junction — Connection point between ther- mocouple metals and the electronic instrument. See refer- Many DIN standards have worldwide recognition. ence junction. DIN — See Deutsche Industrial Norm. grounded junction — Type of thermocouple probe in which the hot, or measuring junction, is an inte- droop — In proportional controllers, the difference gral part of the sheath material. No electrical isolation is provided. between set point and actual value after the system stabi- lizes. isolated junction — A form of thermocouple probe construction in which the measuring junction is duty cycle — The percentage of a cycle time in which the fully enclosed in a protective sheath and electrically isolat- output is on. ed from it. Commonly called an ungrounded junction. reference junction — The junction in a thermo- external signal conditioner power supply — A dc voltage couple circuit held at a stable, known temperature (cold source that powers external devices. junction). Standard reference temperature is 32°F (0°C). thermocouple junction — The point where the filter — two dissimilar metal conductors join. In a typical thermo- couple circuit, there is a measuring junction and a refer- digital filter (DF) — A filter that slows the response of a system when inputs change unrealistically ence junction. See reference junction. or too fast. Equivalent to a standard resistor-capacitor ungrounded junction — See isolated junction. Appendix A.2 WATLOW Series 988 User’s Manual Glossary, M - Z linearization, square root — The extraction of a linear perature. Also see integral. signal from a nonlinear signal corresponding to the mea- automatic reset — The integral function of a PI sured flow from a flow transmitter. Also called square root or PID temperature controller that adjusts the process extraction. temperature to the set point after the system stabilizes. The inverse of integral. Modbus (RTU) — Remote Terminal Unit. automatic power reset — A feature in latching limit controls that does not recognize power outage as a NEMA 4X — A NEMA specification for determining resis- limit condition. When power is restored, the output is re- tance to moisture infiltration. This rating certifies the con- energized automatically, as long as the temperature is within limits. troller as washable and corrosion resistant. manual reset — 1) A feature on a limit control on/off — A method of control that turns the output full on that requires human intervention to return the limit to until set point is reached, and then off until the process normal operation after a limit condition has occurred. 2) error exceeds the hysteresis. The adjustment of a proportional control to raise the pro- portional band to compensate for droop. open loop — A control system with no sensory feedback. no key reset — A method for resetting the con- troller’s memory (for instance, after an EPROM change). output — Control signal action in response to the differ- ence between set point and process variable. resistance temperature detector (RTD) — A sensor that uses the resistance temperature characteristic to measure overshoot — The amount by which a process variable temperature. There are two basic types of RTDs: the wire exceeds the set point before it stabilizes. RTD, which is usually made of platinum, and the thermis- tor, which is made of a semiconductor material. The wire P control — Proportioning control. RTD is a positive temperature coefficient sensor only, while the thermistor can have either a negative or positive PD control — Proportioning control with derivative (rate) temperature coefficient. action. retransmit output — An analog output signal that may PDR control — Proportional derivative control with manu- be scaled to represent the process value or set point value. al reset, used in fast responding systems where the reset causes instabilities. With PDR control, an operator can RTD — See resistance temperature detector. enter a manual reset value that eliminates droop in the system. slidewire feedback — A method of controlling the position of a valve. It uses a potentiometer to vary resistance and indicate position of the valve. PI control — Proportioning control with integral (automat- ic reset) action. switching sensitivity — In on/off control, the tempera- PID — Proportional, integral, derivative. A control mode ture change necessary to change the output from full on to with three functions: proportional action dampens the sys- full off. See hysteresis. tem response, integral corrects for droop, and derivative prevents overshoot and undershoot. thermal system — A regulated environment that consists of a heat source, heat transfer medium or load, sensing process variable — The parameter that is controlled or device and a control instrument. measured. Typical examples are temperature, relative thermocouple (t/c) — A temperature sensing device humidity, pressure, flow, fluid level, events, etc. The high process variable is the highest value of the process range, made by joining two dissimilar metals. This junction pro- expressed in engineering units. The low process variable is duces an electrical voltage in proportion to the difference the lowest value of the process range. in temperature between the hot junction (sensing junction) and the leadwire connection to the instrument (cold junc- tion). proportional band (PB) — A range in which the propor- tioning function of the control is active. Expressed in units, degrees or percent of span. See PID. thermocouple break protection — The ability of a con- trol to detect a break in the thermocouple circuit and take proportional control — A control using only the P (pro- a predetermined action. portional) value of PID control. three-mode control — Proportioning control with integral rate band — A range in which the rate function of a con- (reset) and derivative (rate). Also see PID. troller is active. Expressed in multiples of the proportional band. See PID. time proportioning control — A method of controlling power by varying the on/off duty cycle of an output. This ratio — A method by which the controller measures the variance is proportional to the difference between the set flow of an uncontrolled variable and uses a proportion of it point and the actual process temperature. to control the flow of a second variable. zero cross — Action that provides output switching only at or near the zero-voltage crossing points of the ac sine reference junction — See junction. wave. See burst fire. reset — Control action that automatically eliminates off- set, or droop, between set point and actual process tem- zero switching — See zero cross. Appendix WATLOW Series 988 User’s Manual A.3 • Process, 0-20mA, 4-20mA into 800Ω maximum, 0- 5Vº (dc), 1-5Vº (dc) or 0-10Vº (dc) into 1kΩ mini- Specifications mum , reverse acting, isolated. 1 (1234) • Electromechanical relay, Form A/B, 5A @ 120/240V� (ac), 6A @ 28Vº (dc), 1/8 hp. @ 120V� (ac) or Control Mode 125VA @ 120V� (ac). Without contact suppression. • Dual input, quad output, optional retransmit of set • External transmitter power supply, 5V ±5% @ 30mA, point or process variable. 12V ±5% @ 30mA or 20V ±5% @ 30mA. • Programmable direct and reverse acting control out- • EIA/TIA-232 communications or EIA/TIA-485, EIA/TIA- puts. 422 communications, opto-isolated. • One-step auto-tuning. Accuracy Operator Interface • Calibration accuracy and sensor conformity: ± 0.1% of • Local/remote set point capability. span, ±1 LSD, 77°F ± 5°F (25°C ± 3°C) ambient and • Dual, 4-digit LED displays: upper, 0.4” (10mm); lower, rated line voltage ±10%. 0.3” (8mm). • Accuracy span: 1000°F (540°C) minimum. • Mode, Auto/Man, Display, Up and Down keys. • Temperature stability: ± 0.2°F/°F (0.1°C/°C) change in Input ambient. • Contact input for software function select. • Voltage stability: ± 0.01% of span /% of rated line volt- • Type J, K, T, N, C(W5) , D(W3) , E, R, S, B, Pt 2 2 2 2 age. thermocouple, 1° or 0.1° RTD. Agency Approvals • 0-50mVº (dc), 0-20mA, 4-20mA, 0-5Vº (dc), 1-5Vº • UL, C-UL File #43684 (dc), 0-10Vº (dc) process. • CE: 89/336/EEC Electromagnetic Compatibility • Slidewire, digital event input or heater current options. Directive. • Sensor break protection de-energizes control output to EN 50081-2: 1994 Emissions. protect system or selectable bumpless transfer to EN 50082-2: 1995 Immunity. manual operation. Latching or non-latching. • 73/23/EEC Low-Voltage Directive. • °F or °C display or process units, user selectable. EN 61010-1: 1993 Safety. • NEMA 4X Sensor Ranges Terminals J t/c: 32 to 1500°F or 0 to 816°C • #6 compression universal head screws (tighten to 5 K t/c: -328 to 2500°F or -200 to 1371°C inch/pounds maximum), accepts 20-14 gauge wire. T t/c: -328 to 750°F or -200 to 399°C Line Voltage/Power N t/c: 32 to 2372°F or 0 to 1300°C • 100 to 240V� (ac) +10%/-15%, 50/60Hz, ± 5%. 1 R t/c: 32 to 3200°F or 0 to 1760°C • 24 to 28V� (ac/dc) +10%/-15%, 50/60Hz, ±5%. 1 S t/c: 32 to 3200°F or 0 to 1760°C • 16VA maximum. • Fused internally (factory replaceable only) Slo-Blo® B t/c: 1598 to 3300°F or 870 to 1816°C type (time-lag): 2A, 250V for high-voltage versions; E t/c: -328 to 1470°F or -200 to 799°C 5A, 250V for low-voltage versions. C t/c (W5) : 32 to 4200°F or 0 to 2316°C 2 • Non-volatile memory retains data if power fails. D t/c (W3) : 32 to 4200°F or 0 to 2316°C 2 Operating Environment Pt 2 : 32 to 2543°F or 0 to 1395°C 2 • 32 to 149°F (0 to 65°C), 0 to 90% RH, non-condens- 1°RTD (JIS): -328 to 1166°F or -200 to 630°C ing. 1°RTD (DIN): -328 to 1472°F or -200 to 800°C Storage Temperature • -40 to 185°F (-40 to 85°C). 0.1°RTD Mechanical (JIS and DIN):-99.9 to 999.9°F or -73.3 to 537.7°C • 1/8 DIN panel mount, NEMA 4X (IP65 equivalent) front 0-5Vº (dc): -999 to 9999 panel. 1-5Vº (dc): -999 to 9999 • Overall width x height x depth: 0-10Vº (dc): -999 to 9999 horizontal - 4.03" x 2.18" x 4.74" 0-20mA: -999 to 9999 (102mm x 55mm x 120mm); 4-20mA: -999 to 9999 vertical - 2.18" x 4.03" x 4.74" (55mm x 102mm x 120mm). 0-50mVº (dc): -999 to 9999 • Depth behind panel; 4.06" (103mm). Slidewire: 100 to 1200Ω • Weight: less than or equal to 14.0oz (0.40kg). Current: 0 to 50A Sample/Update Rates Potentiometer: 0 to 1200Ω • 1 input: 10Hz. Output Options • 2 inputs: 5Hz. • Solid-state relay, 0.5A @ 24V� (ac) min., 253V� (ac) • Retransmit: 1Hz. max., opto-isolated, burst fire. With or without contact • Remote set point: 1Hz. suppression. • PID: 10Hz. • Open collector: Max. voltage 42Vº (dc), max. current • Outputs: 10Hz. 1A. • Display: 2Hz. • Switched dc signal: Min. turn-on voltage of 3Vº (dc) • Alarm Outputs: 1 Hz into min. 500Ω load; max. On voltage not greater than Resolution 32Vº (dc) into an infinite load, isolated. • Inputs: 16 bits. • Electromechanical relay , Form C, 5A @ 120/240V� • Outputs: 12 bits. 1 (ac), 6A @ 28Vº (dc), 1/8 hp. @ 120V� (ac) or 1 Electromechanical relays are warranted for 100,000 clo- 125VA @ 120V� (ac). With or without contact sup- sures only. Solid-state switching devices are recom- pression. Off-state output impedance with RC sup- mended for applications requiring fast cycle times or pression is 20kΩ. extended service life. 2 Not an ANSI symbol. A.4 WATLOW Series 988 User’s Manual Appendix Warranty/Returns Total Customer Satisfaction Warranty Returns The Watlow Series 988 is warranted to be free of 1. Call Watlow Customer Service, (507) 454-5300, defects in material and workmanship for 36 months for a Return Material Authorization (RMA) num- after delivery to the first purchaser for use, providing ber before returning any item for repair. We that the units have not been misapplied. Since need this information: Watlow has no control over their use, and some- • Ship to address • Bill to address times misuse, we cannot guarantee against failure. • Contact name • Phone number Watlow's obligations hereunder, at Watlow's option, • Ship via • Your P.O. number are limited to replacement, repair or refund of pur- • Symptoms and/or special instructions chase price, and parts which upon examination • Name and phone number of person returning prove to be defective within the warranty period the material. specified. This warranty does not apply to damage resulting from transportation, alteration, misuse or 2. Prior approval and an RMA number, from the abuse. Customer Service Department, is needed when returning any unused product for credit. Make sure the RMA number is on the outside of the carton, and on all paperwork returned. Ship on Watlow Controls a Freight Prepaid basis. Watlow Controls is a division of Watlow Electric Mfg. 3. After we receive your return, we will examine it Co., St. Louis, Missouri, a manufacturer of industrial and determine the cause for your action. electric heating products since 1922. Watlow begins with a full set of specifications and completes an 4. In cases of manufacturing defect, we will enter industrial product that is manufactured totally in- a repair order, replacement order, or issue cred- house, in the U.S.A. Watlow products include elec- it for material. A 20-percent restocking charge is tric heaters, sensors, controls and switching applied for all returned stock controls and devices. The Winona operation has been designing accessories. solid state electronic control devices since 1962, and has earned the reputation as an excellent sup- 5. If the unit is unrepairable, it will be returned to plier to original equipment manufacturers. These you with a letter of explanation. Repair costs will OEMs depend upon Watlow Controls to provide not exceed 50 percent of the original cost. compatibly engineered controls which they can incorporate into their products with confidence. Watlow Controls resides in a 100,000-square-foot marketing, engineering and manufacturing facility in Shipping Claims Winona, Minnesota. When you receive your Watlow control, examine the package for any signs of external damage it may have sustained enroute. If there is apparent dam- age either outside the box or to its contents, make a claim with the shipper immediately. Save the origi- nal shipping carton and packing material. Appendix WATLOW Series 988 User’s Manual A.5 Index a-h %OUT LED 3.1 DIN A.2 B 0-5Vº (dc) process wiring DIP switch functions 1.1 - 1.4 baud rate 4.45, 8.4 DIP switch locations 1.1 - 1.4 input 1 2.8 input 2 2.9 brackets 2.1 - 2.3 DIP switch setting bumpless transfer 4.35, 7.4 input 1.2 output 1 2.12 output 2 2.13 burst fire 8.1 - 8.3, A.2 lockout 1.4 0-10Vº (dc) process wiring output 1.3 display 6.11 input 1 2.8 C input 2 2.9 Display Key 3.1 calibration curve, RTD 2 4.14 Display Loop 3.2 output 1 2.12 output 2 2.13 calibration manual ii displays 3.1 Calibration Menu 6.13 - 6.14 documentation, maintaining ii, 6.9 0-20mA process wiring lockout 6.6 Down-arrow Key 3.1 input 1 2.8 input 2 2.9 calibration offset A.2 droop A.2 calibration offset 1 4.6 dual in-line package (DIP) switches 1.1 - output 1 2.12 output 2 2.13 calibration offset 2 4.14 1.4 calibration offset adjustment 7.3 dual PID sets 9.8 - 9.9 0-50mV (high impedance) wiring cascade control 9.2 - 9.5, A.2 duty cycle A.2 input 1 2.8 input 2 2.9 auto-tuning 9.3 duplex control 9.10 - 9.11 manual tuning 9.4 1-5Vº (dc) process wiring input 1 2.8 cascade action 4.37 E cautions iii input 2 2.9 Celsius 4.35 environmental chamber 8.7 output 1 2.12 clearing error codes 7.10 error code messages 7.8 output 2 2.13 closed loop A.2 error code results 7.10 4-20mA process wiring input 1 2.8 cold junction A.2 error codes, clearing 7.10 communications 8.4 - 8.5 error latching 4.36 input 2 2.9 Communications Menu 4.44 - 4.48, 8.4 event input 1 4.40 output 1 2.12 lockout 6.6 event input 1 Status 5.4 output 2 2.13 compression molding press 8.11 event input 1 wiring 2.11 consumer feedback iii event input 2 4.40 A controller chassis, removing 1.1, 7.5 event input 2 status 5.4 controlling output action 8.8 event input 2 wiring 2.10 access to panel back 2.2 control outputs off 8.8 external signal conditioner ac output wiring control type 4.36 power supply A.2 output 1 2.12 output 2 2.13 crossover process value 4.39 power supply DIPs 1.3 crossover set point value 4.39 power supply wiring output 3 2.14 current 8.10 output 2 2.13 output 4 2.15 current transformer 8.11, A.2 output 3 2.14 address 4.46 current transformer input 2.10 output 4 2.15 alarm deviation 7.6 current transformer wiring 2.10 cycle time process 7.6 F output 1 5.13 rate 7.7 output 2 5.16 Factory Menus 6.1 - 6.14 alarm 2 4.23 cycle time adjustment 7.3 factory ship date 6.8 alarm 2 high 5.5 alarm 2 low 5.4 failure mode 4.35 Fahrenheit 4.35 alarm 2 side 4.23 D feedback iii alarm 3 4.25 data bits & parity 4.45, 8.4 filter time constants 8.12 - 8.13 alarm 3 high 5.6 data communications ii, 2.15, 4.1, 8.4 input 1 4.7 alarm 3 low 5.5 alarm 3 side 4.26 Data Communications with the Watlow input 2 4.15 Series 988 Family of Controllers ii, fluid sample container 9.11 alarm 4 4.28 2.15, 4.1, 4.44 form A 7.5, A.2 alarm 4 high 5.7 date 6.3 form B 7.5, A.2 alarm 4 low 5.6 dead band 5.16, 8.6 - 8.7 form C A.2 alarm 4 side 4.29 alarm display, masked 7.6 sample application 8.7 front panel 3.1 decimal 1 4.4 front panel lockout 6.3, 8.8 alarm high 5.2 decimal 2 4.11 alarm jumper, changing 7.5 decimal point, location of 4.3, 4.35 alarm low 5.2 G Declaration of Conformity A.12 alarm reset 8.8 alarms 7.5 - 7.7 default 6.14, A.2 gas-fired furnace 8.23 derivative A.2 Global Menu 4.34 - 4.43, 9.8 alarms, latching 7.7 output 1 5.12 lockout 6.5 alarms, non-latching 7.7 output 2 5.15 Glossary A.2 - A.3 alarm silencing 7.7 deviation alarm 7.6 ground loops 2.4 - 2.5 algorithm 4.38, 9.3 ambient temperature 6.3 device address 8.4 DEV LED (set point deviation) 3.1 analog output 4.31 H Diagnostics Menu 6.7 - 6.12 annunciator 4.41, A.2 lockout 6.6 heater with digital event 8.9 Auto/Manual key 3.1, 7.4 differential control 9.6 - 9.7 heater current 8.10 - 8.11 Auto/Manual LED 3.1, 7.4 auto/manual operation 7.4, 8.8 digital event input options 8.8 - 8.9 heat-treat oven 8.21 digital event wiring high power limit 4.42 automatic operation 7.4 input 1 2.11 humidity chamber 8.13 auto-tune 5.7 input 2 2.10 hunt 4.16, 8.22, 8.23 auto-tune set point 4.42 dimensions 2.1 hunting A.2 auto-tuning 7.1, 9.3 Appendix A.6 WATLOW Series 988 User’s Manual Index h-r L4 (output 4) 3.1 hysteresis A.2 process retransmit 2.14 latching 2 4.24 hysteresis 1 4.20 switched dc, open collector 2.14 latching 3 4.27 hysteresis 2 4.22 output 4 4.28 latching 4 4.30 hysteresis 3 4.26 output 4 wiring 2.15 latching alarm 7.7 hysteresis 4 4.29 ac outputs 2.15 learn high range 4.13 external transmitter power supply 2.15 learn low range 4.13 switched dc, open collector 2.15 I linearization A.2 output configurations linearization, input 8.14 - 8.15 idle set point 5.3, 8.8 output 1 (control) 3.1 linearization 1 4.8 inner loop, cascade 9.2 - 9.3 output 2 (control or alarm) 3.1 linearization 2 4.15 input 1 4.3 - 4.8 output 3 (alarm or retransmit) 3.1 local-remote 5.8 input 1 wiring 2.8 output 4 (alarm or communications) 3.1 locating DIP switches 1.1 - 1.4 0-5Vº (dc) process 2.8 output DIP switches 1.3 Lockout, Panel Menu 6.2 - 6.6 0-10Vº (dc) process 2.8 Output Menu 4.18 - 4.33 lockout DIP switch 1.4 0-20mA process 2.8 lockout 6.5 lockout level, setting 6.2 - 6.6 0-50mV (high impedance) 2.8 output module types 6.10 loop error detect 8.10 1-5Vº (dc) process 2.8 output power supply lower display 3.1 output 2 2.13 4-20mA process 2.8 low power limit 4.41 RTD (2- or 3-wire) 2.8 output 3 2.14 lube oil tank 9.5 thermocouple 2.8 output 4 2.15 input 2 4.9 -4.16 overriding alarms 7.7 input 2 wiring 2.9 - 2.10 overshoot A.3 M 0-5Vº (dc) process 2.9 maintaining documentation ii, 6.9 0-10Vº (dc) process 2.9 P manual operation 7.4 0-20mA process 2.9 manual tuning 7.2 0-50mV (high impedance) 2.9 P control A.3 mechanical relay 7.2 panel back access 2.2 1-5Vº (dc) process 2.9 menu lockout 6.2 - 6.6 panel cutouts 2.1 - 2.2 4-20mA process 2.9 mixing tank 9.13 Panel Lockout Menu 6.2 - 6.6 current transformer input 2.10 Mode Key 3.1, 8.23 PD control A.3 digital event input 2 2.10 Modbus 8.4 PDR control A.3 potentiometer input 2.10 model number ii, iii, A.11 PI control A.3 RTD (2- or 3-wire) 2.9 module types 6.9 - 6.10 PID 2 crossover selection 4.38 slidewire feedback 2.10 mounting 2.1 - 2.3 PID control A.3 thermocouple 2.9 muffle furnace 8.17 PID A Menu 5.9 - 5.16 input DIP switches 1.2 PID B Menu 5.9 - 5.16 0-5V 1.2 PID Menu lockout 6.4 0-10V 1.2 N PID parameters 7.1, 9.8 0-20mA 1.2 National Electric Code (NEC) 2.4, 2.6, 2.7 PID sets, switching 8.8 0-50mV 1.2 NEMA 4X seal 2.3, A.2 PLOC Menu 6.2 0-50mV (high impedance) 1.2 non-latching alarm 7.7 potentiometer wiring 2.10 1-5 1.2 notes iii power supply (see external signal conditioner) 4-20mA 1.2 DIP switches 1.3 RTD 1.2 output 2 2.13 thermocouple 1.2 O output 3 2.14 input filter 8.12 - 8.13 on/off control A.2 output 4 2.15 input linearization 8.14 - 8.15 Operation Menus 5.1 - 5.16 power wiring 2.4 Input Menu 4.2 - 4.17 operation parameters, manual tuning 7.2 process variable A.3 lockout 6.5 open loop 6.12, A.2 process 1 4.20 input module 6.9 ordering information A.5 process 2 4.21 input ranges (tables) outer loop, cascade 9.2 - 9.3 process 3 4.31 input 1 4.5 - 4.6 output A.2 process alarm 7.6 input 2 4.12 output 1 4.19 process retransmit wiring 2.14 input-to-output isolation 2.4, 2.13 - 2.15 output 1 wiring 2.12 process value, 8.16 installation 2.1 - 2.3 0-5Vº (dc) process 2.12 proportional band A.3 integral A.2 0-10Vº (dc) process 2.12 output 1 5.10 output 1 5.11 0-20mA process 2.12 output 2 5.13 output 2 5.14 1-5Vº (dc) process 2.12 proportional band adjustment 7.3 interface type 4.47 4-20mA process 2.12 proportioning control A.3 isolation 2.4, A.2 ac outputs 2.12 protocol type 4.46, 8.4 switched dc, open collector 2.12 J output 2 4.21 Q, R output 2 wiring 2.13 JIS A.2 0-5Vº (dc) process 2.13 ramping function 4.43, 8.16 jumper location 7.5 0-10Vº (dc) process 2.13 ramp rate 4.43, 8.16 junctions A.2 0-20mA process 2.13 ramp to set point 8.16 - 8.17 1-5Vº (dc) process 2.13 range high 1 4.5 - 4.6 K 4-20mA process 2.13 range high 2 4.11 - 4.12 ac outputs 2.13 range low 1 4.5 - 4.6 keys 3.1 external transmitter power supply 2.13 range low 2 4.11 - 4.12 switched dc, open collector 2.13 rate L output 3 4.25 output 1 5.12 output 3 wiring 2.14 output 2 5.15 L1 (output 1) 3.1 ac outputs 2.14 rate alarm 7.7, 8.17 L2 (output 2) 3.1 external transmitter power supply 2.14 rate band A.3 L3 (output 3) 3.1 Appendix WATLOW Series 988 User’s Manual A.7 Index r-z Prompt Index rate/derivative adjustment 7.3 temperature limit control protection 2.6 ratio control 9.12 - 9.13, A.3 terminal designation stickers 2.4 [----] (error) 7.8 reference junction A.2 test chambers relay, mechanical 7.2 wih communications 8.5 A release tabs 1.1, 2.2 - 2.3, 7.5 with dual PID sets 9.9 [A2HI] (alarm 2 high) 5.5, 8.17 remote set point 4.10, 8.8, 8.18 - 8.19 test displays 6.11 removing controller chassis 1.1, 2.2 - 2.3, test output 6.11 [A2LO] (alarm 2 low) 5.4, 8.17 7.5 thermal system A.3 [A2Sd] (alarm 2 side) 4.23 reset thermocouple 2.5, A.3 [A3HI] (alarm 3 high) 5.6 output 1 5.11 thermocouple break protection A.3 [A3LO] (alarm 3 low) 5.5 output 2 5.14 thermocouple wiring [A3Sd] (alarm 3 side) 4.26 reset/integral adjustment 7.3 input 1 2.8 [A4HI] (alarm 4 high) 5.7 restore 6.14 input 2 2.9 [A4LO] (alarm 4 low) 5.6 retransmit 8.20 - 8.21, A.3 three-mode control A.3 [A4Sd] (alarm 4 side) 4.29 retransmit calibration offset 4.33 time constant, filter [ACAL] (retransmit calibration offset) 4.33 retransmit high limit 4.32 input 1 4.7 [Actn] (control output action) 8.8 retransmit low limit 4.32 input 2 4.15 [Addr] (device address) 4.46 RTD A.3 time proportioning control A.3 [‘AL2] (alarm 2) 4.23 RTD calibration curve 1 4.7 tuning ]AL2n] (alarm 2 reverse) 7.6 RTD calibration curve 2 4.14 automatic 7.1 - 7.2 [‘AL3] (alarm 3) 4.25 RTD input 2.5 manual 7.2 - 7.4 [AL3n] (alarm 3 reverse) 7.6 RTD wiring settings 7.2 - 7.3 {~AL4} (alarm 4) 4.28 input 1 2.8 Tuning of Industrial Control Systems 7.1 [AL4n[ (alarm 4 reverse) 7.6 input 2 2.9 [ALgO] (algorithm) 4.38, 9.8 RTU Modbus 8.4 [‘ALr] (alarm reset) 8.8 U [AMb] (ambient temperature) 6.8 S [Anun] (annunciator) 4.41 Up-arrow Key 3.1 [Aout] (analog output) 4.31 safety practices 2.4, 2.6, 2.7 upper display 3.1 semiconductor oven 8.3 using manual ii - iii [‘ArH] (retransmit high limit) 4.32 sensor installation 2.5 [‘ArL] (retransmit low limit) 4.32 sensor type [AtSP] (auto-tune set point) 4.42, 7.1 V, W input 1 4.3 [‘AUt] (auto-tune) 5.7, 7.2 input 2 4.9 - 4.10 warnings iii serial number 6.8 warranty A.5 B set point, in tuning 7.2 - 7.3 waste-water treatment 8.15 set point, ramp to 8.16 - 8.17 water boiler 9.7 [bAUd] (baud rate) 4.45 set point 1 3.2 wiring 2.1, 2.4 - 2.15 [both] (alarm 3 trigger) 4.26 set point 2 5.1, 5.3 event input 1 2.11 [bPLS] (bumpless transfer) 4.35 set point 2 control 4.22 event input 2 2.10 [brSt] (burst fire) 8.2 setting DIP switches 1.1 - 1.4 input 1 2.8 input 1.2 input 2 2.9 - 2.10 lockout 1.4 output 1 2.12 C output 1.3 output 2 2.13 [‘C_F] (Celsius_Fahrenheit) 4.35 Setup Menus 4.1 - 4.48 output 3 2.14 [‘CAL] (calibration lockout) 6.6 shipping claims A.5 output 4 2.15 [‘CAL] (Calibration Menu) 6.13 silencing 2 4.24 wiring example 2.6 [CAL1] (calibration offset 1) 4.6 silencing 3 4.27 wiring safety 2.4, 2.6, 2.7 [CAL2] (calibration offset 2) 4.14 silencing 4 4.30 [CntL] (control type) 4.36 silencing alarms 7.7 X, Y, Z [COM] (Communications lockout) 6.6 slidewire feedback 8.22 - 8.23, A.3 [COM] (Communications Menu) 4.44, 8.4 slidewire feedback wiring 2.10 zero switching A.3 [CSAC] (cascade action) 4.37 slidewire hysteresis 4.16 zone heating 8.19 [CSCd] (cascade control) 4.36 software filter 1 4.7 [Ct1A] (cycle time, output 1, PID A) 5.13, 8.2 software filter 2 4.15 [Ct1b] (cycle time, output 1, PID B) 5.13, 8.2 software revision 6.8 [Ct2A] (cycle time, output 2, PID A) 5.16, 8.2 specifications A.4 [Ct2b] (cycle time, output 2, PID B) 5.16, 8.2 square root extraction (linearization, [Curr] (current) 8.10, 8.11 square root) 8.14 - 8.15, A.2 storing data 8.4 - 8.5 switched dc, open collector wiring D output 1 2.12 output 2 2.13 [dAtA] (data bits & parity) 4.45, 8.4 output 3 2.14 [DAtE] (factory ship date) 6.8 output 4 2.15 [‘‘db] (dead band) 5.16 switching sensitivity A.3 [db‘A] (dead band PID A) 5.16, 8.6 system heat-up profiles 9.2 [db‘b] (dead band PID B) 5.16, 8.6 System Menu 5.1 - 5.8 [‘dE1] (deviation alarm input 1) 7.6 lockout 6.4 [‘dE2] (deviation alarm input 2) 7.6 [dE1A] (derivative, output 1, PID A) 5.12 [dE1b] (derivative, output 1, PID B) 5.12 T [dE2A] (derivative, output 2, PID A) 5.15 technical assistance iii, 6.10 [dE2b] (derivative, output 2, PID B) 5.15 [dEC1] (decimal 1) 4.4 Appendix A.8 WATLOW Series 988 User’s Manual Index—prompts [‘LOC] (front panel lockout) 6.3, 8.8 [dEC2] (decimal 2) 4.11 [‘LoP] (low power limit) 4.41 [‘dFL] (default) 6.14 [LooP] (loop error detect) 8.10 [rtd2] (RTD calibration curve 2) 4.14 [diAg] (Diagnostics Menu) 6.7 [LOW] (alarm 3 trigger) 4.26 [diAg] (diagnostics lockout) 6.6 [‘L-r] (local-remote) 5.8 [diFF] (differential) 4.36, 9.7 S [LrnH] (learn high) 4.13, 8.23 [‘dir] (direct action) 4.37 [‘SEt] (Setup Menu) 4.1 [LrnL] (learn low) 4.13, 8.23 [dISP] (test displays) 6.11 [SHYS] (slidewire hysteresis) 4.16 [dUPL] (duplex) 4.38 [SIL2] (silencing 2) 4.24 M, N [SIL3] (silencing 3) 4.27 E [Mod] (Modbus) 4.46 [SIL4] (silencing 4) 4.30 [‘nLA] (non-latching) 4.36 [SLid] (slidewire) 8.23 [E1‘1] (A/D underflow error) 7.8 [‘‘no] (none) 4.38, 9.8 [‘‘Sn] (serial number) 6.8 [E2‘1] (A/D underflow error) 7.8 [‘nor] (normal) 4.36 [SOFt] (software revision) 6.8 [E1‘2] (sensor under-range error) 7.8 [‘SP1] (set point 1) 9.3 [E2‘2] (sensor under-range error) 7.8 [‘SP2] (set point 2) 5.3 [E1‘3] (sensor over-range error) 7.8 O [SP2c] (set point 2 control) 4.22 [E2‘3] (sensor over-range error) 7.8 [‘OFF] (control outputs off) 8.8 [StPt] (set point) 8.17, 9.8 [E1‘4] (A/D overflow error) 7.8 [‘‘on] (on) 8.4, 8.19 [StPt] (crossover set point value) 4.39 [E2‘4] (A/D overflow error) 7.8 [OPEr] (Operation Menus) 5.1 - 5.16 [Strt] (start) 8.17 [‘Ei1] (event input 1) 4.40 [OPLP] (open loop) 6.12, 7.9 [‘SYS] (system lockout) 6.4 [Ei1S] (event input 1 status) 5.4 [‘Ot1] (output 1) 4.19 [‘SyS] (System Menu) 5.2 [‘Ei2] (event input 2) 4.40 - 4.41 [‘Ot2] (output 2) 4.21 [Ei2S] (event input 2 status) 5.4 [‘Ot3] (output 3) 4.25 [‘Er3] (ambient temperature error) 7.9 T, U, V, W, X, Y, Z [‘Ot4] (output 4) 4.28 [‘Er4] (RAM identification error) 7.9 [OtPt] (output lockout) 6.5 [tout] (test outputs) 6.11 [‘Er5 (non-volatile checksum error) 7.9 [OtPt] (Output Menu) 4.18 [‘Er9 (configuration error) 7.9 [OtY1] (output 1 module type) 6.10 [‘Err] (error latching) 4.36 [OtY2] (output 2 module type) 6.10 [OtY3] (output 3 module type) 6.10 F [OtY4] (output 4 module type) 6.10 [FAIL] (failure mode) 4.35 [Ftr1] (software filter 1) 4.7 P [Ftr2] (software filter 2) 4.15 [Pb1A] (proportional band, output 1, PID A) 5.10 [FULL] (full) 4.46, 8.4 [Pb1b] (proportional band, output 1, PID B) 5.10 [Pb2A] (proportional band, output 2, PID A) 5.13 G [Pb2b] (proportional band, output 2, PID B) 5.13 [‘Pid] (switch PID sets) 4.38, 8.8 [gLbL] (Global Menu) 4.34 [Pid2] (PID 2 crossover selection) 4.38, 9.8 [gLbL] (global lockout) 6.5 [PidA] (PID A Menu) 5.3, 9.8 [Pidb] (PID B Menu) 5.3, 9.8 H [PidA] (PID A lockout) 6.4 [Pidb] (PID B lockout) 6.4 [HigH] (alarm 3 trigger) 4.26 [PLOC] (Panel Lockout Menu) 6.1 - 6.6 [‘HiP] (high power limit) 4.42 [Pr‘2] (input 2 process ) 3.2, 8.10, 9.4 [Hunt] (hunt) 4.16, 8.22, 8.23 [Prc1] (process 1) 4.20 [HYS1] (hysteresis 1) 4.20 [Prc2] (process 2) 4.21 [HYS2] (hysteresis 2) 4.22 [Prc3] (process 3) 4.31 [HYS3] (hysteresis 3) 4.26 [Proc] (crossover process value) 4.39, 9.8 [HYS4] (hysteresis 4) 4.29 [Prot] (protocol type) 4.46, 8.4 I Q, R [IdSP] (idle set point) 5.3, 8.8 [rA1A] (rate, output 1, PID A) 5.12, 9.4 [‘In1] (input 1) 4.3 - 4.4 [rA1b] (rate, output 1, PID B) 5.12 [‘In2] (input 2) 4.9 [rA2A] (rate, output 2, PID A) 5.15 [InPt] (Input Menu) 4.2 [rA2b] (rate, output 2, PID B) 5.15 [InPt] (input lockout) 6.5 [rAtE] (ramp rate) 4.43 [IntF] (interface type) 4.47 [rAti] (ratio) 4.36, 9.13 [It1A] (integral, output 1, PID A) 5.11 [rE1A] (reset, output 1, Pid A) 5.11, 9.4 [It1b] (integral, output 1, PID B) 5.11 [rE1b] (reset, output 1, PID B) 5.11 [It2A] (integral, output 2, PID A) 5.14 [rE2A] (reset, output 2, PID A) 5.14 [It2b] (integral, output 2, PID B) 5.14 [rE2b] (reset, output 2, PID B) 5.14 [itY1] (input 1 module type) 6.9 [‘reU] (reverse action) 4.37 [itY2] (input 2 module type) 6.9 [‘rH1] (range high 1) 4.5 - 4.6 [‘rH2] (range high 2) 4.11 - 4.12, 8.11, 9.3 J, K, L [‘rL1] (range low 1) 4.5 - 4.6 [‘LAt] (latching) 4.36 [‘rL2] (range low 2) 4.11 - 4.12, 8.11, 9.3 [LAt2] (latching 2) 4.24 [root] (square root extraction) 8.14, 8.15 [LAt3] (latching 3) 4.27 [‘‘rP] (ramping function) 4.43, 8.17 [LAt4] (latching 4) 4.30 [‘rSP] (remote set point) 4.10, 8.8, 8.19 [Lin1] (input 1 linearization) 4.8, 8.14, 8.15 [‘rSt] (restore) 6.14 [Lin2] (input 2 linearization) 4.15, 8.14 [rtd1] (RTD calibration curve 1) 4.7 Appendix WATLOW Series 988 User’s Manual A.9 Menu Overview 75 Pr 2 InSP 0 50 °F Press · to exit Display Loop any menu and (Lower Display) Set point 1, Process input 2 Inner Loop DEV LED on % OUT LED on Process units Remote set point reach the Display set point or (cascade only) Ratio value Loop at any time. SP2 ( ) Press � to advance to the Operation Set point 2 Operation Menus ( ) IdSP Idle set point menus. Outputs are still active. ( ) OPEr Operation Figure A.10 - > The Series 988 Map. (SyS) (System) (PIDA) (PIDA) (PIDB) (PIDB) Ei1S ( ) Pb1A ( ) Event input 1 status Output 1 proportional band A Pb1b ( ) Output 1 proportional band B Ei2S ( ) rE1A ( ) Event input 2 status Output 1 reset A rE1b ( ) Output 1 reset B � ( ) ( ) A2LO Alarm 2 low It1A Output 1 integral A ( ) It1b Output 1 integral B ( ) rA1A ( ) � A2HI Alarm 2 high Output 1 rate A ( ) rA1b Output 1 rate B NOTE: A3LO ( ) dE1A ( ) Alarm 3 low Output 1 derivative A ( ) dE1b Output 1 derivative B ( ) ( ) A3HI � Ct1A This is a complete Alarm 3 high Output 1 cycle time A � Ct1b ( ) Output 1 cycle time B ( ) ( ) A4LO Pb2A ( ) Alarm 4 low Output 2 proportional band A Pb2b Output 2 proportional band B listing of all Series ( ) ( ) A4HI rE2A Alarm 4 high Output 2 reset A rE2b ( ) Output 2 reset B ( ) ( ) 988 prompts. AUt It2A Auto-tune Output 2 integral A It2b ( ) Output 2 integral B L-r ( ) rA2A ( ) Local-remote Output 2 rate A rA2b ( ) Output 2 rate B ( ) dE2A Output 2 derivative A dE2b ( ) Output 2 derivative B Not all prompts will ( ) Ct2A Output 2 cycle time A Ct2b ( ) Output 2 cycle time B db A ( ) appear on your con- Dead band A ( ) db b Dead band B trol. They are Press > and < for 3 seconds to enter dependent on your ( ) the Setup menus. Outputs are disabled. SEt Setup Menus Setup configuration and > model number. (OtPt) (Output) (COM) (InPt) (Communications) (Input) (gLbL) (Global) bAUd ( ) Ot1 ( ) Baud rate Output 1 In1 ( ) Input 1 ( ) C_F Celcius_Fahrenheit dAtA ( ) Data bits and parity Prc1 ( ) Process 1 � dEC1 ( ) ( ) Decimal place 1 FAI L Failure mode ( ) ( ) Prot Protocol type HYS1 Hysteresis 1 rL1 ( ) Range low 1 Err ( ) Error latching Addr ( ) Ot2 ( ) Address Output 2 rH1 ( ) Range high 1 To navigate: ( ) Cnt L Control type ( ) intF Interface type Prc2 ( ) CAL1 ( ) Process 2 Calibration offset 1 CSAC ( ) Cascade action ( ) Press · to return HYS2 rtd1 ( ) Hysteresis 2 RTD calibration curve 1 ALgO ( ) Control algorithm ( ) SP2c � ( ) Control set point 2 Ftr1 Input 1 software filter to the Display Loop Pid2 ( ) PID 2 crossover selection ( ) AL2 Lin1 ( ) Alarm 2 Input 1 linearization Proc ( ) Crossover process value from any location and ( ) A2Sd ( ) Alarm 2 side In2 Input 2 ( ) Crossover set point value ( ) StPt LAt2 Latching for alarm 2 to advance through rSP ( ) � Remote set point ( ) Event input 1 Ei1 SIL2 ( ) Silence alarm 2 dEC2 ( ) Decimal place 2 the Display Loop. ( ) Event input 2 Ot3 ( ) Ei2 Output 3 ( ) rL2 Range low 2 ( ) Annunciator AL3 ( ) Anun Alarm 3 ( ) rH2 Range high 2 ( ) Low power limit � A3Sd ( ) LoP Alarm 3 side ( ) LrnL Press > or < to Learn range low ( ) ( ) HYS3 HiP High power limit Hysteresis 3 LrnH ( ) Learn range high move between the ( ) ( ) LAt3 Latching for alarm 3 Auto-tune set point AtSP ( ) CAL2 Calibration offset 2 ( ) SIL3 rP ( ) Ramping function rtd2 ( ) Silence alarm 3 menus. RTD calibration curve 2 ( ) Ot4 ( ) Ramp rate Ftr2 ( ) Input 2 software filter Output 4 rAtE ( ) Lin2 ( ) AL4 Alarm 4 Input 2 linearization ( ) A4Sd Press � to Hunt ( ) Alarm 4 side Slidewire dead band ( ) HYS4 Hysteresis 4 SHyS ( ) Slidewire inner advance through a ( ) hysteresis LAt4 Latching for alarm 4 menu. SIL4 ( ) Silence alarm 4 ( ) Aout Analog output ( ) Prc3 Process 3 Hold � while A r L ( ) Retransmit low limit ( ) A r H Retransmit high limit pressing > to ( ) ACAL Retransmit cal. offset move backwards At the [‘SEt] prompt, press > and < another through the menus. ( ) Fcty Factory Factory Menus 3 seconds to enter the Factory menus. > Press > or < to (Calibration) (PLOC) (Panel Lockout) (diAg) (Diagnostics) (CAL) select prompt values. ( ) b380 Front Panel lockout LOC ( ) ( ) Factory ship date dAtE A 50 ( ) b10U ( ) SyS ( ) System menu lockout ( ) SOFt Software revision ( ) A 00 ( ) b 0U ( ) PIDA menu lockout PidA Sn ( ) Serial number ( ) tc b20A ( ) ( ) � Pidb PIDB menu lockout AMb ( ) Ambient temperature A 0H ( ) b 4A ( ) NOTE: InPt ( ) Input menu lockout Acnt ( ) Ambient A/D count ( ) A 20 ( ) b 0u ( ) OtPt Output menu lockout � gnd ( ) Ground A/D count A 15 ( ) The controller will b100 ( ) ( ) gLbL Global menu lockout cnt1 ( ) Input 1 A/D count ( ) A380 1 4 ( ) not default back to COM ( ) Communications menu lockout cnt2 ( ) Input 2 A/D count A10U ( ) 1 20 ( ) diAg ( ) Diagnostics menu lockout ( ) Input 1 module ity1 normal display A 0u ( ) 1 0 ( ) ( ) CAL Calibration menu lockout ( ) Input 2 module ity2 ( ) A20A ( ) while in the Factory 1 10 Output 1 module Oty1 ( ) A 4A ( ) 2 4 ( ) ( ) Output 2 module Menu. All outputs Oty2 A 0u ( ) ( ) 2 20 Output 3 module Oty3 ( ) are disabled while ( ) 2 0 ( ) A100 Output 4 module Oty4 ( ) ( ) b 50 ( ) 2 10 in this menu. ( ) Test displays dISP b 00 ( ) 3 LO ( ) � Test output tout ( ) ( ) ( ) b 0H 3 HI ( ) Open loop OPLP b 20 ( ) ( ) rSt Restore factory values b 15 ( ) dFL ( ) Default prompts Appendix A.10 WATLOW Series 988 User’s Manual Model Number Ordering Information (1237) To order, complete the code number to the right with the information below: 9 8 _ _ - _ _ _ _ - _ _ _ _ Series 988: a single-channel, temperature/process controller, 1 analog input, 1 digital input, 1 analog or digital input, 4 outputs. Power Supply & Mounting 6 = 24 to 28Vı (ac/dc) nominal, vertical mounting 7 = 24 to 28Vı (ac/dc) nominal, horizontal mounting 8 = 100 to 240Vı (ac/dc) nominal vertical mounting 9 = 100 to 240Vı (ac/dc) nominal horizontal mounting Software A = Standard B = Enhanced (Includes cascade, ratio, | duplex, dual PID set) Input 1 1 = Thermocouple only (Excluding Type B, R, and S) 2 = Universal signal conditioner Input 2 0 = None 1 = Thermocouple only (Excluding Type B, R, and S) 2 = Universal signal conditioner 3 = Slidewire feedback 2 4 = Current transformer 5 = Digital contact event (One digital event is standard on all units) Output 1 B = Solid-state relay, Form A, 0.5A, with RC suppression (NO & C) C = Switched dc or open collector, isolated 1 D = Electromechanical relay , Form C, 5A with RC suppression 1 E = Electromechanical relay , Form C, 5A without contact suppression F = Universal process, 0-5Vº (dc), 1-5Vº (dc), 0-10Vº (dc), 0-20mA, 4-20mA, isolated K = Solid-state relay, Form A, 0.5A, without contact suppression (NO & C) Output 2 A = None B = Solid-state relay, Form A, 0.5A, with RC suppression (NO & C) C = Switched dc or open collector, isolated 1 D = Electromechanical relay , Form C, 5A with RC suppression (NO, NC & C) 1 E = Electromechanical relay , Form C, 5A without contact suppression (NO, NC & C) F = Universal process 0-5Vº (dc), 1-5Vº (dc), 0-10Vº (dc), 0-20mA, 4-20mA, isolated K = Solid-state relay, Form A, 0.5A, without contact suppression (NO & C) T = External signal conditioner power supply, 5, 12 or 20Vº (dc) @ 30mA Output 3 A = None B = Solid-state relay, Form A, 0.5A, with RC suppression (NO & C) C = Switched dc or open collector, isolated 1 J = Electromechanical relay , Form A or B, 5A without contact suppression (NO or NC) K = Solid-state relay, Form A, 0.5A without contact suppression (NO & C) M = Retransmit, 0-20mA, 4-20mA N = Retransmit, 0-5Vº (dc), 1-5Vº (dc), 0-10Vº (dc) T = External signal conditioner power supply, 5, 12 or 20Vº (dc) @ 30mA 1 Electromechanical relays Output 4 warranted for 100,000 clo- A = None sures only. Solid-state B = Solid-state relay, Form A, 0.5A, with RC suppression (NO & C) switching devices recom- C = Switched dc or open collector, isolated 1 mended for applications D = Electromechanical relay , Form C, 5A with RC suppression (NO, NC & C) 1 requiring fast cycle times or E = Electromechanical relay , Form C, 5A without contact suppression (NO, NC & C) extended service life. K = Solid-state relay, Form A, 0.5A without contact suppression (NO & C) R = EIA/TIA-232 communications, opto-isolated 2 A Current Transformer input S = EIA/TIA-485 / EIA/TIA-422 communications, opto-isolated cannot be used in conjunc- T = External signal conditioner power supply, 5, 12 or 20Vº (dc) @ 30mA tion with a process output U = EIA/TIA-485 / EIA/TIA-232 communications, opto-isolated installed on output 1. Display GG = Green/Green displays RR = Red/Red displays ® Slo-Blo is a registered GR = Green/Red displays XX = Custom overlays or default settings trademark of Littelfuse, Inc. RG = Red/Green displays Appendix WATLOW Series 988 User’s Manual A.11 Declaration of Conformity Erklärt, daß das folgende Produkt: Deutsch Series 986, 987, 988, 989 96 Beschreibung: Serie 986, 987, 988, 989 WATLOW CONTROLS Modellnummer(n): 9 8 (6 7 8 oder 9) (beliebiger Buchstabe) - (1 oder 2) (0 1 2 3 4 oder 5) (B C D E F oder K) (A B C D E F K 1241 Bundy Boulevard oder T) - (A B C J K M N oder T) (A B C D E K R S Winona, Minnesota 55987 USA oder T) (2 beliebige Buchstaben) Klassifikation: Regelsystem, Installationskategorie II, Emissionsgrad II Nennspannung: 100 bis 240 V~ (ac) oder 24 bis 28 V� (ac/dc) Nennfrequenz: 50/60 Hz Stromverbrauch: Max. 16 VA Declares that the following product: English Erfüllt die wichtigsten Normen der folgenden Anweisung(en) der Europäischen Designation: Series 986, 987, 988, 989 Union unter Verwendung der untenstehenden einschlägigen Dokumente: Model Number(s): 9 8 (6, 7, 8 or 9) (Any letter) - (1 or 2) (0 1 2 3 4 or 5) 89/336/EEC Elektromagnetische Übereinstimmungsanweisung (B C D E F or K) (A B C D E F K or T) - (A B C J K M EN 50082-2: 1995 EMC-Rahmennorm für Störsicherheit, Teil 2: Industrielle N or T) (A B C D E K R S or T) (Any two letters) Umwelt Classification: Control, Installation Category II, Polution Degree II EN 61000-4-2: 1995 Elektrostatische Entladung EN 61000-4-4: 1995 Elektrische schnelle Stöße Rated Voltage: 100 to 240V~ (ac) or 24 to 28V� (ac/dc) ENV 50140: 1994 Strahlungsimmunität Rated Frequency: 50/60 Hz ENV 50141: 1994 Leitungsimmunität Rated Power Consumption: 16VA maximum ENV 50204: 1995 Mobiltelefon Meets the essential requirements of the following European Union Directive(s) EN 50081-2: 1994 EMC-Rahmennorm für Emissionen, Teil 2: Industrielle using the relevant section(s) of the normalized standards and related documents Umwelt shown: EN 55011: 1991 Beschränkungen und Methoden der Messung von 89/336/EEC Electromagnetic Compatibility Directive Funkstörungsmerkmalen industrieller, wissenschaftlicher und medizinischer Hochfrequenzgeräte (Klasse A) EN 50082-2: 1995 EMC Generic immunity standard, Part 2: Industrial EN 61000-3-2: 1995 Grenzen der Oberwellenstromemissionen environment EN 61000-3-3: 1995 Grenzen der Spannungsschwankungen und Flimmern EN 61000-4-2: 1995 Electrostatic discharge 72/23/EEC Niederspannungsrichtlinie zu entsprechen EN 61000-4-4: 1995 Electical fast transients ENV 50140: 1994 Radiated immunity EN 61010-1: 1993 Sicherheitsrichtlinien für Elektrogeräte zur Messung, zur ENV 50141: 1994 Conducted immunity Steuerung und im Labor, Teil 1: Allgemeine Richtlinien ENV 50204: 1995 Cellular phone EN 50081-2: 1994 EMC Generic emission standard, Part 2: Industrial environment Declara que el producto siguiente: Español EN 55011: 1991 Limits and methods of measurement of radio disturbance Designación: Series 986, 987, 988, 989 characteristics of industrial, scientific and medical radio- Números de modelo: 9 8 (6 7 8 ó 9)(Cualquier letra) - (1 ó 2)(0 1 2 3 4 ó frequency equipment (Class A) 5)(B C D E F o K)(A B C D E F K o T) - (A B C J K M EN 61000-3-2: 1995 Limits for harmonic current emissions N o T)(A B C D E K R S o T)(Cualquier combinación EN 61000-3-3: 1995 Limitations of voltage fluctuations and flicker de dos letras) 73/23/EEC Low-Voltage Directive Clasificación: Control, categoría de instalación II, grado de EN 61010-1: 1993 Safety requirements for electrical equipment for contaminación ambiental II measurement, control, and laboratory use, Part 1: Tensión nominal: 100 a 240 V~ (Vca) o 24 a 28V � (Vca/Vcc) General requirements Frecuencia nominal: 50/60 Hz Consumo nominal Déclare que le produit suivant : Français de energía: 16 VA máximo Désignation : Série 986, 987, 988, 989 Cumple con los requisitos esenciales de las siguientes directivas de la Unión Numéro(s) de modèle(s) : 98 (6, 7, 8 ou 9) (lettre quelconque) - (1 ou 2) (0, 1, 2, Europea, usando las secciones pertinentes de las reglas normalizadas y los 3, 4 ou 5) (B, C, D, E, F ou K) (A, B, C, D, E, F, K ou documentos relacionados que se muestran: T) - (A, B, C, J, K, M, N ou T) (A, B, C, D, E, K, R, S, 89/336/EEC - Directiva de compatibilidad electromagnética ou T) (deux lettres quelconques) EN 50082-2: 1995 Norma de inmunidad genérica del EMC, parte 2: Classification : Commande, installation catégorie II, degré de Ambiente industrial pollution II EN 61000-4-2: 1995 Descarga electrostática Tension nominale : 100 à 240 V ~ ou 24 à 28 V � (c.a./c.c.) EN 61000-4-4: 1995 Perturbaciones transitorias eléctricas rápidas ENV 50140: 1994 Inmunidad radiada Fréquence nominale : 50/60 Hz ENV 50141: 1994 Inmunidad conducida Consommation ENV 50204: 1995 Teléfono portátil d’alimentation nominale : 16 VA maximum EN 50081-2: 1994 Norma de emisión genérica del EMC, parte 2: Ambiente Conforme aux exigences de la (ou des) directive(s) suivantes de l’Union industrial Européenne figurant aux sections correspondantes des normes et documents EN 55011: 1991 Límites y métodos de medición de características de associés ci-dessous : perturbaciones de radio correspondientes a equipos de 89/336/EEC Directive de compatibilité électromagnétique radiofrecuencia industriales, científicos y médicos (Clase A) EN 61000-3-2: 1995 Límites para emisiones de corriente armónica EN 50082-2 : 1995 Norme générique d’insensibilité électromagnétique, EN 61000-3-3: 1995 Limitaciones de fluctuaciones del voltaje Partie 2 : Environnement industriel EN 61000-4-2 : 1995 Décharge électrostatique 73/23/EEC Directiva de baja tensión EN 61000-4-4 : 1995 Courants électriques transitoires rapides EN 61010-1: 1993 Requerimientos de seguridad para equipos eléctricos ENV 50140 : 1994 Insensibilité à l’énergie rayonnée de medición, control y uso en laboratorios, Parte 1: ENV 50141 : 1994 Insensibilité à l’énergie par conduction Requerimientos generales ENV 50204 : 1995 Téléphone cellulaire EN 50081-2 : 1994 Norme générique sur les émissions électromagnétiques, Partie 2 : Environnement industriel EN 55011 : 1991 Limites et méthodes de mesure des caractéristiques Erwin D. Lowell Winona, Minnesota, USA d’interférences du matériel radiofréquence industriel, scientifique et médical (Classe A) Name of Authorized Representative Place of Issue EN 61000-3-2 : 1995 Limites d’émission d’harmoniques EN 61000-3-3 : 1995 Limitations d’écarts de tension et de papillotement General Manager January 9, 1996 73/23/EEC Directive liée aux basses tensions Title of Authorized Representative Date of Issue EN 61010-1 : 1993 Exigences de sécurité pour le matériel électrique de mesure, commande et de laboratoire, Partie 1 : Exigences générales ________________________________________ Signature of Authorized Representative (1230) Appendix A.12 WATLOW Series 988 User’s Manual Watlow Series 988 User’s Manual Watlow Controls, 1241 Bundy Blvd., P.O. Box 5580, Winona, MN 55987-5580, Phone: 507/454-5300, Fax: 507/452-4507
Frequently asked questions
What makes Elite.Parts unique?

What kind of warranty will the 988A-10DD-MARR have?
Which carriers does Elite.Parts work with?
Will Elite.Parts sell to me even though I live outside the USA?
I have a preferred payment method. Will Elite.Parts accept it?






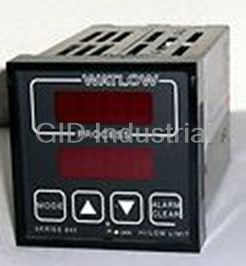



What they say about us
FANTASTIC RESOURCE
One of our top priorities is maintaining our business with precision, and we are constantly looking for affiliates that can help us achieve our goal. With the aid of GID Industrial, our obsolete product management has never been more efficient. They have been a great resource to our company, and have quickly become a go-to supplier on our list!
Bucher Emhart Glass
EXCELLENT SERVICE
With our strict fundamentals and high expectations, we were surprised when we came across GID Industrial and their competitive pricing. When we approached them with our issue, they were incredibly confident in being able to provide us with a seamless solution at the best price for us. GID Industrial quickly understood our needs and provided us with excellent service, as well as fully tested product to ensure what we received would be the right fit for our company.
Fuji
HARD TO FIND A BETTER PROVIDER
Our company provides services to aid in the manufacture of technological products, such as semiconductors and flat panel displays, and often searching for distributors of obsolete product we require can waste time and money. Finding GID Industrial proved to be a great asset to our company, with cost effective solutions and superior knowledge on all of their materials, it’d be hard to find a better provider of obsolete or hard to find products.
Applied Materials
CONSISTENTLY DELIVERS QUALITY SOLUTIONS
Over the years, the equipment used in our company becomes discontinued, but they’re still of great use to us and our customers. Once these products are no longer available through the manufacturer, finding a reliable, quick supplier is a necessity, and luckily for us, GID Industrial has provided the most trustworthy, quality solutions to our obsolete component needs.
Nidec Vamco
TERRIFIC RESOURCE
This company has been a terrific help to us (I work for Trican Well Service) in sourcing the Micron Ram Memory we needed for our Siemens computers. Great service! And great pricing! I know when the product is shipping and when it will arrive, all the way through the ordering process.
Trican Well Service
GO TO SOURCE
When I can't find an obsolete part, I first call GID and they'll come up with my parts every time. Great customer service and follow up as well. Scott emails me from time to time to touch base and see if we're having trouble finding something.....which is often with our 25 yr old equipment.
ConAgra Foods