

 Manufacturers
STARTECH UNIDUPDOCK

Description
Startech-UNIDUPDOCK-Docking Station Standalone Hard Drive Duplicator Dock
Part Number
UNIDUPDOCK
Price
Request Quote
Manufacturer
STARTECH
Lead Time
Request Quote
Category
TBD
Specifications
Bus Interface
USB 2.0
Chipset ID
ACARD ARC286
Compatible Operating Systems
Windows 2000/XP/Vista/7, Mac OS X, Linux
Connectors
2 x 7+15 SATA connector, 2 x 40-pin IDE male, 2 x LP4 molex male, 1 x USB type B, 1 x DIN power connector
Dimensions
151.0mm x 110.0mm x 27.0mm
Hard Drive Compatibility
2.5” SATA 1.5/3.0Gb/s and ATA/33/66/100/133 drives up to
LEDs
4 x Disk Power/Activity
Maximum Data Transfer Rate
USB: 480Mb/s
RAID Modes
0, 1, JBOD (concatenation), single
Weight
235g
Features
- 1 x Instruction Manual
- 1 x UNIDUPDOCK duplicator dock
- 1 x Universal Power Adapter
- 1 x USB cable
- 2 x 40 to 44-pin IDE adapter
- 2 x 40-pin IDE ribbon cable (female/female)
- 2 x LP4 molex adapter cable
- 3 x Power Cords (NA/UK/EU)
- stem Requirements
Datasheet


Extracted Text
USB to IDE SATA Standalone Hard Drive Duplicator Dock
UNIDUPDOCK
DE: Bedienungsanleitung - de.startech.com
FR: Guide de l'utilisateur - fr.startech.com
ES: Guía del usuario - es.startech.com
IT: Guida per l'uso - it.startech.com
NL: Gebruiksaanwijzing - nl.startech.com
PT: Guia do usuário - pt.startech.com
For the most up-to-date information, please visit: www.startech.com
Manual Revision: 03/29/2011
FCC Compliance Statement
This equipment has been tested and found to comply with the limits for a Class B digital device,
pursuant to part 15 of the FCC Rules. These limits are designed to provide reasonable protection
against harmful interference in a residential installation. This equipment generates, uses and can
radiate radio frequency energy and, if not installed and used in accordance with the instructions,
may cause harmful interference to radio communications. However, there is no guarantee that
interference will not occur in a particular installation. If this equipment does cause harmful
interference to radio or television reception, which can be determined by turning the equipment
off and on, the user is encouraged to try to correct the interference by one or more of the
following measures:
Reorient or relocate the receiving antenna.
Increase the separation between the equipment and receiver.
Connect the equipment into an outlet on a circuit different from that to which the receiver is
connected.
Consult the dealer or an experienced radio/TV technician for help.
Use of Trademarks, Registered Trademarks, and other Protected Names and Symbols
This manual may make reference to trademarks, registered trademarks, and other protected
names and/or symbols of third-party companies not related in any way to StarTech.com.
Where they occur these references are for illustrative purposes only and do not represent an
endorsement of a product or service by StarTech.com, or an endorsement of the product(s) to
which this manual applies by the third-party company in question. Regardless of any direct
acknowledgement elsewhere in the body of this document, StarTech.com hereby acknowledges
that all trademarks, registered trademarks, service marks, and other protected names and/or
symbols contained in this manual and related documents are the property of their respective
holders.
Table of Contents
Introduction ........................................................................................................................................................1
Packaging Contents ................................................................................................................................1
System Requirements ............................................................................................................................1
Product View ................................................................................................................................................2
Configuration Buttons ...........................................................................................................................2
Installation............................................................................................................................................................3
Hardware Installation ..............................................................................................................................3
Driver Installation ......................................................................................................................................4
How to Use ..........................................................................................................................................................5
Menu Options .............................................................................................................................................5
Advanced Menu Options .....................................................................................................................7
Duplicator (Copy) Mode .......................................................................................................................8
RAID Mode ....................................................................................................................................................8
Available RAID Modes ............................................................................................................................9
RAID 1 Rebuild ............................................................................................................................................9
Specifications .....................................................................................................................................................10
Technical Support ...........................................................................................................................................11
Warranty Information ....................................................................................................................................11
Instruction Manual i
Introduction
The StarTech.com UNIDUPDOCK functions as both a convenient hard drive copying/imaging
solution and an external USB to SATA/IDE HDD docking station for 2.5” (up to 500Gb) or 3.5” hard
drives (up to 2 TB).
Packaging Contents
• 1 x UNIDUPDOCK duplicator dock
• 1 x USB cable
• 2 x 40-pin IDE ribbon cable (female/female)
• 2 x LP4 molex adapter cable
• 2 x 40 to 44-pin IDE adapter
• 1 x Universal Power Adapter
• 3 x Power Cords (NA/UK/EU)
• 1 x Instruction Manual
System Requirements
2.5” and/or 3.5” SATA and/or IDE hard drive(s)
® ®
USB operation: Microsoft Windows 2000/XP/Vista/7 (32/64-bit),
® ® ®
or Apple Mac OS X, or Linux
Instruction Manual 1
Product View
Built-in LCD screen
Configuration buttons
LP4 molex
connector
USB connector
40-pin IDE
connector
ON/OFF switch
Power connector
7+15 SATA
connector
Configuration Buttons
Button Function
Navigate Up
Navigate Down
ENT Enter
ESC Cancel
RESET Reset duplicator dock (soft)
MUTE Mute buzzer sounds
Instruction Manual 2
Installation
WARNING: Hard drives require careful handling, especially when being transported. If you are
not careful with your hard disk, lost data may result. Always handle your hard drive and storage
device with caution.
Hardware Installation
1. Plug the universal power adapter into a wall power outlet and into the DC In connector on
the duplicator dock.
2. If using a SATA hard drive as the source disk, gently slide the hard drive into the 7+15 SATA
connector labeled Source-1 on the duplicator dock. Skip to step 6.
3. If using an
IDE hard drive as the source disk, connect the IDE ribbon cable (included) to the 40-pin
connector labeled Source-2. The connector is keyed to fit only one way.
4. Connect the LP4 molex cable (included) into the 4-pin connector next to the 40-pin IDE
connector. The connector is keyed to fit only one way.
5. The jumper settings on IDE hard drives must be set to either ‘master’ or ‘cable select’. Refer
to hard drive manufacture if unsure how to set.
6. Connect the IDE hard drive to the ribbon cable and LP4 molex connector. If connecting a
2.5” IDE hard drive, attach the 40 to 44-pin adapter to the end of the ribbon cable and LP4
cable, then connect the hard drive to the adapter.
NOTE: Only one Source disk and one Destination disk can be installed at a time. Only
connect a SATA or an IDE hard drive, not both.
Instruction Manual 3
7. Follow the same procedure for either a SATA or IDE hard drive for the Destination side of
the duplicator dock.
NOTE: SATA and IDE hard drives can be mixed, so one side can be SATA while the other
is IDE.
8. Slide the power ON/OFF switch on the side of the unit to the ON position, to power up
the unit.
9. Once the unit has booted up, use the configuration buttons and built-in LCD display to
configure and operate the duplicator dock.
10. If using as an external hard drive dock, connect the USB cable from the duplicator dock to
the computer’s USB port.
Instruction Manual 4
Driver Installation
No driver installation is required for any supported operating system, as this hard drive dock is
natively supported, so the drivers are already installed.
How to Use
Menu Options
Copy HDD
• Perform a 1:1 sector clone from the Source disk to the Destination disk. Each disk
sector on the Source disk will be copied, regardless if it contains data or not. If using
a Destination disk larger than the Source, any extra space will be untouched and left
unallocated.
Instruction Manual 5
Compare HDD
• Compares the sectors on the Source disk to the Destination disk. Used to ensure that the
Copy operation was successful.
Pre-scan
• Scans the Source disk for bad sectors/blocks and reports the errors.
Rescan Bus
• Rescans the hard drive connectors on the duplicator dock to detect new/swapped drives.
Source Size
• Displays the total storage capacity of the Source disk.
Setup
System information and settings
• DMA Mode
• Switch between different DMA modes, for better compatibility across different drives. Will
affect maximum data transfer rates.
Copy Size
• Specify the percentage of the source drive that should be copied.
Startup Menu
• Sets the first item that should be selected from the main menu on startup.
Auto Compare
• Automatically runs the Compare HDD function after copying. OFF by default.
Copy with Detect
• Automatically rescans the bus before beginning Copy operation. OFF by default.
Button Sound
• Turn audio feedback (beeping) ON/OFF.
Device Info
• Lists disk information about the Source/Destination disks.
System Info
• Lists information about the duplicator, such as firmware version.
USB RAID Mode
• Set the RAID mode for the attached drives when connected to a computer via USB.
Switch between USB and Duplicator modes.
Instruction Manual 6
Advanced Menu Options
The Advanced Menu can be access from the main menu by pressing and holding the
Frequently asked questions
What makes Elite.Parts unique?

What kind of warranty will the UNIDUPDOCK have?
Which carriers does Elite.Parts work with?
Will Elite.Parts sell to me even though I live outside the USA?
I have a preferred payment method. Will Elite.Parts accept it?
Why buy from GID?

Quality
We are industry veterans who take pride in our work

Protection
Avoid the dangers of risky trading in the gray market

Access
Our network of suppliers is ready and at your disposal

Savings
Maintain legacy systems to prevent costly downtime

Speed
Time is of the essence, and we are respectful of yours
Related Products
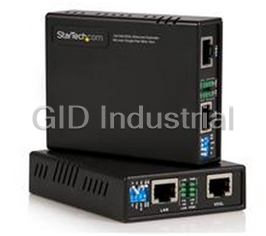
Startech 110VDSLEXT 10/100 VDSL2 Ethernet Extender Kit over Single Pair Wire – 1km

Startech 410VDSLEXT 4 Port 10/100 VDSL2 Ethernet Extender Kit over Single Pair Wire - 1km

Startech CPNTA2HDMI Component to HDMI Video Converter with Audio
Startech CPNTTOS2HDMI Component and Toslink to HDMI Video Converter with Audio


Request a Quote

The quote request has been received

Close

Facing challenges or have inquiries? Feel free to contact us!
Call Us +1-469-283-2440
What they say about us
FANTASTIC RESOURCE
One of our top priorities is maintaining our business with precision, and we are constantly looking for affiliates that can help us achieve our goal. With the aid of GID Industrial, our obsolete product management has never been more efficient. They have been a great resource to our company, and have quickly become a go-to supplier on our list!
Bucher Emhart Glass
EXCELLENT SERVICE
With our strict fundamentals and high expectations, we were surprised when we came across GID Industrial and their competitive pricing. When we approached them with our issue, they were incredibly confident in being able to provide us with a seamless solution at the best price for us. GID Industrial quickly understood our needs and provided us with excellent service, as well as fully tested product to ensure what we received would be the right fit for our company.
Fuji
HARD TO FIND A BETTER PROVIDER
Our company provides services to aid in the manufacture of technological products, such as semiconductors and flat panel displays, and often searching for distributors of obsolete product we require can waste time and money. Finding GID Industrial proved to be a great asset to our company, with cost effective solutions and superior knowledge on all of their materials, it’d be hard to find a better provider of obsolete or hard to find products.
Applied Materials
CONSISTENTLY DELIVERS QUALITY SOLUTIONS
Over the years, the equipment used in our company becomes discontinued, but they’re still of great use to us and our customers. Once these products are no longer available through the manufacturer, finding a reliable, quick supplier is a necessity, and luckily for us, GID Industrial has provided the most trustworthy, quality solutions to our obsolete component needs.
Nidec Vamco
TERRIFIC RESOURCE
This company has been a terrific help to us (I work for Trican Well Service) in sourcing the Micron Ram Memory we needed for our Siemens computers. Great service! And great pricing! I know when the product is shipping and when it will arrive, all the way through the ordering process.
Trican Well Service
GO TO SOURCE
When I can't find an obsolete part, I first call GID and they'll come up with my parts every time. Great customer service and follow up as well. Scott emails me from time to time to touch base and see if we're having trouble finding something.....which is often with our 25 yr old equipment.
ConAgra Foods